Thursday, May 16, 2019

HAPPY DAYS

Happy Thursday evening stampers! I hope you had a great week! My week was pretty busy with work, but I manage to scrapbook a layout for fun. One night a week, I like to create something. It helps me handle my stress.

 I created this layout for Pinkfresh Studio's May challenge. And because I love how pretty the stamps look, I thought I'd take a minute to share it with you!

Here is the challenge inspiration from Pinkfresh Studio's blog! There's still time to join.


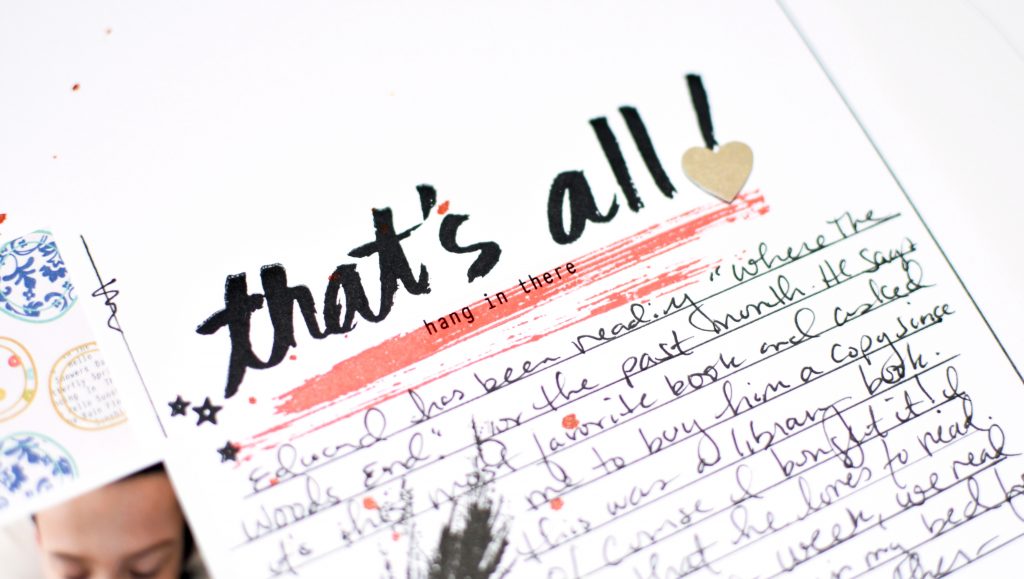
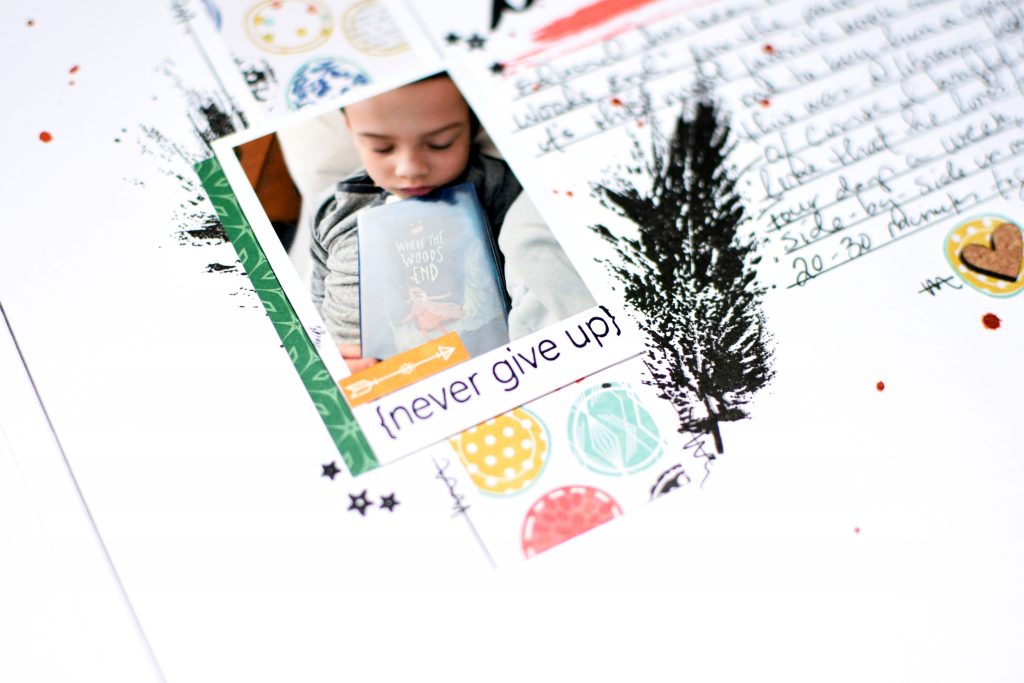
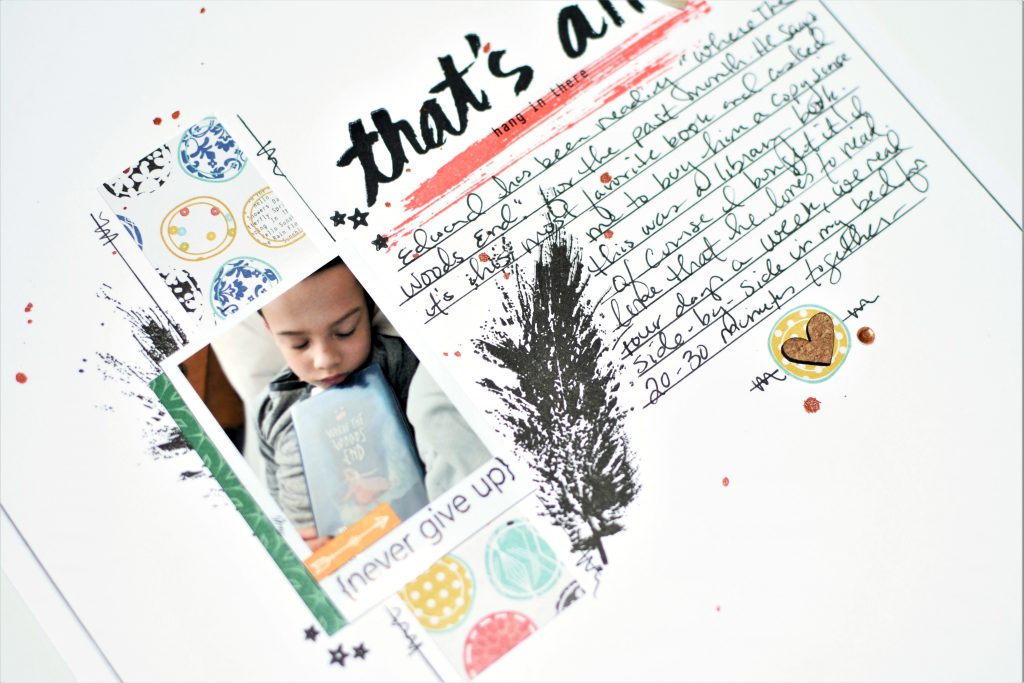
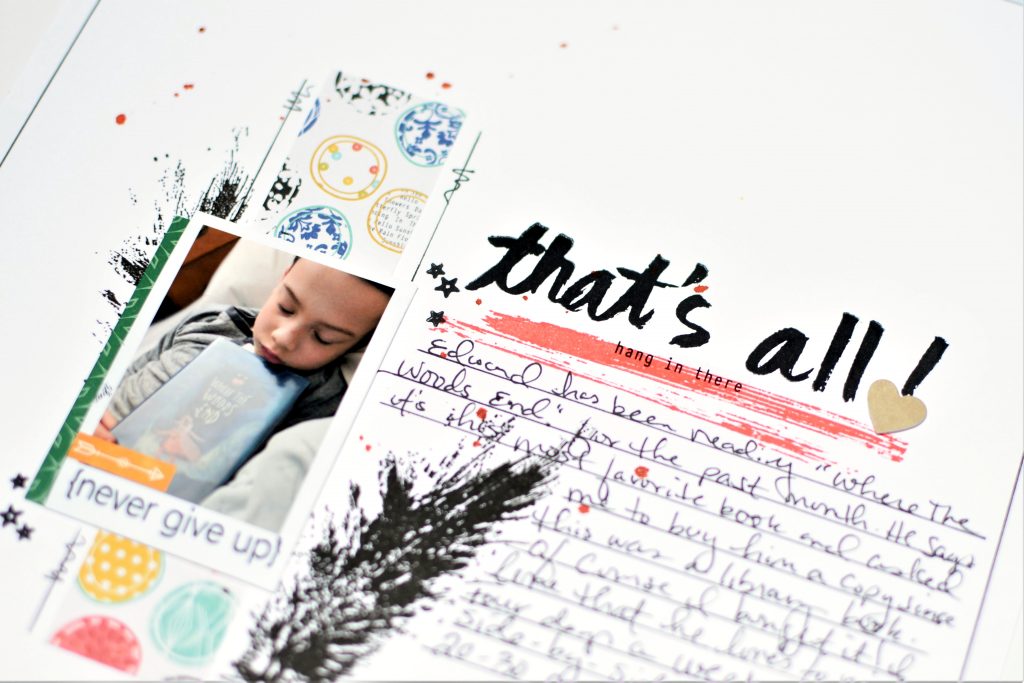
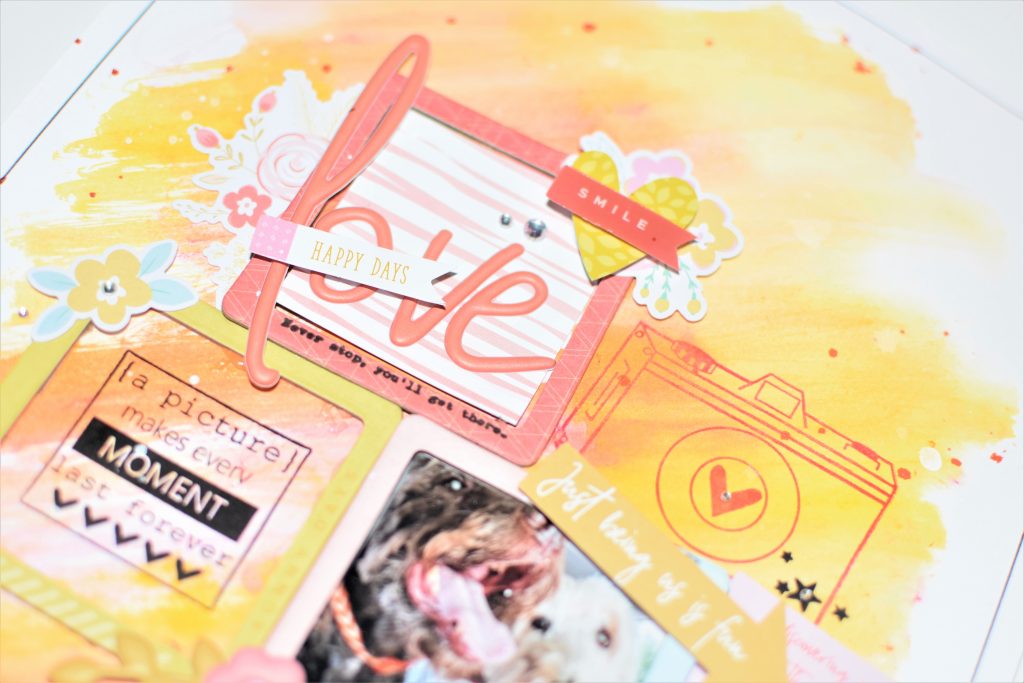
I used two different stamps sets to create this colorful layout. I used the "a picture makes every moment last forever" sentiment inside the frame that's part of the Journey Stamp Set and the stars are from the Daily Thoughts Stamp Set. I colored a piece of white cardstock using some pink, yellow and orange watercolor paints. Once everything was mounted down on the layout, I splashed some red and white mist all over the layout.

DSC_1930 DSC_1934

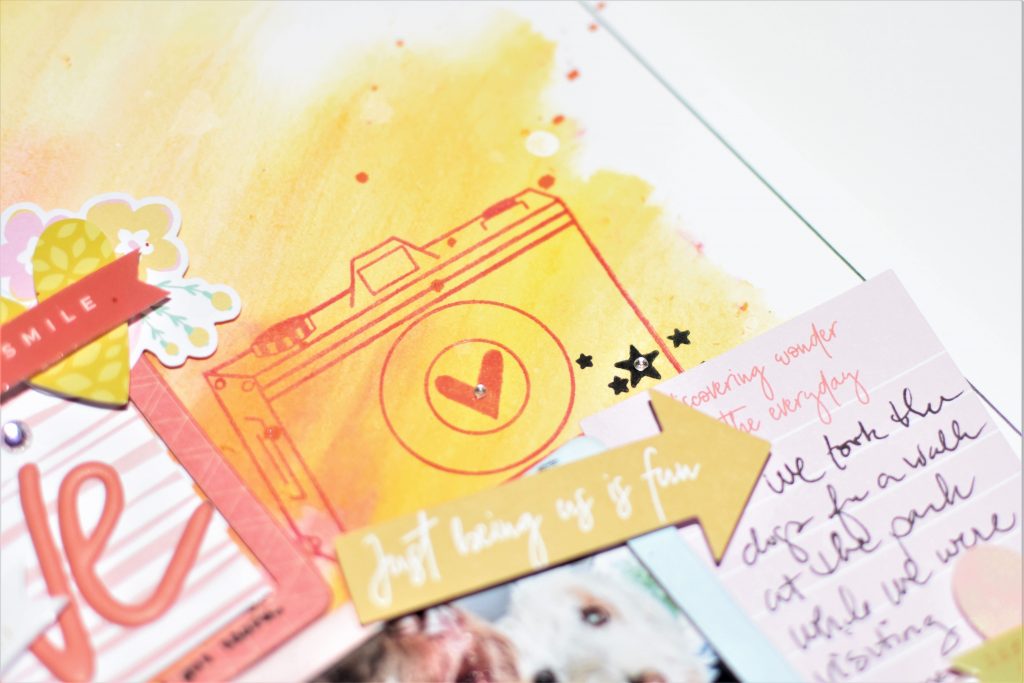
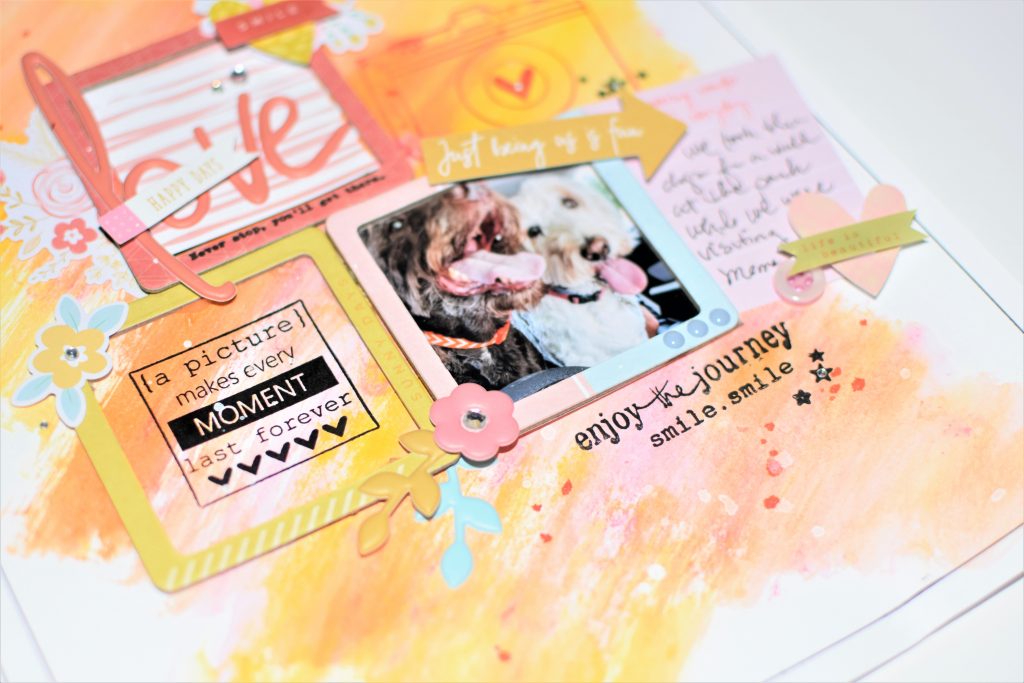
I used the Nocturne and Glamorous VersaFine Clair ink on this layout. Both are available in the Precious Remembrance Shop! Love how crisp these inks are! I accidentally smeared the sentiment at the bottom. To fix it so it wouldn't be so noticeable, I used a black pen to touch it up. 

DSC_1936 DSC_1937 DSC_1940 DSC_1941

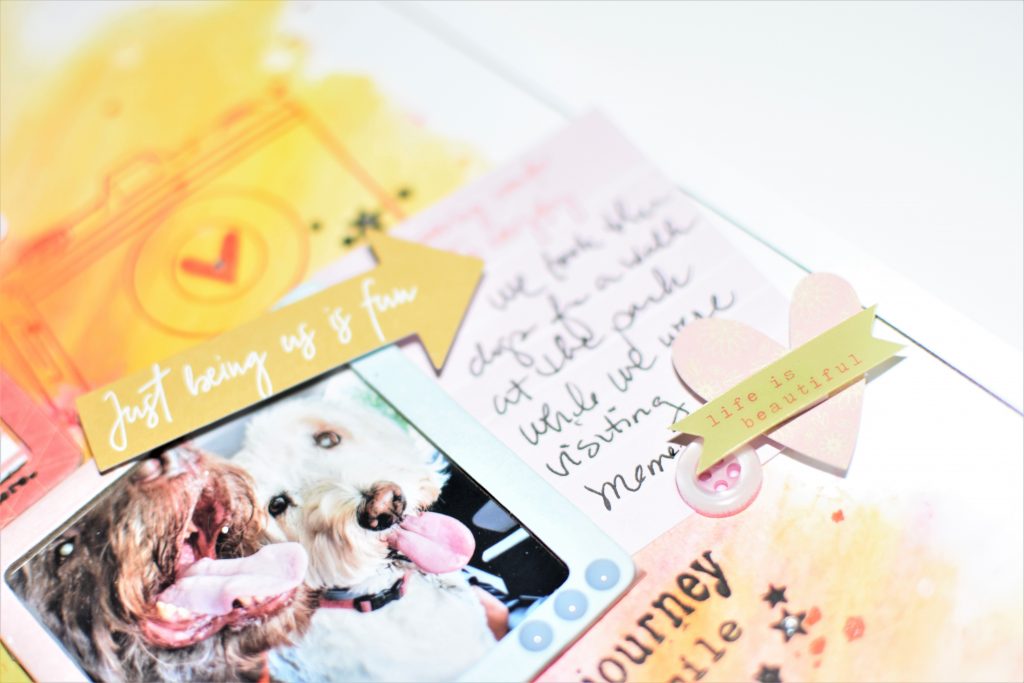
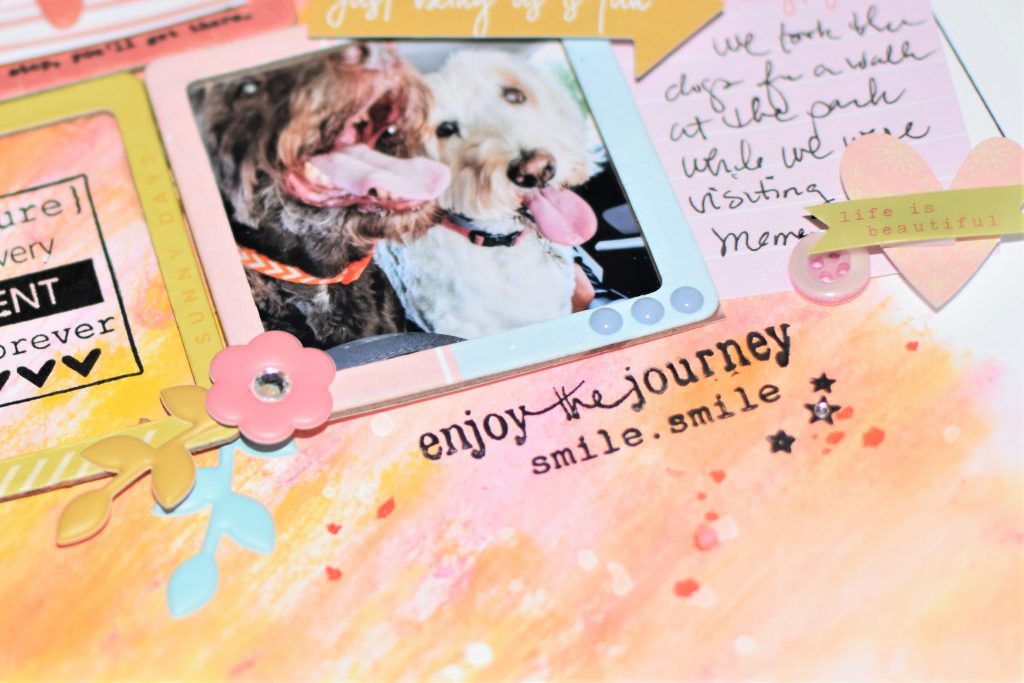
Love how happy this layout looks with the bright, pretty colors...and the dogs are simply adorable. They are my Mother-In-Law's dogs. :)

Thanks for visiting today. I hope you have a fun weekend~

Wednesday, May 15, 2019

THAT'S ALL

Hi everyone. I've been playing with my stamps again, having a blast. A few weeks ago, I snapped this photo of my son after he finished reading. He was so exhausted from school that day and then I made him read before bed... it did not take him long to fall asleep. I love watching him sleep. When he's asleep, he looks so precious and innocent. However, when he's awake, he's energetic, crazy and exhausting...LOL


To begin, I used a few stamps (Totally Stamp SetDaily ThoughtsDIY Stamp Set) to decorate the  background. Then, I splashed some Glimmer Mist to the background. Once I was satisfied with the background, I cut a strip of patterned paper to help frame the photo and mounted both of them to the base. I completed the layout by adding a few stickers and gems here and there.

DSC_1437

I used foam squares to mount the photo to the layout to add dimension to the layout since most of the layout was flat due to the stickers and stamps.

DSC_1438
I fussy cut the circle from patterned paper then embellished it with a cork heart from Pretty Little Studio. I used a black pen and a ruler to add the scribbles and line.

DSC_1439
DSC_1441

I totally love the big title and that font! It's so perfect for this layout, considering the fact that Edward always says, "that's all" for tonight...when he is finished reading for 20-30 minutes.

DSC_1443

Thanks so much for visiting today!


Sunday, May 12, 2019

SUMMER LAYOUTS

Good morning! Nicole here with a few layouts I created this month for TCW. I am so excited to be  guest designing for them this month. For this layout, I decided to use the Beach House stencil for my title! I love how bold the title looks with the blue ink.


This technique was super simple. I stamped the blue ink directly onto the cardstock being careful not to move the stencil.


We love summer in my house... and we're looking forward to this summer. We had a weird winter... For this layout, I used the Crazy Waves stencil to create a fun background for my photos.


I used washi tape to hold the stencil down. Then I used three different shades of blue to create an ombre effect.

 
Here is a closer look at the background once the paint is completely dry.


Thanks for visiting today! I'll see you again in a few days with a few more projects that are in the works.

Monday, May 06, 2019

TOTALLY

Good morning! Hope you had a wonderful weekend! I'm here to brighten your week...literally...with this fun, bright, and colorful layout! I've been waiting to use a lot of the stamps from the "Totally Stamp Set" for sometime now. 


I created this layout one morning and I just started stamping the images in different colors onto white cardstock. Then, I splashed some lime green mist on top of the stamped images. I used a few different color markers to fill in the triangles and the stars.


I used the "9" from the Sketchy Alphabet stamp to stamp Edward's age in the circle. I wanted to fill in as much of the white space that I possibly could with a variety of stamps to help tell my story. I used the "smile.smile" stamp from the Journey Stamp Set as well. What can I say, I love mixing different stamp sets together to create a fun layout!

DSC_1444

DSC_1445

DSC_1446
 DSC_1448

Thanks for stopping by today!