Saturday, April 25, 2020

RAINBOW CARDS

Happy Saturday friends and family! Last week, I started playing with my Ink On 3 Inks and I just love them. These inks are very easy to blend onto cards. I used Trinity Stamp's Love You Bunches Stamp Set and their blending brush to create these beautiful cards within minutes.


Each card is 3 1/2x4". I like making smaller sized cards. They are easier for me... To create this card, I cut a rectangle to measure 3"x 3 3/4". Then, I blended all of the colors, one-by-one to fill in all the white space. After I finished blending the ink on the card, I stamped the "Love You Bunches" stamp onto the colored cardstock. I glued the rectangle onto the front of the card.


I had a few die cuts from various kits from Citrus Twist Kits in my stash that I added as the sentiment. Then I added the gems.


Aren't they so pretty? I love the colors... and I can't wait to give these out to my friends and family!


Wednesday, April 22, 2020

THE SIMPLE LIFE


Hello, it's me again with my last project I created using Simple Stories' Simple Vintage Garden District Collection. I promise this is the layout project using this collection. You are probably waiting to see something different. LOL... I am moving onto Vicki Boutin's latest collection sometime this week!

I snapped this picture of me and Reese on New Year's Eve. This is my friend's dog and she is a sweetie! I have been wanting to scrapbook it for a few months now... This collection looks great with the black and white photo.


I really wanted to use the chipboard frame to frame the photo. Since the frame was too big, I cut it in half. Then I carefully cropped my photo to fit within the frame without chopping off too much of our faces. :) I adhered the "the simple life" bits and pieces at the top, trimming down the left side so it would line up against the layout properly. 


I tucked some flowers behind the frame before I completely mounted down the frame. Then I added a few more flowers and the bumble bee to the top left-side of the photo. These little bumble bees are adorable!


I added a few more bits and pieces and the tag from the Decorative Brads. Then I fed a piece of lace through the tag to give the layout a nice feminine touch.


I hope you're having a wonderful week! Thanks so much for stopping by today!


Tuesday, April 21, 2020

HANDMADE BOOKMARKERS

I spent the morning making sure Edward completed his classwork...then I vacuumed and dusted the bedrooms and the living room. After I was done that, I did a load of laundry, folded and put it away. I even ironed a pile of clothes that I had on the ironing board... and then I was bored again.

Since I wasn't really in the mood to scrapbook a layout, I made bookmarks instead! These were fun to make!


For the first book marker, I punched the bookmark die using my Sizzix and Trinity Stamp's Narrow Card and bookmark die. Then, I used inks from Catherine Pooler's shop. Love the quality of these inks and I am so glad I bit the bullet and invested in them. I used a blending buddy to blend the colors onto the bookmark. I was going for a semi-rainbow look. Once I was satisfied with the coloring, I used Trinity Stamp's Love You Bunches stamp set and their blending buddy to blend the different colors on the bookmark.


The next card, I kept simple... I just used the dies and pattern papers and embellishments I had on hand.


I used the Love You Bunches stamp set to create this card. It's not perfect, but it's still pretty! This was the first card I created. I learned that you should ALWAYS use your Misti Stamping Tool if you have one. Because if you are using an acrylic block and ink and it does not show a crisp image, it is very hard to line up the stamp and try again.

Regardless, they were fun to make. Something different and not too time consuming! Have you made anything different lately? I'm thinking about altering a wood piece from Foundation Decor, but I just can't seem to motivate myself to do it. :) I think i'll take a break and read.

Hope you all are staying safe and being productive! Get your stuff done now so you can enjoy being outside this summer!


Friday, April 17, 2020

SPREAD JOY, NOT GERMS HOP


Welcome to the Spread Joy, Not Germs blog hop! You should be arriving from Joni Wilson's blog. If you get lost along the way, the entire blog list can be found on Catherine Pooler's Blog.

I've had a lot of spare time due to the Covid19 and got to thinking about all of those essential employees putting their lives at risk for us! I'm doing my part...staying inside. It's actually been nice being stuck inside the house. My house is clean, the closets are organized, the laundry is done, and I've done a lot of scrapping!


Be sure to hop along each blog and comment for your chance on winning lots of prizes from some fabulous companies!! The prizes will be randomly drawn from all the blogs and comments. Deadline to enter is April 24 for prizes. Winners will be announced on Monday, April 27 on Catherine and Alexandra's blogs. 

Some prizes that are up for grabs include:

Trinity Stamps- $25 Gift Certificate
Catherine Poolers- $20 Gift Certificate on each of the Brand Ambassadors' blogs*
Heffy Doodler- $35 voucher for the store
Paper Sweeties- $50 Gift Certificate
Beacon-Product gift bag
CAS-ual Fridays- Win the new release- over $80 in value
Ink on 3- $35 Gift Certificate

These are just a few of the prizes... there are 31 sponsors!!! 


I used Trinity Stamp's "A Crafter's Heart" stamp set to create my second card. I had fun with this one... I used Ink on 3's Artist Grade Fusion Inks to color the card. The colors are soooo pretty! Once the ink was completely dry, I used markers to color in some of the shapes.


For the Dust for you card, I used Catherine Pooler's inks (Lime Rickey andSomething Borrowed). I used a blending buddy to blend the colors onto the white cardstock. Then I stamped the bunny from Trinity Stamp's Dust Bunny Stamp Set on a scrap piece of paper, colored him using markers and cut him out to use for the card. After I stamped the "Dust for you" I felt the card still needed something else so I used the butterfly and grass from the Rhino Bird Stamp Set that is on sale and it's your last chance to grab it before it's gone! Lastly, I used the Rainbow Die Set to add a rainbow!


For my last card, I used Trinity Stamps' Love You Bunches Stamp Set and the Thank You Sentimini Stamp Set. I love this floral stamp set, it's been used quite a bit these past few months. I used my Altenew markers to color in the flowers. These are my favorite markers ever. I just love them. 


Thanks so much for taking time out of your day to stop by today! I really appreciate it. Your next stop is Annie Collin's blog. Enjoy!


Wednesday, April 15, 2020

10 THINGS I LOVE ABOUT YOU


Good morning! I just had the best time playing with Vicki Boutin's Let's Wander Collection. At first glance, this collection looks like it is geared towards vacation projects, but once I really looked at the embellishments, I realized it can be used for anything! You just have to be creative...


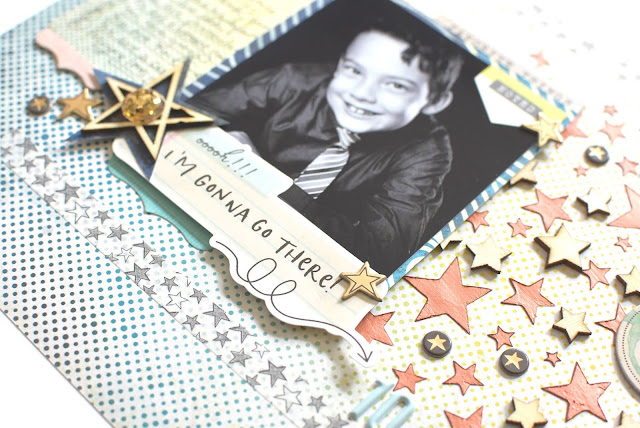
To begin, I used the Copper Penny Modeling Paste and the star stencil to create copper stars in the middle of the layout. I decided to scrapbook this layout horizontally to allow me some space to spread out across the entire center of the layout, which is what I needed for the design I had in mind.


I carefully placed the wood veneer stars between the copper stars, using glue to adhere them. Once the Modeling Paste was completely dry, I added the chipboard pieces.

I cut the blue star from a piece of patterned paper and then I glued the wood veneer star to the center of the paper star. Then I added the blue gem. I LOVE how this looks together. This idea came to mind when I was thinking of an embellishment I could make, rather than using a button or two for embellishments.


I wrote my top ten things I love about Edward on a scrap piece of paper and then I tucked it slightly behind the matted photo. Then I made another star embellishment and added a few more chipboard pieces here and there. The "ten" was made using a stamp set I purchased from Citrus Twist.


I used a few stickers and washi tape to make the layout more fun. I totally love how this layout turned out.


Normally, I would have used a ruler and black pen to draw a 1/4" border around the layout, but with this layout, I added a strip of washi across the top and bottom of the layout. It totally worked!


What do you think? It's totally cool, right! I love this soooo much. Thanks so much for visiting today and I hope you found today's post inspiring!


Tuesday, April 14, 2020

SO HAPPY


Good morning! It's been so hard not being able to visit Henry! He's such a happy kid. He lights up the room, I tell ya. My sister dressed him up nicely. Doesn't he look handsome!


For this layout, I used a few different stamps from Trinity Stamps to embellish the layout. I used the "happy" sentiment from the Happy Sentimini Stamp Set. Then I used the little dust bunnies from the Dust Bunnies Stamp Set. LOVE these little guys! Seriously, if you haven't checked out Trinity Stamp's latest release, you should. I used the scribble stamp from the So Appreciative Stamp Set to add a touch of black to break up the brights a bit.


I used lots of products from two different kits from Citrus Twist Kits to embellish this layout. The papers are darling and I love the puffy star sticker and chipboard. Their kits are amazing.


I cut the labels from the cut-apart sheet to use for my journaling. Then I added the chipboard heart and puffy sticker.


Thanks so much for visiting today!


Monday, April 13, 2020

BEST DAY EVER


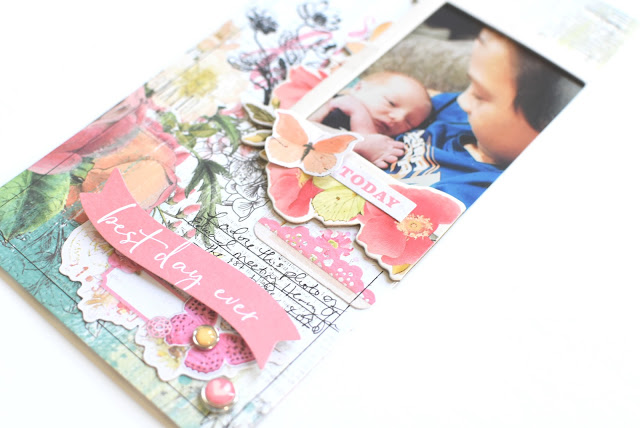
Hello everyone! I am back with another layout I created using Simple Stories' Simple Vintage Garden District Collection. This year, I am mixing up the sizes of my layouts a bit. I really like scrapping in this size. This layout is 4x8. I decided to try this size early this year because I am always scrapbooking wallet sized photos or one photo layouts and this size works for my scrapbooking style!


The 6X8 Simple Vintage Garden District Paper pad is PERFECT for scrapbooking this size. To begin, I cut the floral print to measure 6x8 and then I moved the photo and frame to where I wanted to place it on the layout. Once I was satisfied, I stamped the flower in black ink to break up the colors a bit. Then, I cut the chipboard frame so it would fit on the layout as shown.


I added a few Floral Bits and Pieces and Decorative Brads to the layout to make it more pretty. Then I used a ruler and black pen to hand-journal and draw the 1/4" border around the layout.


This size makes scrapbooking simple quick and easy for those of you who do not have a lot of time to scrapbook! You may want to consider scrapbooking in this size. Also, when scrapbooking in this size, a little goes a long way!


This floral stamp is so pretty. I thought about coloring the flowers using markers, but then I decided to leave it alone.


What do you think about this size? Are you ready to dive in and give it a try!? I totally love it. Thanks so much for visiting today!


Saturday, April 11, 2020

JOYFUL


Hello all! Hope everyone is well during this crazy time. I've been taking this time to just scrapbook and relax. It's been nice, being stuck in the house for a change. I've just been able to focus on ME. Today, I'm sharing another layout I created using Simple Stories' Simple Vintage Garden District Collection. For this layout, I wanted to play with the stamps a bit... mainly the floral stamps!


To begin, I cut a patterned paper from the 6x8 Paper Pad to measure 8x4. Then I used a ruler and black pen to draw a 1/4" border around the layout. I stamped the flowers at the bottom left-side of the layout and the top right-side of the layout to use as a photo corner.


I embellished the layout using several Floral Bits and Pieces and Decorative Brads. I even managed to add  a piece of washi after cutting the washi in half so it was not too big.


Normally, I would hand-journal on my layouts, but the sentiments from the Bits and Pieces and stamps was enough. These embellishments look so pretty together. I used a tiny stapler to staple the heart directly onto the photo.


And here is the completed layout. That green is sooooo pretty. I just love the color scheme of this collection and the patterns. I have one more layout I created using this collection and then I will be moving on to Vicki Boutin's latest collection for a fun mixed media layout.

Thanks for visiting today!