Friday, October 30, 2020

SEE THE BEAUTY IN EVERYTHING

 Good morning! Nicole here. I have another layout to share with you using the Cozy Time Collection. I love fall and this collection is perfect for documenting those fall memories! I'm happy that we haven't not skipped fall and gone straight to winter because the weather has been perfect. Nice and cool. And the leaves are beautiful!


To create this layout, I cut the patterned paper down to measure 8 1/2x11 and then I cut the striped patterned paper to measure 7 1/2x10. I used a black Sharpie pen and a ruler to draw a 1/4" border around the striped paper. 


I layered a few journaling cards behind the photo and then embellished the left corner of the photo with chipboardstickers and sticker dots. So pretty!! I cut the blue tab from a journaling card to use as an embellishment. 


I added the flower sticker with a sticker dot to add dimension. Then placed the "Enjoying the fresh air" clear sticker on part of the journaling card along with the triangles.


I stamped "5 Miles" at the bottom and colored them in using markers. I used the green to pull out the color of the leaf from the photo.


For my second project I created a card! I folded a Travel Notebook Paper in half and cut it down to measure 4"x3". Then I added a smaller patterned paper to the center of the card. I added the stickers and sticker dot to add dimension. So simple, but pretty!

For the inside of the card, I added another piece of plain patterned paper to the right-side of the card and then I added the sticker to the left-side of the card.


I made these fun pieces to decorate my living room for the fall. I painted the wooden leaves from Foundation Decor and then embellished them with patterned paper, stickers and chipboard embellishments from Studio Forty's Nordica Collection.


Thanks so much for stopping by today!


Friday, October 23, 2020

OH, WHAT FUN!

 Hello!! I know...before you say it...just hear me out. Yes, Christmas is TWO months away...and today Trinity Stamps is having their Holiday release on Instagram. If you're a stamper, you gotta check out all of the new products...and the stamps, O.M.G. Just click here to join the Instagram hop and be inspired. Or if you just want to skip the hop and start shopping, click here!


Disclaimer: "Trinity Stamps provided me with products to create this layout. The opinions I share are solely my own."

I had so much fun creating this layout. I used pictures from our cruise last Christmas. I've been waiting for the perfect time to scrap these cute photos. I used lots of journaling cards and die cuts from Elle's Studio to create the layout. Can you spot the adorable Trinity Stamps products?


I used the Snow Mole-bile and Shake your Merry Maker stamps on this layout along with the metal bow dies!


The star was created using Trinity Stamp's "We Wish you a Merry Christmas" metal die. I love playing with layers...especially cute journaling cards such as these. You can never have too many journaling cards!


What do you think? Isn't the santa adorable? I just love him!! I used markers from Altenew to color in the stamped images. Love how pretty the colors look on the stamped images. If you want to be inspired by the team and new products, click here!

Thank you for stopping by today!


Wednesday, October 21, 2020

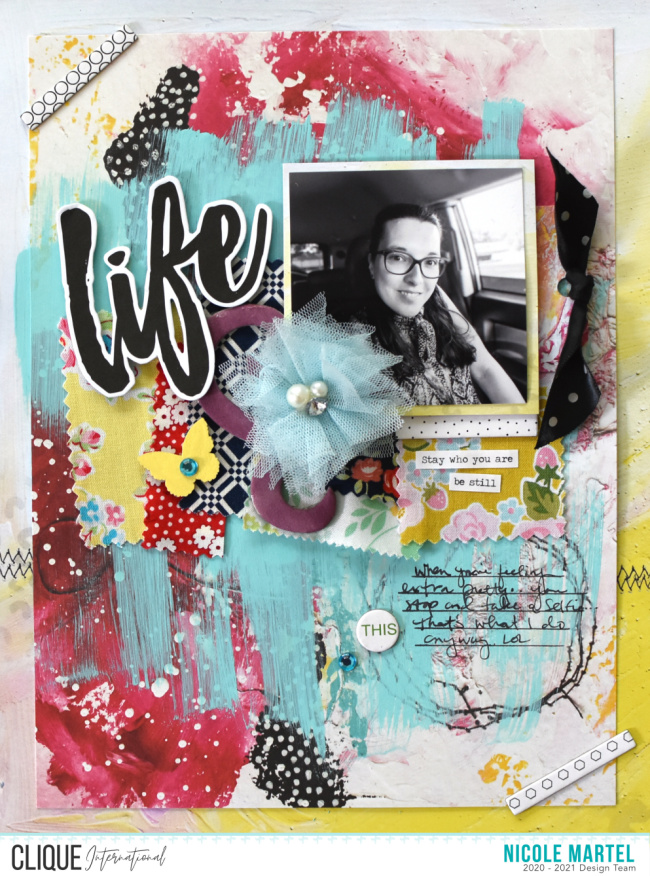
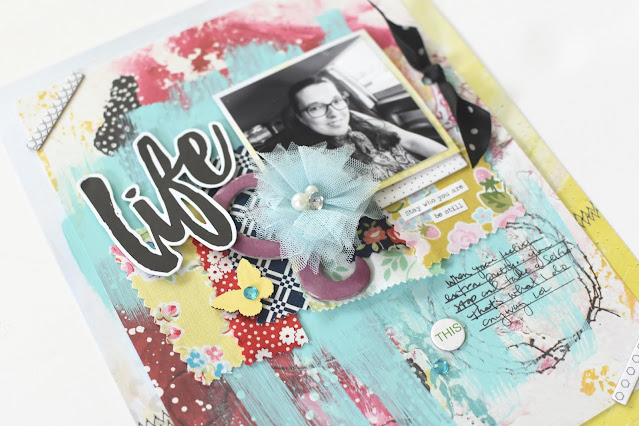
LIFE

Good morning! Today I'm sharing a fun mixed media layout. I just love all the colors and textures on this layout. One of my favorite products in Clique International's shops is patterned paper from A.B. Studios. These papers make it so easy to create a mixed media layout! 


The papers are all mixed media. I decided that I wanted to break up the pink and red from the patterned paper so I brushed some Drop Dead Gorgeous paint across the layout. I love the blue with all the pretty colors. Makes me happy. 


I painted the veneer butterfly and glued the gem to the center. Then I used a marker to color a piece of chipboard swirl purple to use as an embellishments.


The fabric swaps are from my stash. I love all the patterns from the fabric and it looks great with the mixed media background. Don't you think? Super chick-like. 

I used a few pieces of chipboard from Studio Forty as photo corners.


What do you think? This is so pretty. Sometimes, I surprise myself... I did not have any plan on where this layout was gonna go... I just picked up the embellishments and paint and just had fun! Thanks for visiting today. I hope you have a wonderful day!


Tuesday, October 20, 2020

POLY-CANVAS ZIP POUCH CREATED WITH STENCILS AND IRON-ON-INK SUBLIMATION MARKERS BY ARTESPRIX

Good morning! I have a fun project to share with you today. I promise you, I wasn't thinking about candy when I created this adorable bag. But, it sure does look like something I bought from the candy store. It's such a fun bag and I had a ton of fun making it.

Disclaimer: "The Crafter's Workshop provided me with products to create this project. The opinions I share are solely my own."

I created this adorable bag using stencils and Iron-on-ink sublimation markers. It was super easy and fun to make! To see more on how I made this, visit The Crafter's Workshop!


Once I finished the bag and it has been through the heat press, I glued on some Rainbow Sherbert Candy Confetti to the tiny circles using craft glue. 


Then I stitched on a few buttons for fun! LOVE THIS SO MUCH!


What do you think? I'm totally addicted to playing with my Sublimation Markers! I am making things I never imagined I'd make... It feels good to make something different from my norm. Check out Artesprix's products if you are interested in creating fun projects using stencils and Sublimation Markers!

Here is a video to see how this fun bag came together!


Thank you for visiting today!


Monday, October 19, 2020

AUTUMN

Hi all! Happy Monday to ya! Today was a weird day at work... it was unusually quiet for a Monday. I hope it continues throughout the week! I thought I had this scheduled to go live this week, but I never prepared the post... Better late than never.


This is such a fun layout! I love how this turned out. I used Fancy Pants Design's Howl Collection from their 2019 Fall Release. It's geared more towards Halloween, but I made it work for a fall layout. The stamped leaves and title helped bring this layout to life. 


The alpha stamp is from one of Scrapbook and Cards Today Magazine. The leaves are from a retired collection of stamps from Trinity Stamps.


To embellish the layout, I used puffy stickers from a variety of Citrus Twist Kits that I have accumulated in my stash of goodies.


I love the pumpkin flair. He's so cute!! For the leaves, I used markers from Altenew. They are my favorite markers...great colors and great quality. Well worth the money.


The lace border is a metal die from Pinkfresh Studio. It looks great on this layout! I love it. I also added a few gems from Pinkfresh Studio. The colors are so pretty.


I have a few more fall layouts coming to the blog. Be on the lookout. It's my favorite season so I will have a few more layouts posted before the month ends!

Thanks so much for visiting today!


Thursday, October 15, 2020

ALTERED JUTE BAG

Hello all! I have a fun project to share with you today. It's a jute bag that I used vinyl and sublimation inks and stamps to create a one of a kind bag! I've become the neighborhood library since this pandemic started. I love to read and I have LOTS of books in every room. I thought it would be fun to create a bag to put a book in for my friendly book nerds!

This post contains affiliate links for the products used by today's poster. They may earn a small commissiion at no additional cost to you. We hope you enjoy Artesprix products!


How Sublimation Markers Work

If you're not familiar with Artesprix Sublimation Markers, you may be wondering how they work without having a sublimation printer or ink. The markers are designed to add your original art using a dye sublimation heat process. The markers hold the ink that you use to draw and design on plain copy paper. The heat process, whether it's a heat press or your own home iron, turns the ink into a a gaseous form that permeates the polyester or polymer blank and creates a lasting image; no fading here. Your image lives on forever! 

How to Use Iron-on-Ink with Sublimation Vinyl

What you will need to create this jute bag:
Step-by-Step Instructions: 

1. Prepare the jute messenger bag with the heat transfer vinyl. Using your Sizzix Die Cutting Machine and metal dies, cut out the giraffe and books using vinyl. 


Step 2: Peel the back sticky film from the vinyl and place them onto the jute bag. Place a sheet of protective paper at the top and bottom of the jute bag and place the project in the heat press for 15 seconds at 310 degrees Fahrenheit. 


Step 3: Remove project from heat press and set aside. 


Step 4: Use the Sublimation Ink Pad and Clear stamps to stamp images onto copy paper. Cut them out using metal dies and color them in. You can use the Black fine tip sublimation marker to fix any areas that did not stamp all the way.*


Step 5: Use heat tape to tape down your colored images over the vinyl.*


Step 6: Place protective paper at the top and bottom of the bag.


Step 7: Heat project in the heat press, images facing up for 60 seconds at 400 degrees Fahrenheit. 


Gently peel a piece of the paper at the edges to make sure the color is vibrant before removing the paper from the bag. It's so pretty!! I love this process!


Step 8: Remove the copy paper from the bag and embellish as desired using a strong glue!


This was my first jute bag. I must admit...I was afraid to give this project a try. I did not want to end up ruining the bag, but I did it and I LOVE it!

Thank you so much for visiting today! Are you ready to try something new? These bags would make a great Christmas gift! Just sayin...