Good morning! Nicole here with a fun home decor project I created for my kitchen using the Cozy Time Collection from Studio Forty and Foundation Decor's Eat Kit.
Wednesday, June 30, 2021
KITCHEN TIER TRAY
Monday, June 28, 2021
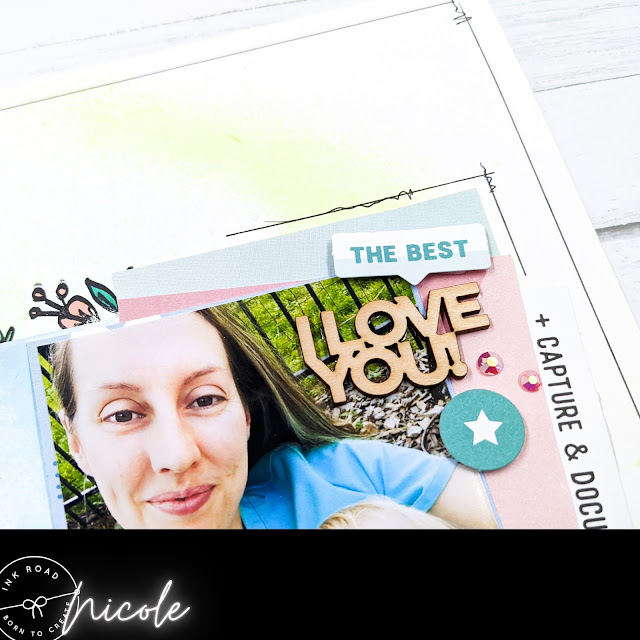
HELLO, YOU'RE KIND OF LOVELY MIXED MEDIA LAYOUT
To pull this layout together, I added a few more embellishments at the top right-side of the photo.
Monday, June 21, 2021
HAPPY BIRTHDAY FRAME CREATED WITH ARTESPRIX SUBLIMATION PRODUCTS
Hello! I'm here to share a fun birthday frame I created using Sassy & Crafty’s adorable stamps and a variety of sublimation products from Artesprix! As soon as I saw the cute little bears I just knew I had to create something with these guys. They are too cute and HAPPY! Who doesn’t need a little more happiness in their lives?! These guys made me smile, for sure.
What are Artesprix Sublimation Markers?
Magic Ink that transfers their beautiful colors from plain copy paper to a polyester product with a heat source. Iron-on-Ink Markers are the way to personalize sublimation, which is specially formulated inks that transfer only when activated with heat.
Materials:
Sublimation Markers
Sublimation Ink Pad
Acrylic Stamp Block
Pencil
Copy Paper
Frame
Sassy & Crafty Let's Eat Cake Stamp Set
Heat Tape
Protective Paper
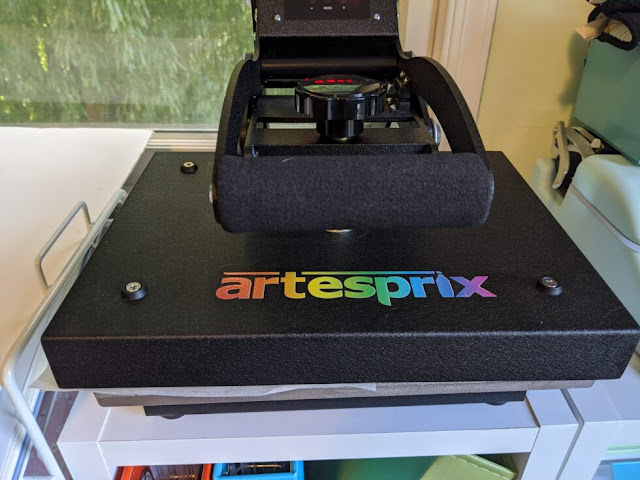
Heat Press
Project Mat
Step-by-Step Tutorial
Step 1: Using a sheet of copy paper and pencil, trace the frame onto the paper so you know how much space you are working with.
Step 2: Stamp images onto a sheet of copy paper using the Sublimation Ink Pad. Tip: Before you stamp on your main project copy paper, you may want to stamp your image on a scrap piece of paper a few times. Sometimes, the ink does not cling to stamps too well, which doesn’t always give you a crisp image. You can eliminate this issue just by stamping on a scrap piece of paper a few times… Trust me!
Tip: Set your heat press at 400 degrees Fahrenheit for 30 seconds before you start coloring in your images. That way, the heat press will be hot enough to sublimate your images when you are finished. :)
Step 3: Color in the images using your sublimation markers.
Step 4: Using heat tape, tape down the frame with the images faced-up.
Step 7: Place a piece of Protective Paper at the top and bottom of your frame.
Step 7: Place your "Sublimation Sandwich" inside the heat press for 60 seconds at 400 degrees Fahrenheit.
Step 8: Take a little peep test to make sure the colors are vibrant.
Step 9: Carefully, remove the frame from the heat press using gloves. Then place the frame onto the Project Mat to cool down. After a minute or two, remove the paper and heat tape to reveal your vivid designs!
Step 10: Assemble picture frame as desired, vertically. Place protective mylar film in picture frame before assembling.
Isn’t this adorable!? I just love it so much! Thank you for visiting today! If you enjoyed this tutorial, check out my Beach Frame I created. It’s super cute! Looking to make your first purchase? Click here to shop through my affiliate link!
Looking to make your first purchase? Click here to shop for Artesprix products through my affiliate link! You can also purchase a few Crafty & Sassy stamps here! Thanks so much for visiting today!
**This post may contain affiliate links. That means that I may receive compensation if you purchase through the links I have provided. The price you pay for the product or service is not higher, but I may get compensated for sharing.**
Thursday, June 17, 2021
MEMORY PLANNER SPREAD
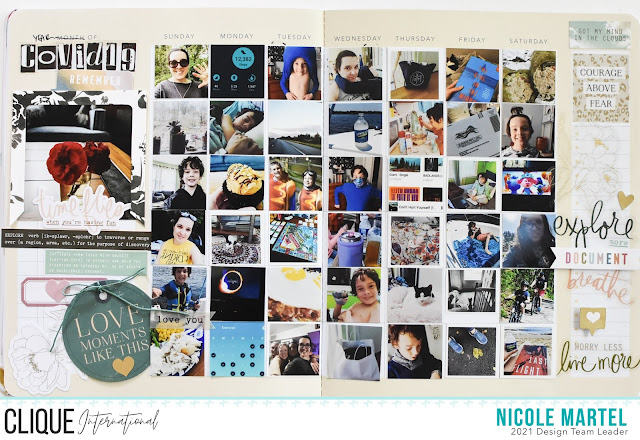
Hi everyone! I've had several photos from last year that I've been wanting to scrap, but every time I looked at them, I just had not interest...and there were so many of them that I wasn't sure what to do... So today I punched them all into tiny squares and got them into my memory planner!! Go me!
There is a total of 43 photos on this spread! Can you believe it? Go ahead and count them yourself. Honestly, I did not realize I had so many pictures! It's super easy to print tiny photos. Simply create a collage of photos using PicMonkey and print them on a letter sized photo paper. I printed these on matte photo so they wouldn't be glossy.
I used a variety of die cuts, stickers and tags to fill in the white space along the sides of both pages.
The vellum stickers are so beautiful. I love how nice they look. I used a few vellum word stickers to help tell my story without having to journal since I didn't really leave my room for any journaling... And the journaling block is too small for me to write in.
If you've been thinking about documenting your stories in a journal, it's super fun once you get started. This is a much different approach to sharing my memories, but I really like it because I can share all of the photos that I wouldn't normally put on a regular 8 1/2x11 scrapbook page. This format allows me to use a variety of photos from different subjects without them feeling out of place. Click here to see what Story Line Products are available in the shop.
Tuesday, June 15, 2021
SUMMER FUN LAYOUT
Hello friends! I'm back with a few more layouts I created using the Lazy Days Collection. The ombre patterned paper really caught my eye. It's sooooo pretty and it goes perfectly with these photos.
I stamped the clouds and sand castles onto a scrap piece of patterned paper and then cut them out using scissors. I mounted them onto the layout using foam squares to add dimension.
The clear stickers are perfect to add to photos you aren't comfortable stamping on. I added the "It was a good day" sticker to the photo. I also added the sun sticker to the bottom right of this layout and stamped the "Let's Go Somewhere" onto the photo using black ink.
I took this picture last summer during our mini family vacation at the beach. We had such a great time together.
I stamped the flower using purple ink and then colored the flowers in using alcohol markers. I think it looks so pretty. Then I added the chipboard, transparent stickers, chipboard and sticker dots to pull this layout together. The flowers make me so happy.
I used a purple pen and circle template to draw the circle around the photo. Then added some doodling.
What do you think of the Lazy Days Collection? Isn't it lovely? Click here to grab some goodies! Save 10% on your purchase with coupon code: NICOLE10 .Thanks so much for stopping by today!
Monday, June 14, 2021
YOU HAVE SEVERAL OPTIONS CARD
Hello! Nicole here with a fun card I created using the Snarks and Rec Vol.2 and Bella Flora (retired) stamp set. I actually saved a scrap piece of paper that I stamped on for another project, but part of the ink did not transfer properly so I cropped it into a square to use for a card!

I love this stamp set. The big bold flowers makes me so happy. Before I stamped the flowers onto white cardstock, I sprayed some green and blue mist to add a pop of color. But I wanted it to be subtle. Then I stamped the floral print in black ink.

I cut a piece of patterned paper to measure 6x3 and folded it in half. I stapled a black heart die cut and added a tiny gem to complete the front of the card.
To complete the card, I stamped "YOU HAVE SEVERAL OPTIONS..." from the Snarks and Rec Vol.2 stamp set inside the card and added another heart and gem.

This was such a simple card to create! I hope you find it inspiring. Thanks so much for stopping by today.
Monday, June 07, 2021
KINDNESS MATTERS CARD
Hello friends! I am back with a pretty card I created using the Be Kind stamp. I wanted to make something more on the feminine side to go with the snide sentiment.

To begin, I cut a piece of patterned paper to measure 8x6 and then folded the paper in half to create a 3x4 card.

Next, I cut another piece of patterned paper to measure 3x2, stamped the "Kindness Matters unless you disagree with me" sentiment in black ink and then I adhered it to the bottom of the card.

I used my Sizzix to create a lacey border for the card and then adhered it to the card.


To complete the card I added a cork heart embellishment and pink gem.

I think it turned out beautifully. And best of all...this was a super simple card to create!

Thanks so much for stopping by today!


