Hello!! Clique International is hosting a weekend Galentines Day Crop and I created this fun layout of my girls. Since my sister Katie moved to Colorado, we do not get many opportunities to take a selfie together, but we got together over the holidays and took lots of pictures. :) This is one of my favorites.
I never really have a plan when I scrapbook. It's true... The first thing I do is grab my picture that I want to document and then I look for papers and embellishments that would go with the picture.
As I am creating...I just move things around until I am satisfied with the placement. While this layout may look simple, it took me about 40 minutes to create because I kept fussing with it. Finally, I just left it along. Do you ever have that problem? Not knowing when it's done?!
I love the grid paper because it made writing in a straight line so much easier. :) I colored the heart within the journaling card using a marker.
I love clustering pretty embellishments together. Ah... it's so pretty! I kept messing with this corner because I really wanted to add some flowers, but they looked a bit too much... so I left them off...Except, I did cut a piece and tucked it behind the die cut lady. :)
Here's a quick video on my process! Thanks so much for watching!
Good morning! I finally used the Don't Grow Up Collection and I am in love!! Ah, what a lovely collection. I've had these photos of Edward from about three years ago... I have not scrapped them yet, but after looking at the Don't Grow Up Collection, I felt the photos made a perfect match! Everything flows together so nicely.
I decided to cut some of the elements from the journaling cards to use as embellishments for the layout. I simply cut them out and mounted them down using foam squares for added dimension.
I added the flair and sticker dots for fun. Then I tore the washi sticker papers at the ends and added a strip at the top of the photo.
To complete the layout, I added a little bit of journaling at the bottom to fill in the white space.. I also included a sticker and stamping at the bottom right-side of the photo.
What do you think? It's super simple, but ohhhh so cute! I created a process video so you can see how this came together. Thank you for visiting today!
Before I go for today, I want to share another layout I created with the Don't Grow Up Collection. I hope that after reading this post and seeing the video, you see just how versatile this collection is. It's not just for documenting those adorable babies.
I love the adorable arrow printed paper and blue grid patterned paper. They are so pretty. I couldn't decide whether I wanted a blue base or the arrow... I decided on the grid as the center base in case I wanted to journal...
I cut the "E" from the patterned paper to use as an embellishment and stamped the "Never Grow Up" image onto paper and then cut it out. I initially stamped on the layout and the stamp smudged...so I had to do a quick fix, which you will see in the video. After 20 years of scrapbooking, I still make mistakes and that's OK because most of the time, I know how to fix them. :)
I used a stamp to create the border around the center to create a nice frame for the layout.
The papers are perfect for fussy cutting cute patterns to use on your layout as embellishments. Simply cut them out and adhere them to the layout using foam squares and add a gem to the center for added dimension.
Hello friends! Nicole here with a fun layout I created using photos that my son took of me on New Year's Eve. When I was trying to get myself situated, on the floor...he said, "You are not a model...you're a scrapbooker!" HAHA...I almost died. LOL. I told him to just take the picture already...
I REALLY love the newest release. Especially the "Let's Party" collection. The color scheme and patterns are soooo perfect... and so refreshing. Lots of fun stuff!!
I hand cut some of the patterns from journaling cards because they were so cute... I really like the cluster of embellishments between the photos. I placed a clear "celebrate" sticker on the donut pattern and cut it out from the paper to use as an embellishment. The pink banner was also cut from the patterned paper.
I used alcohol brush markers to color in the clear sticker balloon and hat! This technique is super fun and easy to do!
To add dimension to the journaling tag, I added the banner stickers... :) Clever, right!? Then I used the stamp and light pink ink to add little bows at the end of the banner.
I seriously had a blast creating this layout. I used black ink with the scribble stamp to create a fun photo corner for the layout. Isn't this such a fun layout!? I am loving it...it totally looks like a layout to celebrate.
Here is another layout I created using the same collection. I had so much fun playing with the stamps from this collection. The possibilities are endless.
I colored in the stamped images using markers. Loving how colorful this layout is. It's so fun and festive.
I used an old tag as a template to cut out a blue tag from a scrap piece of paper. Then I punched a hole through the top and added some thread. Super simple and easy way to create your own embellishments.
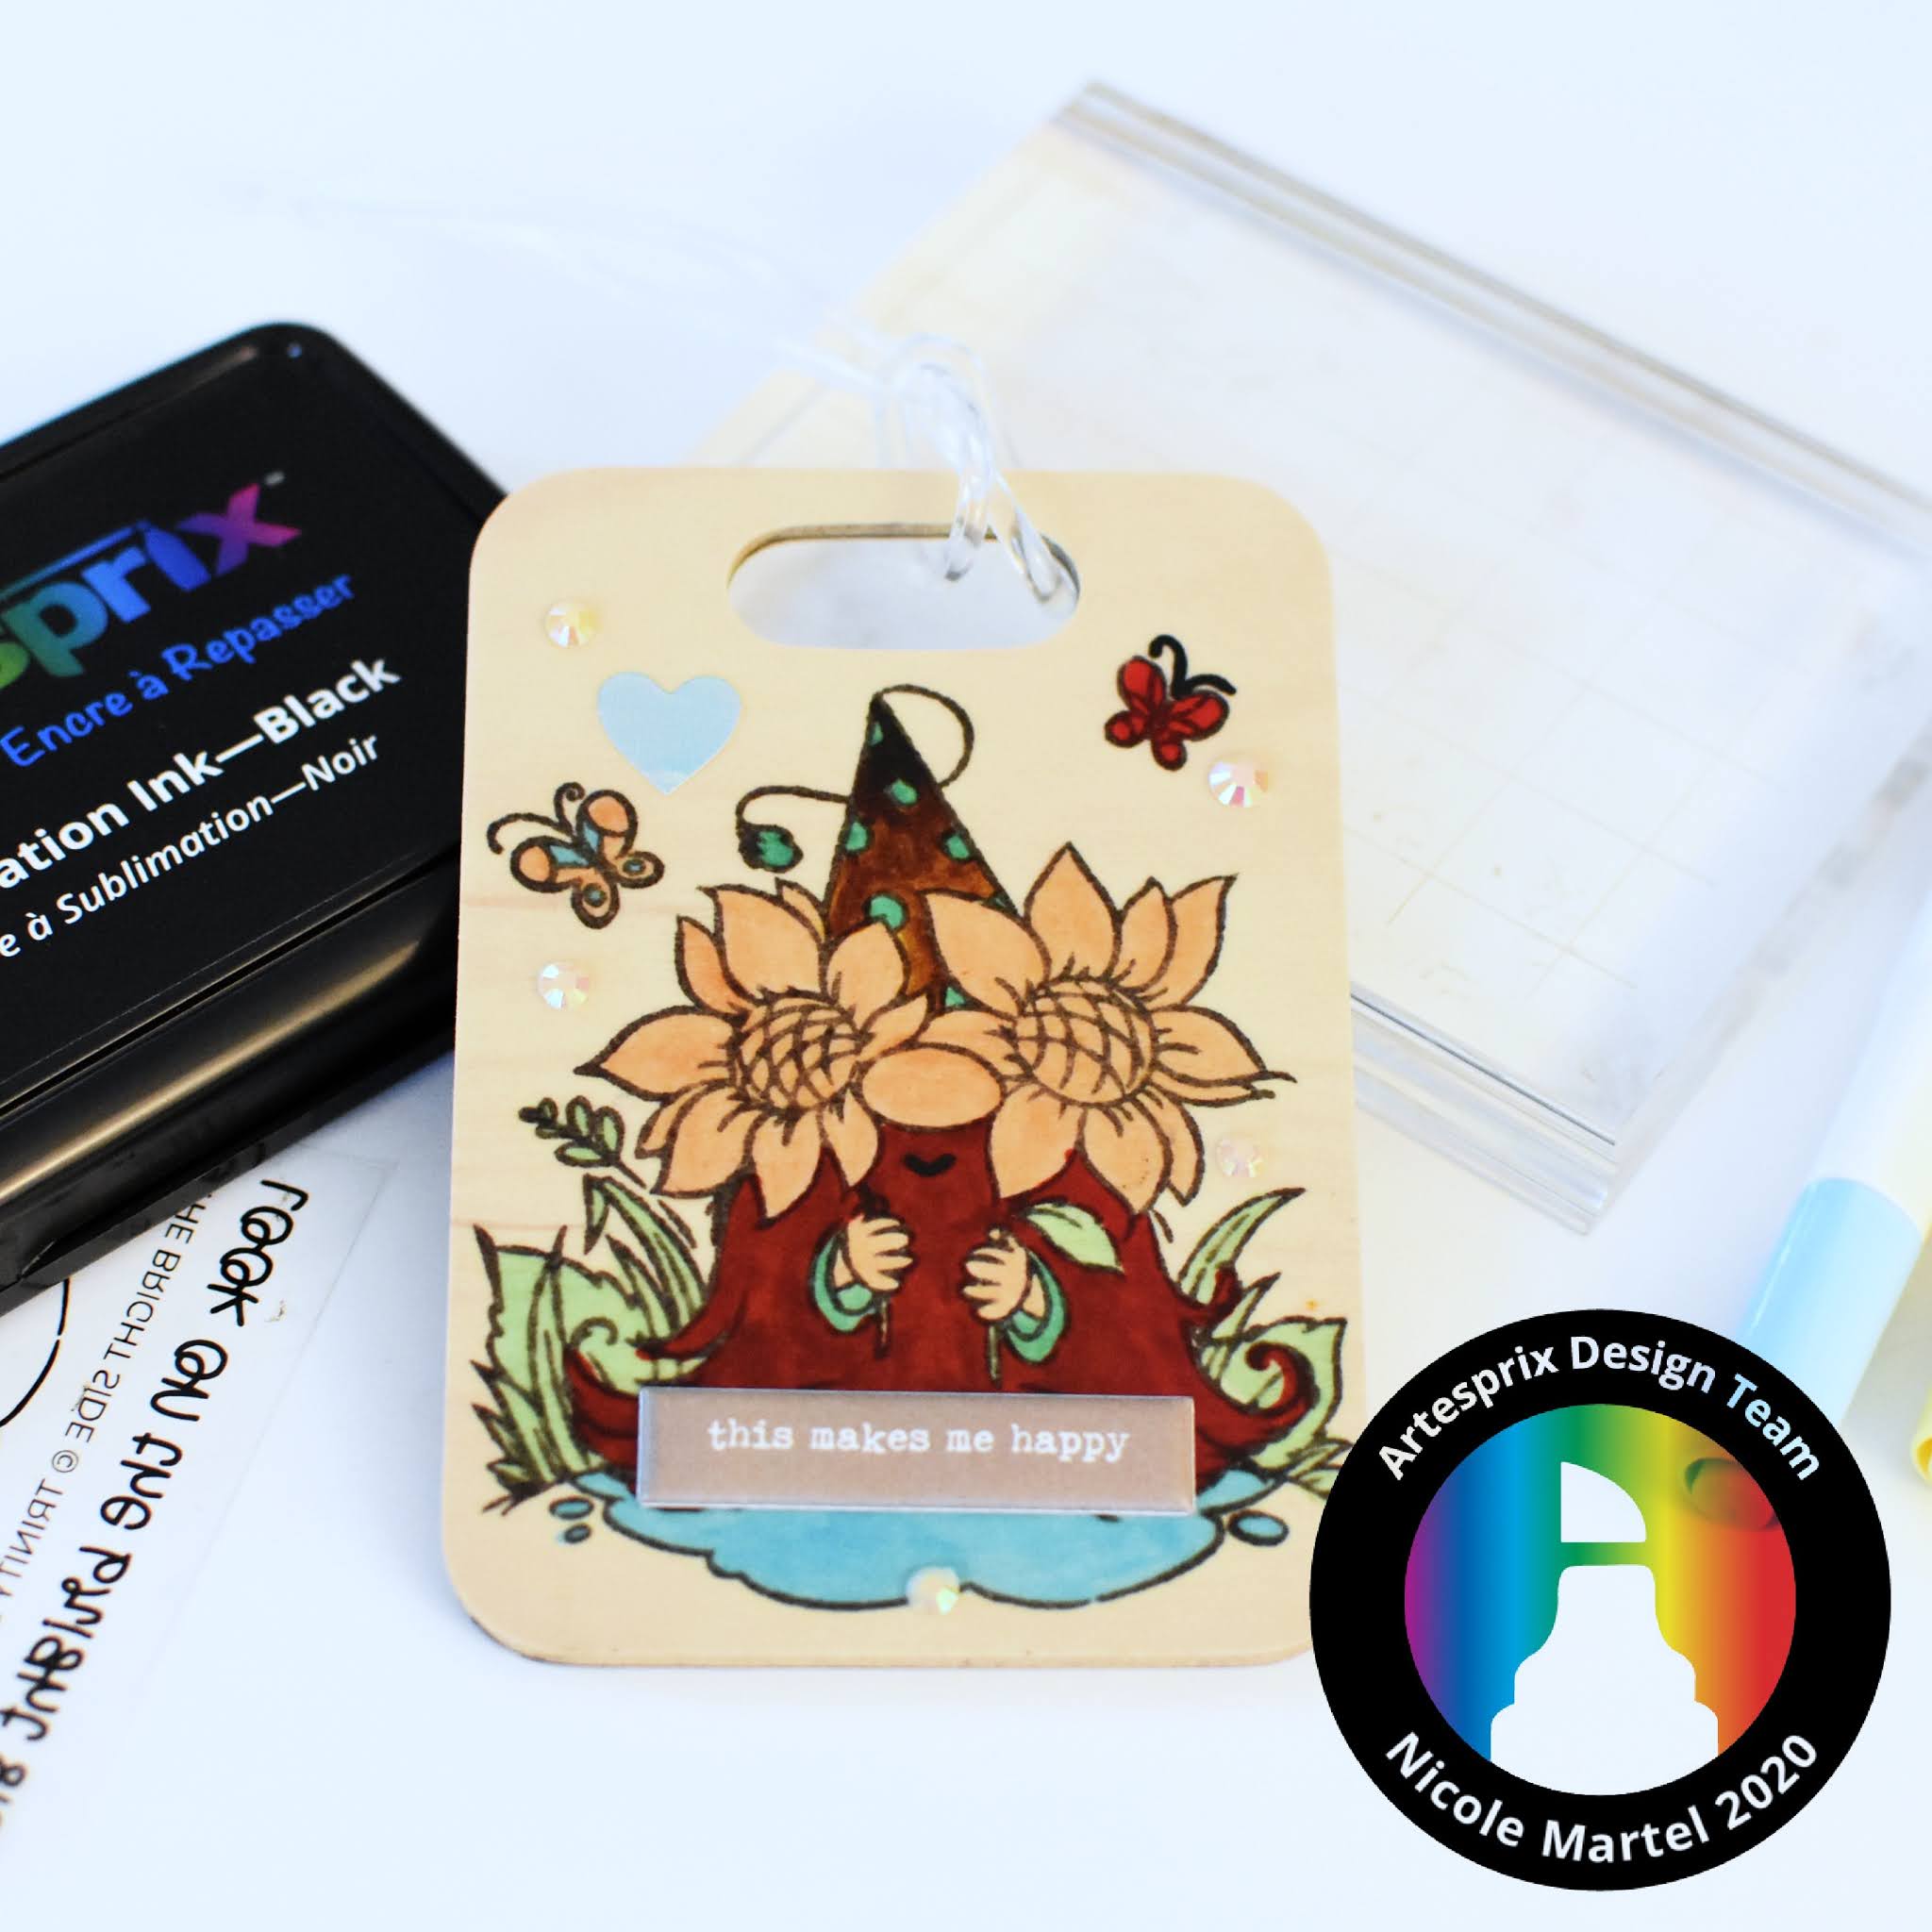
Hello everyone!! Happy New Year! Today, I have a fun tag to share with you...and there's a video as well! I really thought I was done with Gnomes...but I really can't help myself. They are just soooooo cute! And these little guys make me happy so why not?!
Step 1. To begin, I used the Maple Bag Tag as a template to trace on white cardstock using a pencil.
Step 2. Next, I stamped Trinity Stamp's Gnome image onto the plain piece of paper using the Sublimation Ink Pad.
Step 3. I colored the images using the Pastel Sublimation Markers.
Step 4. Tape the blank image facing up using the heat tape. Then, create your sublimation sandwich. One protective Paper sheet at the bottom and one sheet at the top of the project.
Step 5. Set your heat press to 400 degrees Fahrenheit and timer for 45 seconds. Make sure you place your project in your heat source image facing up. After your timer has completed, make sure to let your project cool down before touch it.
Step 6. Embellish as desired!
Don't forget to check out the variety of blanks in the shop. There are many different things you can create by hand using the Sublimation Markers, Ink, and Stamps along with our blanks! Click here to see all of Artesprix's products!
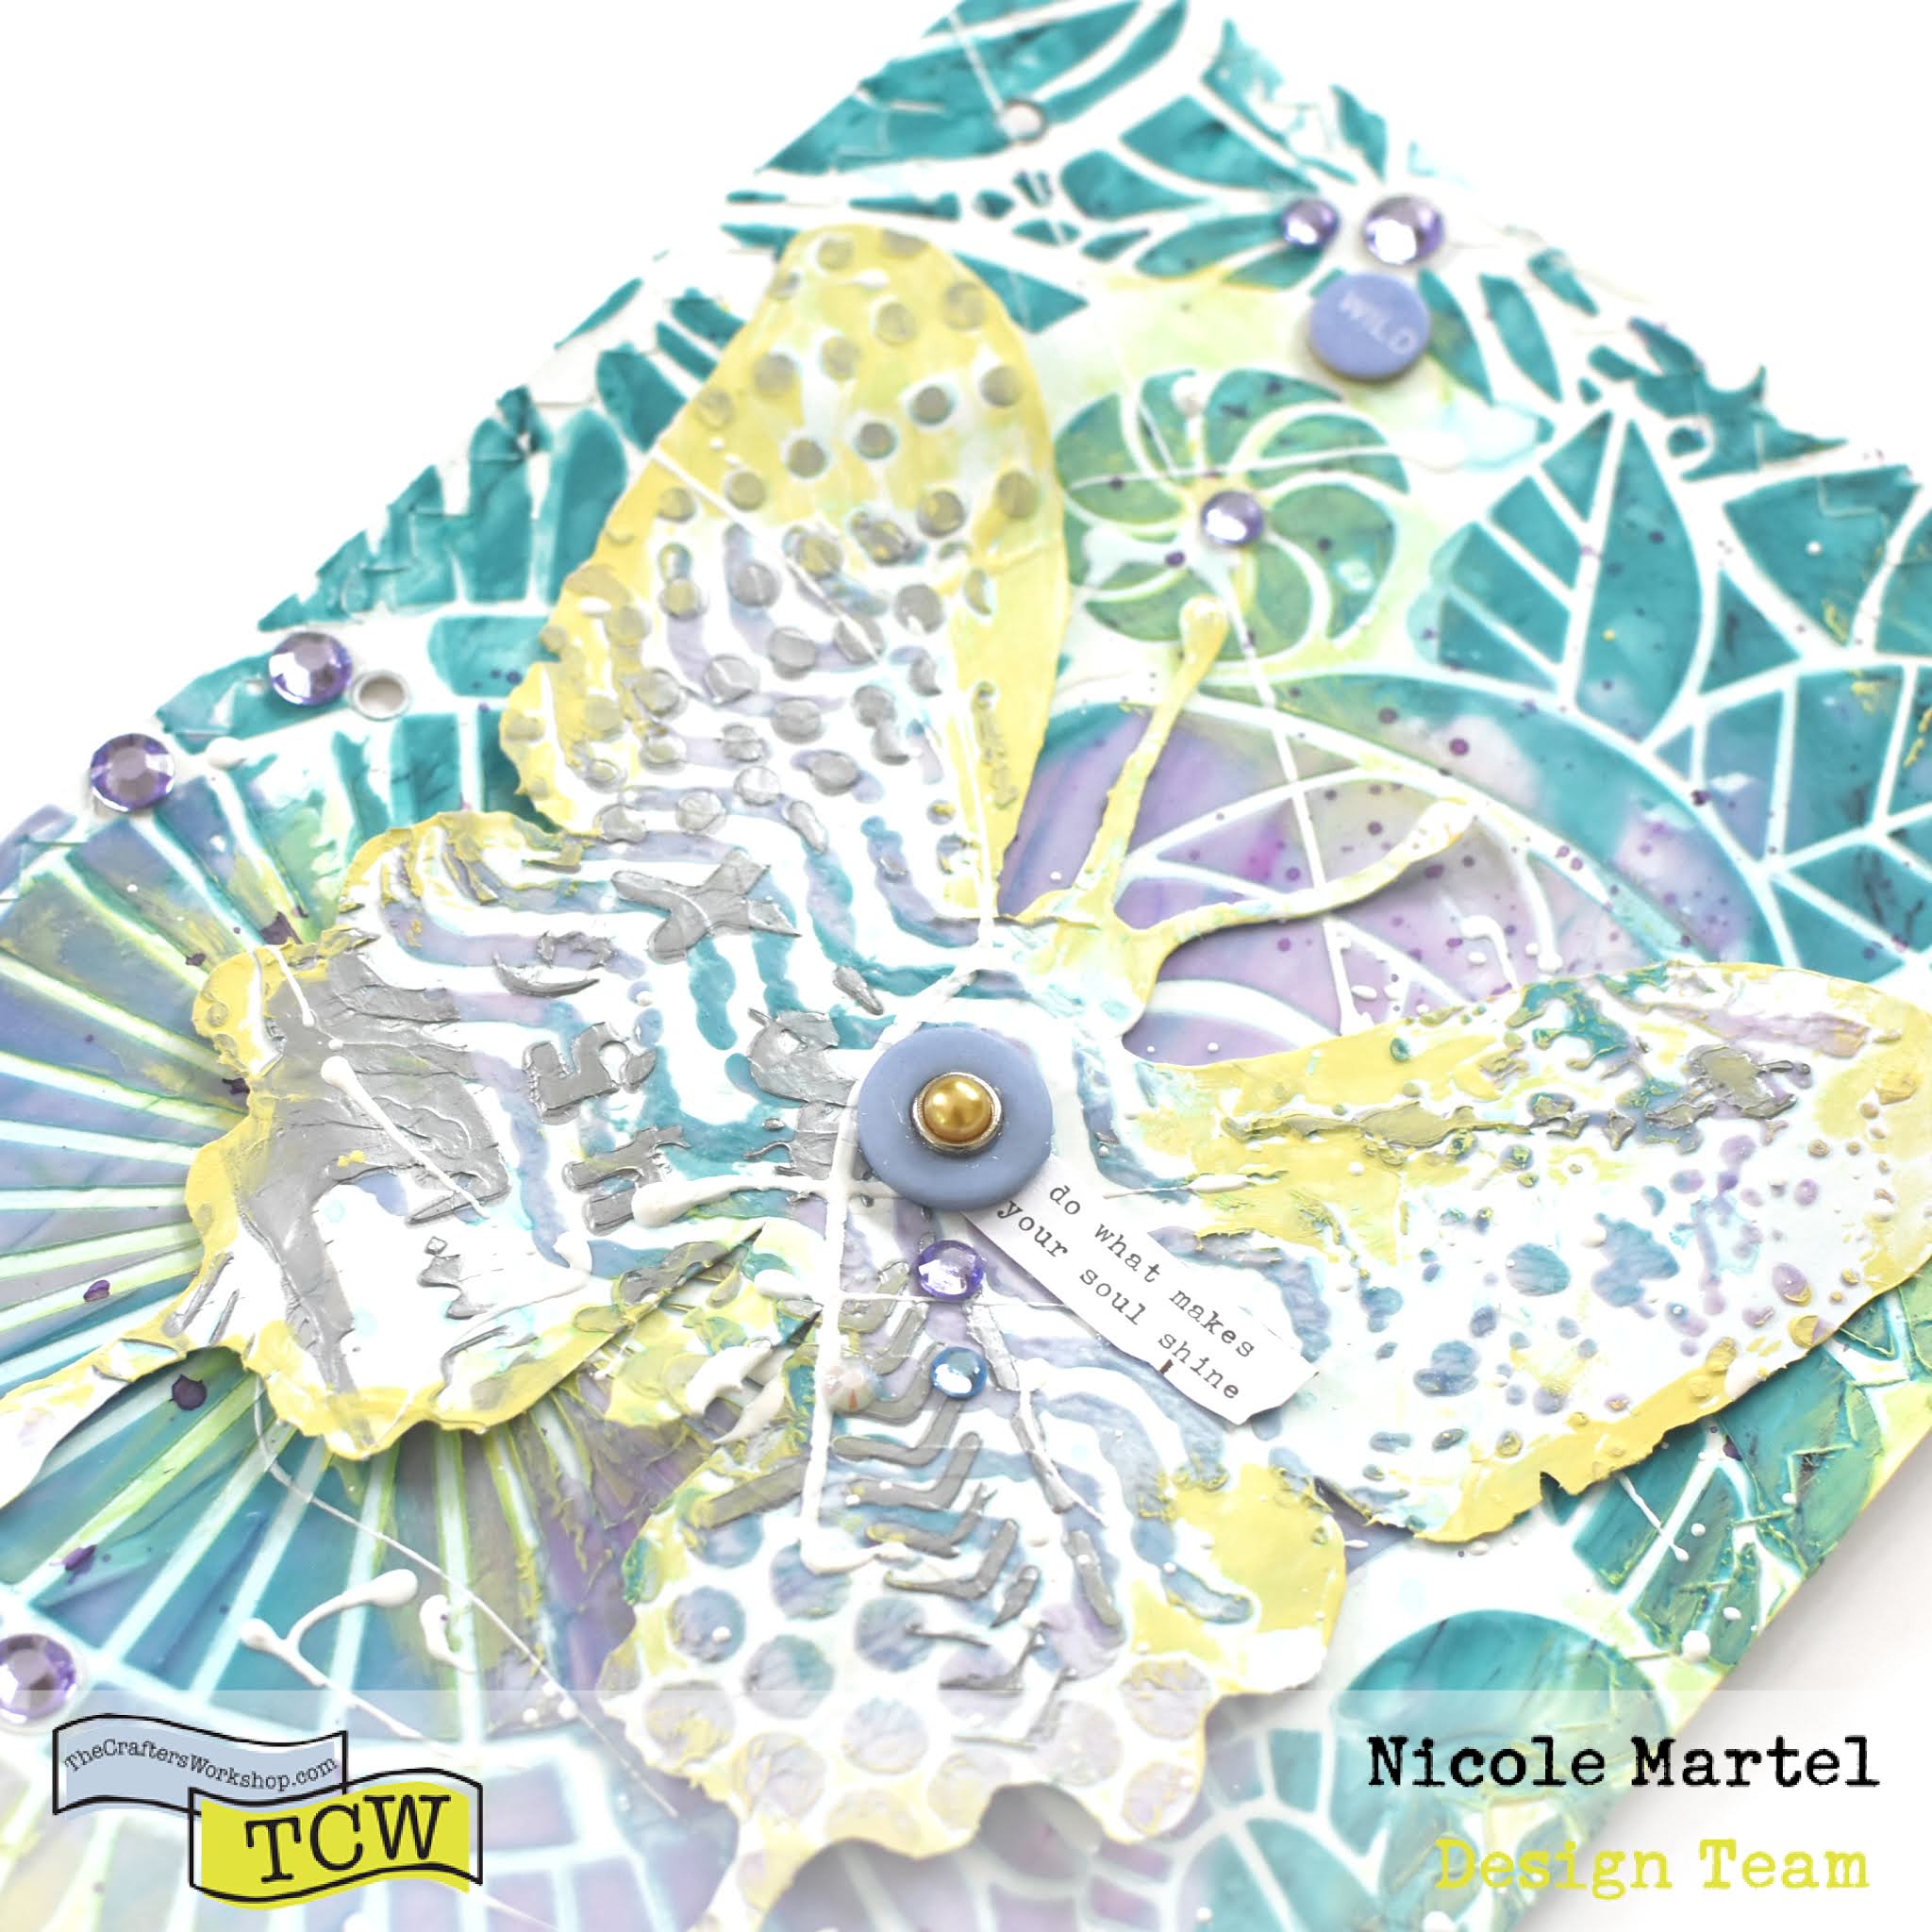
Good morning! I'm super excited to share this art journaling page I created for The Crafter's Workshop. I used a little bit of everything. I created this piece one Friday night when it was nice and quiet with my iTunes blasting in the background. Seriously, I'm not sure where this came from... sometimes I impress myself when I just create... not worrying about what others might think.
Disclaimer: "The Crafter's Workshop provided me with some product to create this project. The opinions I share are soley my own."
I cut the butterfly die cut using my Silhouette Portrait then coated it in white gesso to prevent the butterfly from tearing once I applied all the mediums.
Love the strip of paper that says "do what makes your soul shine." I cut this sentiment from a die cut.
Good morning! I have a fun project to share with you today. I promise you, I wasn't thinking about candy when I created this adorable bag. But, it sure does look like something I bought from the candy store. It's such a fun bag and I had a ton of fun making it.
Disclaimer: "The Crafter's Workshop provided me with products to create this project. The opinions I share are solely my own."
I created this adorable bag using stencils and Iron-on-ink sublimation markers. It was super easy and fun to make! To see more on how I made this, visit The Crafter's Workshop!
Once I finished the bag and it has been through the heat press, I glued on some Rainbow Sherbert Candy Confetti to the tiny circles using craft glue.
Then I stitched on a few buttons for fun! LOVE THIS SO MUCH!
What do you think? I'm totally addicted to playing with my Sublimation Markers! I am making things I never imagined I'd make... It feels good to make something different from my norm. Check out Artesprix's products if you are interested in creating fun projects using stencils and Sublimation Markers!
Here is a video to see how this fun bag came together!