Wednesday, April 23, 2025

HAPPY BIRTHDAY ART JOURNALING SPREAD/A CHERRY ON TOP

Good morning, friends! Nicole here with another mixed media art journal project. This past month, we celebrated my neice's third birthday. I came home and created this fun art journal spread using stamps and stencils to create a fun background. One thing I realized while creating this spread is that I definitely gravitate towards things that I like in real life... Such as pigs and animals in general, and Art by Marlene fits my personality! I love funky stuff...and I like playing with bright, colorful products. I think that's why I'm hooked on art journaling! It's freeing...
To begin, I used a pencil to draw marks on the plain art journal page to create a pattern for the background. Next, I colored in the triangles using the Duo Acrylic Markers. This markers are fantastic!!! I love them so much. Next, I cut the patterned paper from the Golden Collector's Book into a fun photo corner and glued it down in the journal.

After that, I moved the fun die cuts around to figure out the placement of all the magical elements. These fun die cuts come inside the Golden Collector's Book.

Once I was satisfied with the placement of the little guys, I glued everything down. I used the white marker to trace around some of the die cuts to make the images more defined so they don't get lost in the background.
I stamped some journaling scripts and hearts to the background. You do not need a block for the stamps. Simply, press the stamp into the ink pad and then press the stamp down on the page using your fingers to press down to ensure the images transfer to the paper. I probably should have done this before gluing down the elements...but to fix this issue, I covered the areas I didn't want to cover with scrap pieces of paper and it worked out. After that, I used the markers to create a variety of dots to fill in the white space.

I stamped the hearts down and then traced them using the markers to change the hearts to multi-colors. I used my fingers to dabb off the excess paint from the hearts to lighten them. Next, I used the stencil to create the little blocks with the markers. I used my finger tips to dabb off the excess to lighten the paint so it blended in the background. Since the acrylic markers are opaque, I used an alcohol marker to color the die cut sentiment pink. 


I hope you found these pages delightful! I had so much fun playing in this journal! Click here to see all the products used and to shop through my affiliate link. Thank you for visiting today.

Nicole

Friday, April 18, 2025

BRIGHTER DAYS AHEAD SNAP BINDER/SIMPLE STORIES

Good morning, friends!! SPRING has arrived and I'm here for it...looking forward to more sunshine, and beautiful days...along with lots of walks with Moxie. Today, I'm sharing an album I created using Simple Stories' Tea Garden collection. I've been wanting to create an album using cherry blossom pictures for a while now and this collection totally worked! There's a lot of pink...which was perfect.

I kept the cover simple...not 100% happy with it...but hey...sometimes, you just have to move on...I think I was thrown off because this collection doesn't have chipboard frames and I typically use them for the cover. But you know what they say...never judge a book by its cover. I promise...the inside is prettier.

I used the decorative page from the 6x8 paper pad and added a few die cuts and chipboard stickers across the two pages. Isn't this such a delightful spread. I just love how pretty it looks.
Every year, my job volunteers at the water station for the Cherry Blossom Credit Union Run in Washington, D.C. I don't volunteer ever year, but I have volunteered about 5-6 times...maybe more. I lost count. The flowers are super pretty and I love the lady bug. I clustered embellishments around the photo to keep the focus on the photo.

I matted two 3x4 photos and placed them in the center. Then, I added clusters of embellishments across the bottom and at the top corner. I used foam strips to pop the "the best day" sentiment up to add dimension.

I decorated the pocket pockets with journaling cards and die cuts and stickers to add dimension. Isn't this lovely? It's so pretty, and the color palette is perfect for Spring.
There have been times when the Cherry Blossoms were absolutely beautiful, while at other times, it was too cold and there were barely any blooms. 

This spread turned out so pretty with the gorgeous photos! I especially love the bee and snail. Super cute.

I decided to play with this one a bit by cutting three tags and placing them at the top of the layout. Next, I added stickers across the top, using foam strips to add dimension. 

I love that these albums come with journaling papers... I added die cuts at the top and bottom of the paper to make it playful.

And that's a wrap! I'm happy to finally have these photos in an album! LOVE how this all came together... Thanks so much for visiting today! Hope you have a great week.

Nicole


Monday, April 14, 2025

FURBABY DOG FLIPBOOK/SIMPLE STORIES

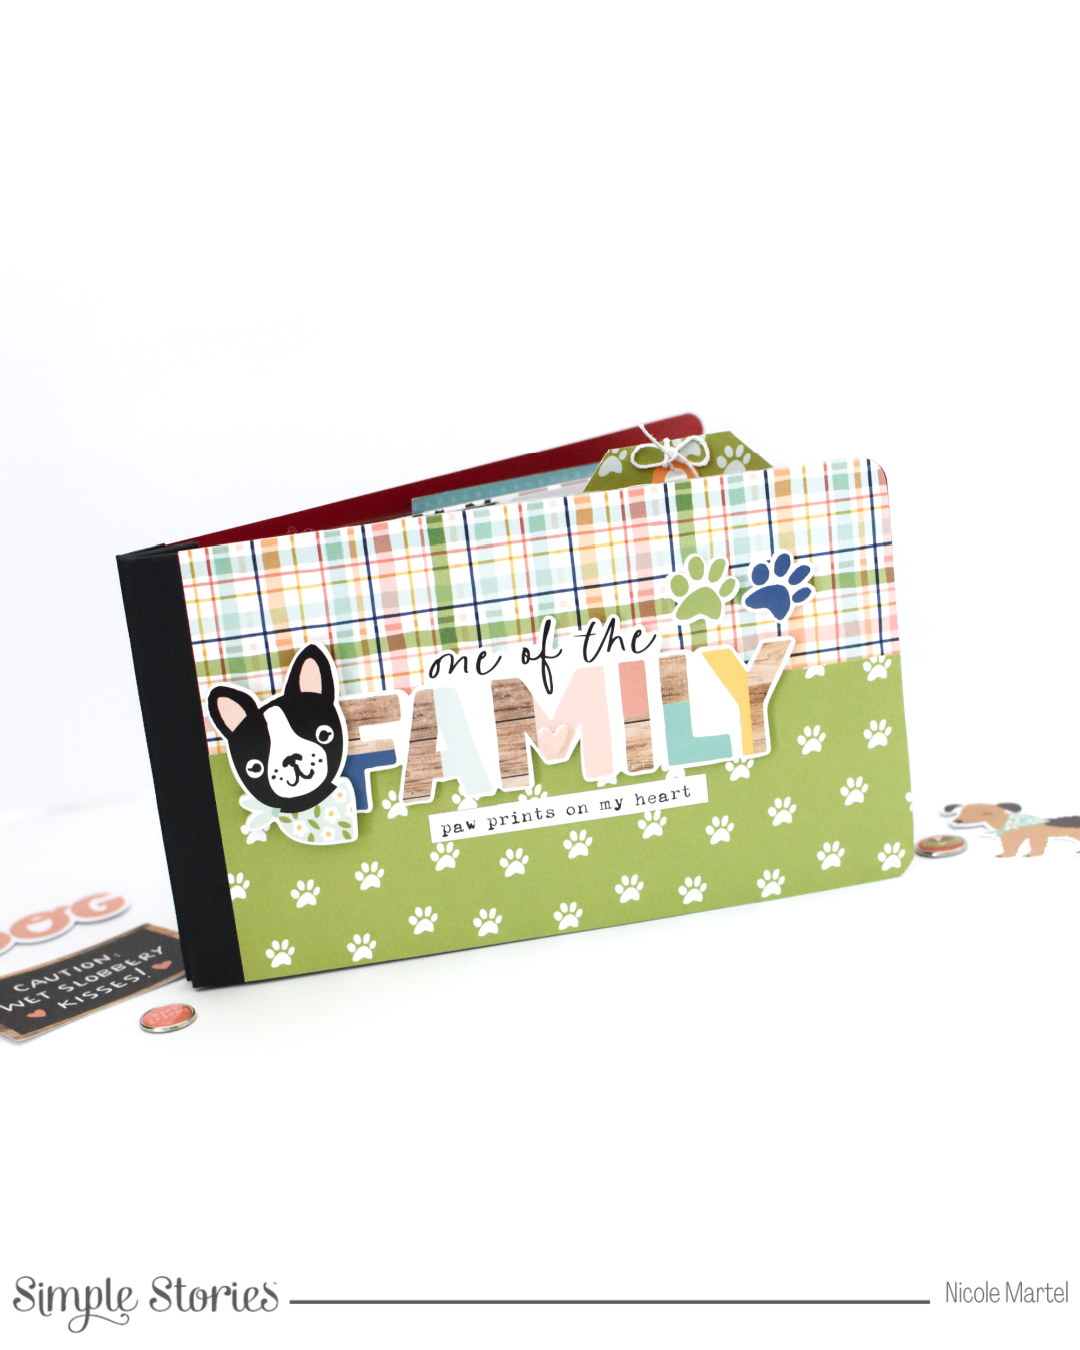
Hello, friends! Nicole here with a cute flipbook I created using the Fur Baby Dog collection. I was super excited as soon as I saw this collection because I happen to have a fur baby...and he's cute...and so is this collection!


I kept the cover pretty simple. I used the front of the cover to trace onto the patterned paper so that it fit perfectly and adhered them to the cover. Net, I decorated the cover with stickers. That Frenchie is too cute! 

My baby LOVES the water... seriously, look at that smile. Yellow always makes me happy...and it really showcased how happy Moxie was on this beautiful, sunny day. I typically follow a format when creating flip books... I create a fun page on the left with no photo-just embellishments and the right-side, I include photos.
Moxie loves to spoil me with lots of slobbery kisses-daily. I cut cut the "Puppy Love" 3x4 journaling card so it was attached to another card to create a flip page. Next I added a few stickers and decorative brads for fun.

Inside the flip page, I added another photo and placed a tag on the rights-side. Super simple and oh, so cute!
The mini tags in the 6x8 paper pad are so cute... I thought I would cut a few out to use as a fun page. I used foam strips to mount down the stickers to add dimension. And there goes that Frenchie again...he's so dang cute. I added a few labels from the 6x8 paper pad on the left side of the photo and placed a few stickers down to make it fun. Next, I cut two tags from the cut-apart sheet and tucked them behind the photo.

Check out the adorable banner with the doggie bones!! SUPER CUTE. I just love it so much. I didn't use too many embellishments for the photo page just a few die cuts and a sticker to keep the focus on the photos.
This is a fun flip page I created of the three of us. I cut three 3x4 journaling cards so they were attached, folded the left side in to create the flip then adhered it directly onto the clear page. I like to be able to touch some of the embellishments in my album and not have all the pages inside the sleeve...I think it's much more fun that way.
This spread is my favorite. I love how happy the orange makes the pages look with the pink polka dots. so cute and I especially love the "LOVE MY DOG" Sticker. I added a doggie to the center of the "o" to make it fun.
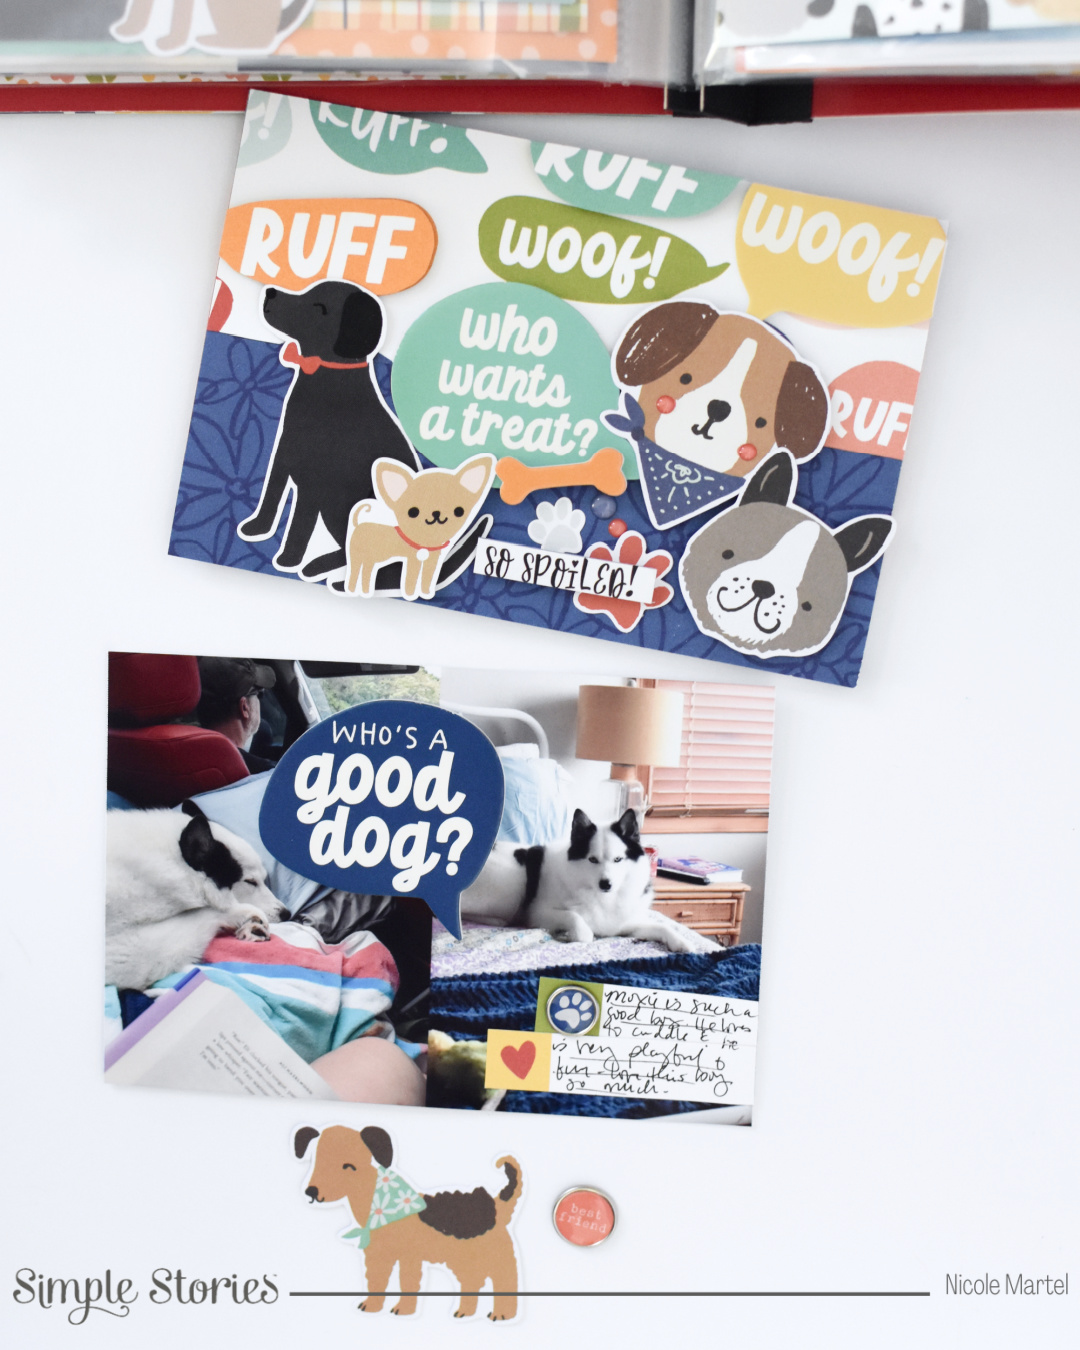
There are so many adorable dog die cuts...I was determined to create a page with them...and I think the speech bubbles paper made it work. Isn't this the cutest page ever? I squeezed in a little journaling on the labels and added a decorative brad to add dimension. 
And that's a wrap! I had so much fun playing with this adorable collection. Will you be using it to scrapbook your fur-baby? What kind of dog do you have? We'd love to hear! I'm excited to announce...we will be getting another fur-baby sometime this month. Moxie needs a buddy! Thank you so much for visiting today! 

Nicole

Products Used:

Simple Stories 4x6 Flipbook in Red
Simple Stories Fur Baby Collection Kit
Simple Stories Fur Baby Boy 6X8 Paper Pad
Simple Stories ColorVibe-Bolds
Simple Stories Fur Baby Cardstock Stickers
Simple Stories Fur Baby Bits & Pieces
Simple Stories Fur Baby Foam Stickers
Simple Stories Fur Baby Decorative Brads
Simple Stories Fur Baby Glossy Enamel Dots
Simple Stories Fur Baby Simple Pages Page Pieces


Wednesday, April 09, 2025

MY FAVORITE COLOR IS RAINBOW/PERFECT PAINTS

Good morning! Nicole here with another art journal spread I created with Shimmering Matte Acrylics and Polishing Plaster to create a beautiful, and vibrant background for my spread.

To begin, I used a paint brush to apply the Rain Slicker Shimmering Matte Acrylic to both spreads.
Next, I used a palette knife to pull the Mexican Turquoise Polishing Plaster through the stencil to create the designs in the background.
After that, I grabbed the Peony Shimmering Matte Acrylic and mixed it with a little bit of water and splashed it all over the spread using a paint brush.

I let this dry for about an hour before adding all the fun embellishments using glue.

I love how vibrant this spread is...with all the pretty little houses... Seriously, it makes me happy just looking at this spread. And I don't know about you, but seeing yellow always makes me happy! As long as I'm not wearing it...LOL.

I hope you found this spread delightful! Thank you for visiting today.

Nicole

Wednesday, April 02, 2025

HOW TO MAKE A BIRDHOUSE/A CHERRY ON TOP

Good morning! Nicole here with a fun project I created. I've been wanting to decorate a bird house for a few years now...not an outside bird house, but something for my craft room. When I saw the Birdhouse from Mintay, I thought it was time to play!

To begin, I glued all the wood pieces together using wood glue. Next, I let it dry for about an hour. After that, I applied a good amount of white gesso all over the birdhouse using a paintbrush. I let it dry over night.
After the gesso was completely dries, I grabbed a variety of floral, polka dots, and geo shape stencils to created the patterns using a palette knife to pull the clear modeling paste through the stencil. I used the stencils all over the birdhouse to add texture. Before I painted the birdhouse, I placed the die cuts on the birdhouse to get an idea of the design and exact colors I wanted to paint the birdhouse. Blue is my favorite color...so I started with the blue. Once the paste was completely dry, I used sponges to paint with the stencil butters all over the birdhouse. The textures from the stencil and modeling paste look amazing! I used my fingers to layer the colors over the texture sparingly, waiting for each color to dry first.
I continued adding color until I was happy with the birdhouse. I totally forgot to take another photo of the birdhouse with all the colors!! But you get the idea...

I used glue to glue down all the die cuts. You can use a gel medium for this as well. This was so much fun to make...My fingers were messy, but it was worth it. When I was finished, I notice the inside was not painted...so I sprayed inside using Mixed Media Gloss Spray.

Here is a close up of all the colors used throughout the birdhouse so you have an idea. Isn't this so pretty!? I'm loving all the texture as well.
 

Here is a close-up of the side of the birdhouse. I layered a variety of die cuts using Art by Marlene's Golden Collector's Book. There are so many fun creatures and elements in this book and the die cuts just pop out of the pages making it super easy to play with... No fussy cutting needed!

For the other side, I just layered it up with more fun elements...I used foams squares to pop some of the elements up to add texture and dimension.

Here's a closer look at the top with all the layered die cuts. SOOOO Fun.
This little cluster makes me feel like a kid again...so fun, and cute. What do you think? Are you inspired to make one of your own? It's so much fun.

Thank you so much for visiting today. I hope you found this project inspiring!! Click here for the full list of products used.

Nicole


Tuesday, April 01, 2025

REACH FOR THE STARS/A CHERRY ON TOP

Good morning friends! I'm excited to share my very first few pages in my art journal. I've been wanting to give art journaling a try for a while now and thought, now is a good time to do it. This month, the design team is hosting a YouTube hop featuring projects with shapes... perfect for art journaling! Click here to see the videos!

I am using a variety of products from Art by Marlene to create these fun pages! Seriously, I cannot tell you how much I enjoyed playing with all the fun things...I played with acrylic markers, stamps, stencils, die cuts, and stickers...and oh, it was o much fun!

To begin, I used acrylic markers to color the paper. Next, I tore a piece of patterned paper and glued it onto the page. After that,  stamped some images all over the page. Then, I glued down all the pretty die cuts and stickers. Super simple, and fun! Be sure to check out my process, here. 

For this page, I used the acrylic markers to color the page and then I stamped the background stamp over the painted page to add florals in the background. Next, I glued down all the fun embellishments. Honestly, the hardest part of this process is choosing the colors for the background and stamp...

This is the inside of the book. I didn't like it being white so I thought I would create an entry page... Loving the purple, blues, and fuchsia together with the pop of black and white. Isn't this page so striking!?
I love that Art by Marlene's die cuts pop right out of the book...No need to cut them out!!


What do you think? Aren't these fun. I just love the vibrant colors, flowers, creatures and shapes on all of these pages. I can't wait to share more pages with you in the upcoming weeks. Thank you so much for visiting today and be sure to check out my process video, here.

Nicole