Showing posts with label STAMPING. Show all posts

Sunday, August 17, 2025

BE TRUE TO WHO YOU ARE/A CHERRY ON TOP

Good morning, friends. Nicole here with another handmade card I created using Pinkfresh Studio's Be Fearless stamps, stencils, and metal dies. I have been in the mood to play with my layered stencils...and I have so many beautiful stamps and stencils that I have yet to play with...they were just sitting on my shelf... I tend to buy pretty stamps and stencils and not use them... I'm just waiting for the right time, you know?
To begin, I stamped the flowers using black ink onto white cardstock using my Misti. Next, I used the Be Fearless layered stencils to color in the images. I used Peach Fuzz, Coral Reef, Passion Fruit, Grassy Knolls, and Key Lime ink. After that, I used the metal die to cut out the flowers using my Big Shot machine.
I used the Stitched Circle metal panel to create a fun background and inked around the edges using the Grassy knoll ink. Next, I mounted down the flowers using foam and layered the "Be true to who you are" sentiment onto the card using foam strips.

To complete the card, I added a few gold glitter drops and ribbon. This card was so much fun to make. I totally enjoyed the process...I just love playing with layered stencils! Shop for products through my affiliate link, here. Click here to watch the full process video for more tips and techniques and thank you for visiting today!

Nicole 


Tuesday, August 05, 2025

BIRTHDAY HUGS CARD/A CHERRY ON TOP


Good morning, friends! I spent this past weekend making birthday cards, and I cannot wait to mail these out to my friends and family members for upcoming birthdays! I mass produced several cards using the same product, but different colors. This card came together fairly quickly and I'm excited to share my process with you!

To begin, I placed a piece of white cardstock inside my Misti and then I placed the Nothing but the Best stamp onto the cardstock to get the image lined up. Next, I used black ink to stamp the floral images onto the cardstock. After that, I used a the Nothing but the Best stencils, blending brushes and ink to color in the images.
I used created a fun medallion background using a metal panel. Also, to add dimension to the card, I popped the flowers and Birthday Hugs sentiment up using foam. Then, I added the glitter drops to complete the card. I just love how beautiful this card turned out. I especially love the airy look to this card. 
Check out my process video here for more tips and techniques on how this beautiful card came today. Please click here to shop for products used through my affiliate link. Thank you so much for visiting today!

Nicole


Monday, July 07, 2025

THIS WAS A GREAT DAY/ELLE'S STUDIO

Hello, friends! I finally found some time to scrapbook some memories from June and I also managed to document the 4th of July. It felt good to get some scrappy time in this weekend.

I used a variety of papers, stickers, puffy stickers, and chipboard embellishments from Elle's Studio to create this 6x8 layout. I love how I managed to squeeze three photos on here without making it look too crowded...and I was able to add some fun embellishments, too. :)


 I used photoshop to add journaling to the digital journaling card and printed it out. LOVE Photoshop. It really helps me get my stories down on paper...

I decided to create a pocket page spread for the fourth so I could add a few more pictures. This was fun!
I matted two 4x6 journaling cards together and punched a hole through the page to create a fun insert for the album. Next, I added embellishments and did a little bit of stamping, too.

I'm so happy I decided to re-subscribe to Elle's Studio. Their products make memory keeping simple, and fun! Thanks for visiting today!

Nicole


Wednesday, April 23, 2025

HAPPY BIRTHDAY ART JOURNALING SPREAD/A CHERRY ON TOP

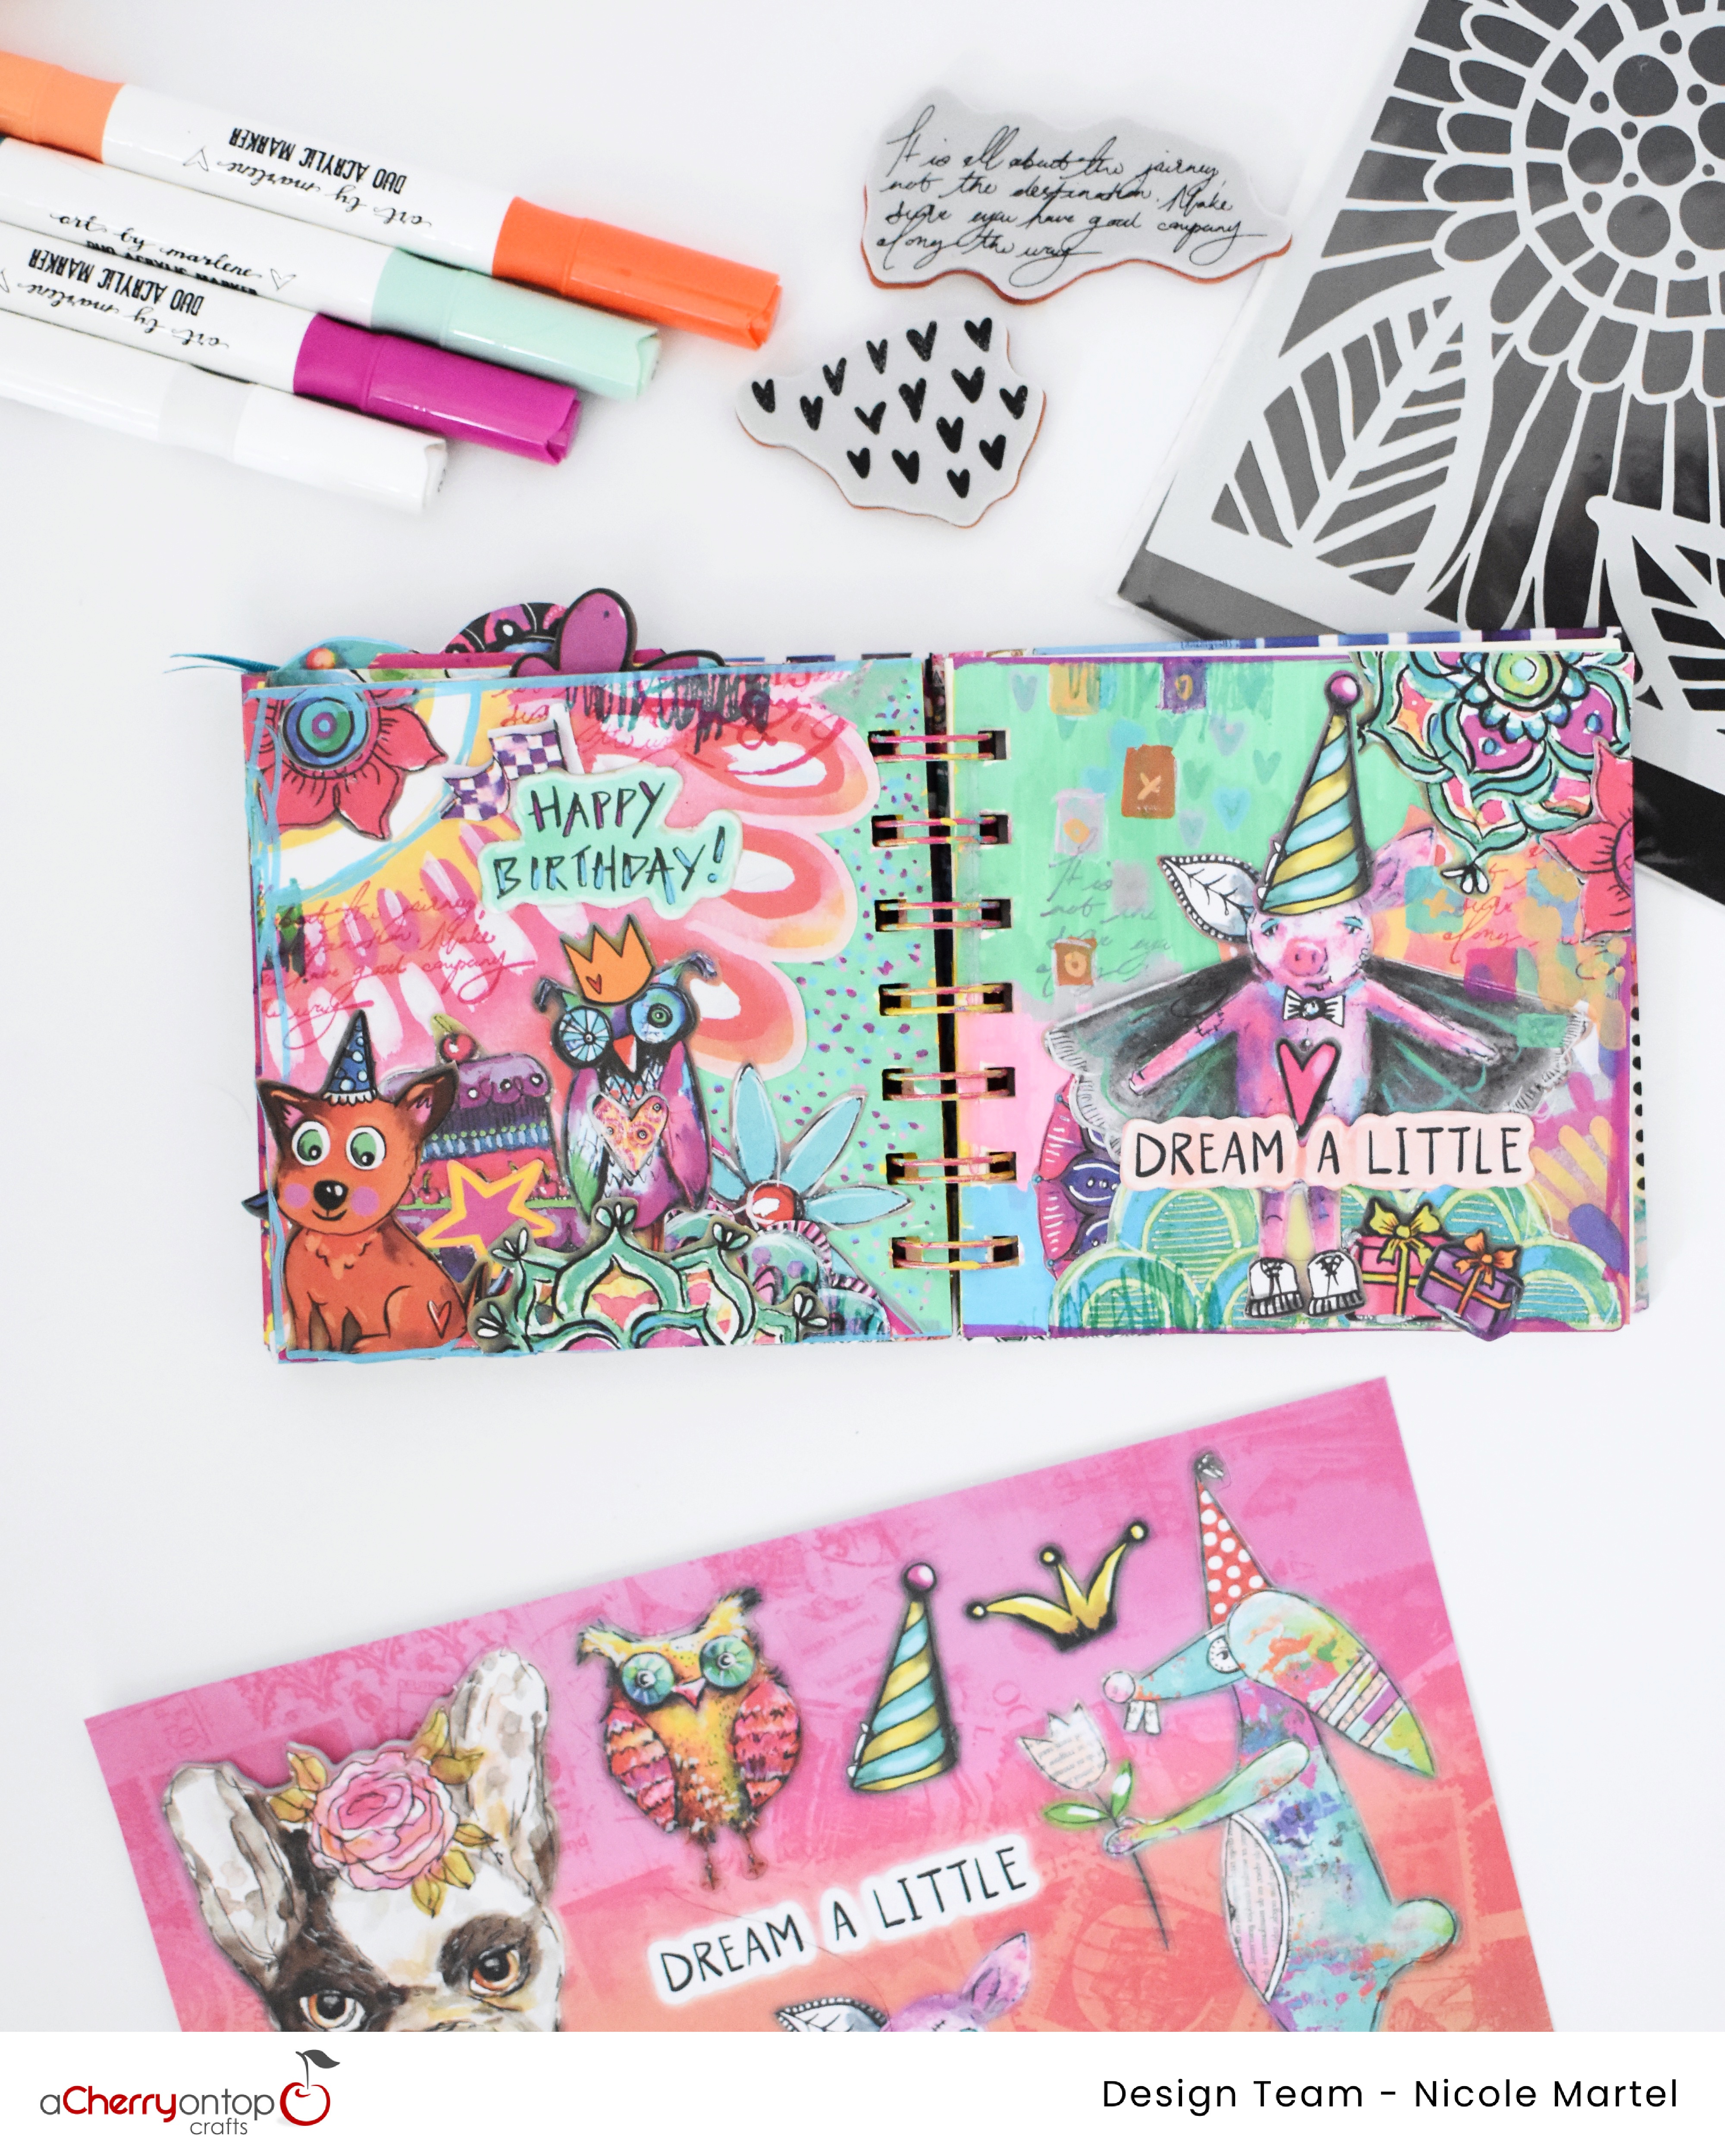
Good morning, friends! Nicole here with another mixed media art journal project. This past month, we celebrated my neice's third birthday. I came home and created this fun art journal spread using stamps and stencils to create a fun background. One thing I realized while creating this spread is that I definitely gravitate towards things that I like in real life... Such as pigs and animals in general, and Art by Marlene fits my personality! I love funky stuff...and I like playing with bright, colorful products. I think that's why I'm hooked on art journaling! It's freeing...
To begin, I used a pencil to draw marks on the plain art journal page to create a pattern for the background. Next, I colored in the triangles using the Duo Acrylic Markers. This markers are fantastic!!! I love them so much. Next, I cut the patterned paper from the Golden Collector's Book into a fun photo corner and glued it down in the journal.

After that, I moved the fun die cuts around to figure out the placement of all the magical elements. These fun die cuts come inside the Golden Collector's Book.

Once I was satisfied with the placement of the little guys, I glued everything down. I used the white marker to trace around some of the die cuts to make the images more defined so they don't get lost in the background.
I stamped some journaling scripts and hearts to the background. You do not need a block for the stamps. Simply, press the stamp into the ink pad and then press the stamp down on the page using your fingers to press down to ensure the images transfer to the paper. I probably should have done this before gluing down the elements...but to fix this issue, I covered the areas I didn't want to cover with scrap pieces of paper and it worked out. After that, I used the markers to create a variety of dots to fill in the white space.

I stamped the hearts down and then traced them using the markers to change the hearts to multi-colors. I used my fingers to dabb off the excess paint from the hearts to lighten them. Next, I used the stencil to create the little blocks with the markers. I used my finger tips to dabb off the excess to lighten the paint so it blended in the background. Since the acrylic markers are opaque, I used an alcohol marker to color the die cut sentiment pink. 


I hope you found these pages delightful! I had so much fun playing in this journal! Click here to see all the products used and to shop through my affiliate link. Thank you for visiting today.

Nicole

Wednesday, March 26, 2025

MIXED MEDIA ART JOURNALING SPREAD/PERFECT PAINTS

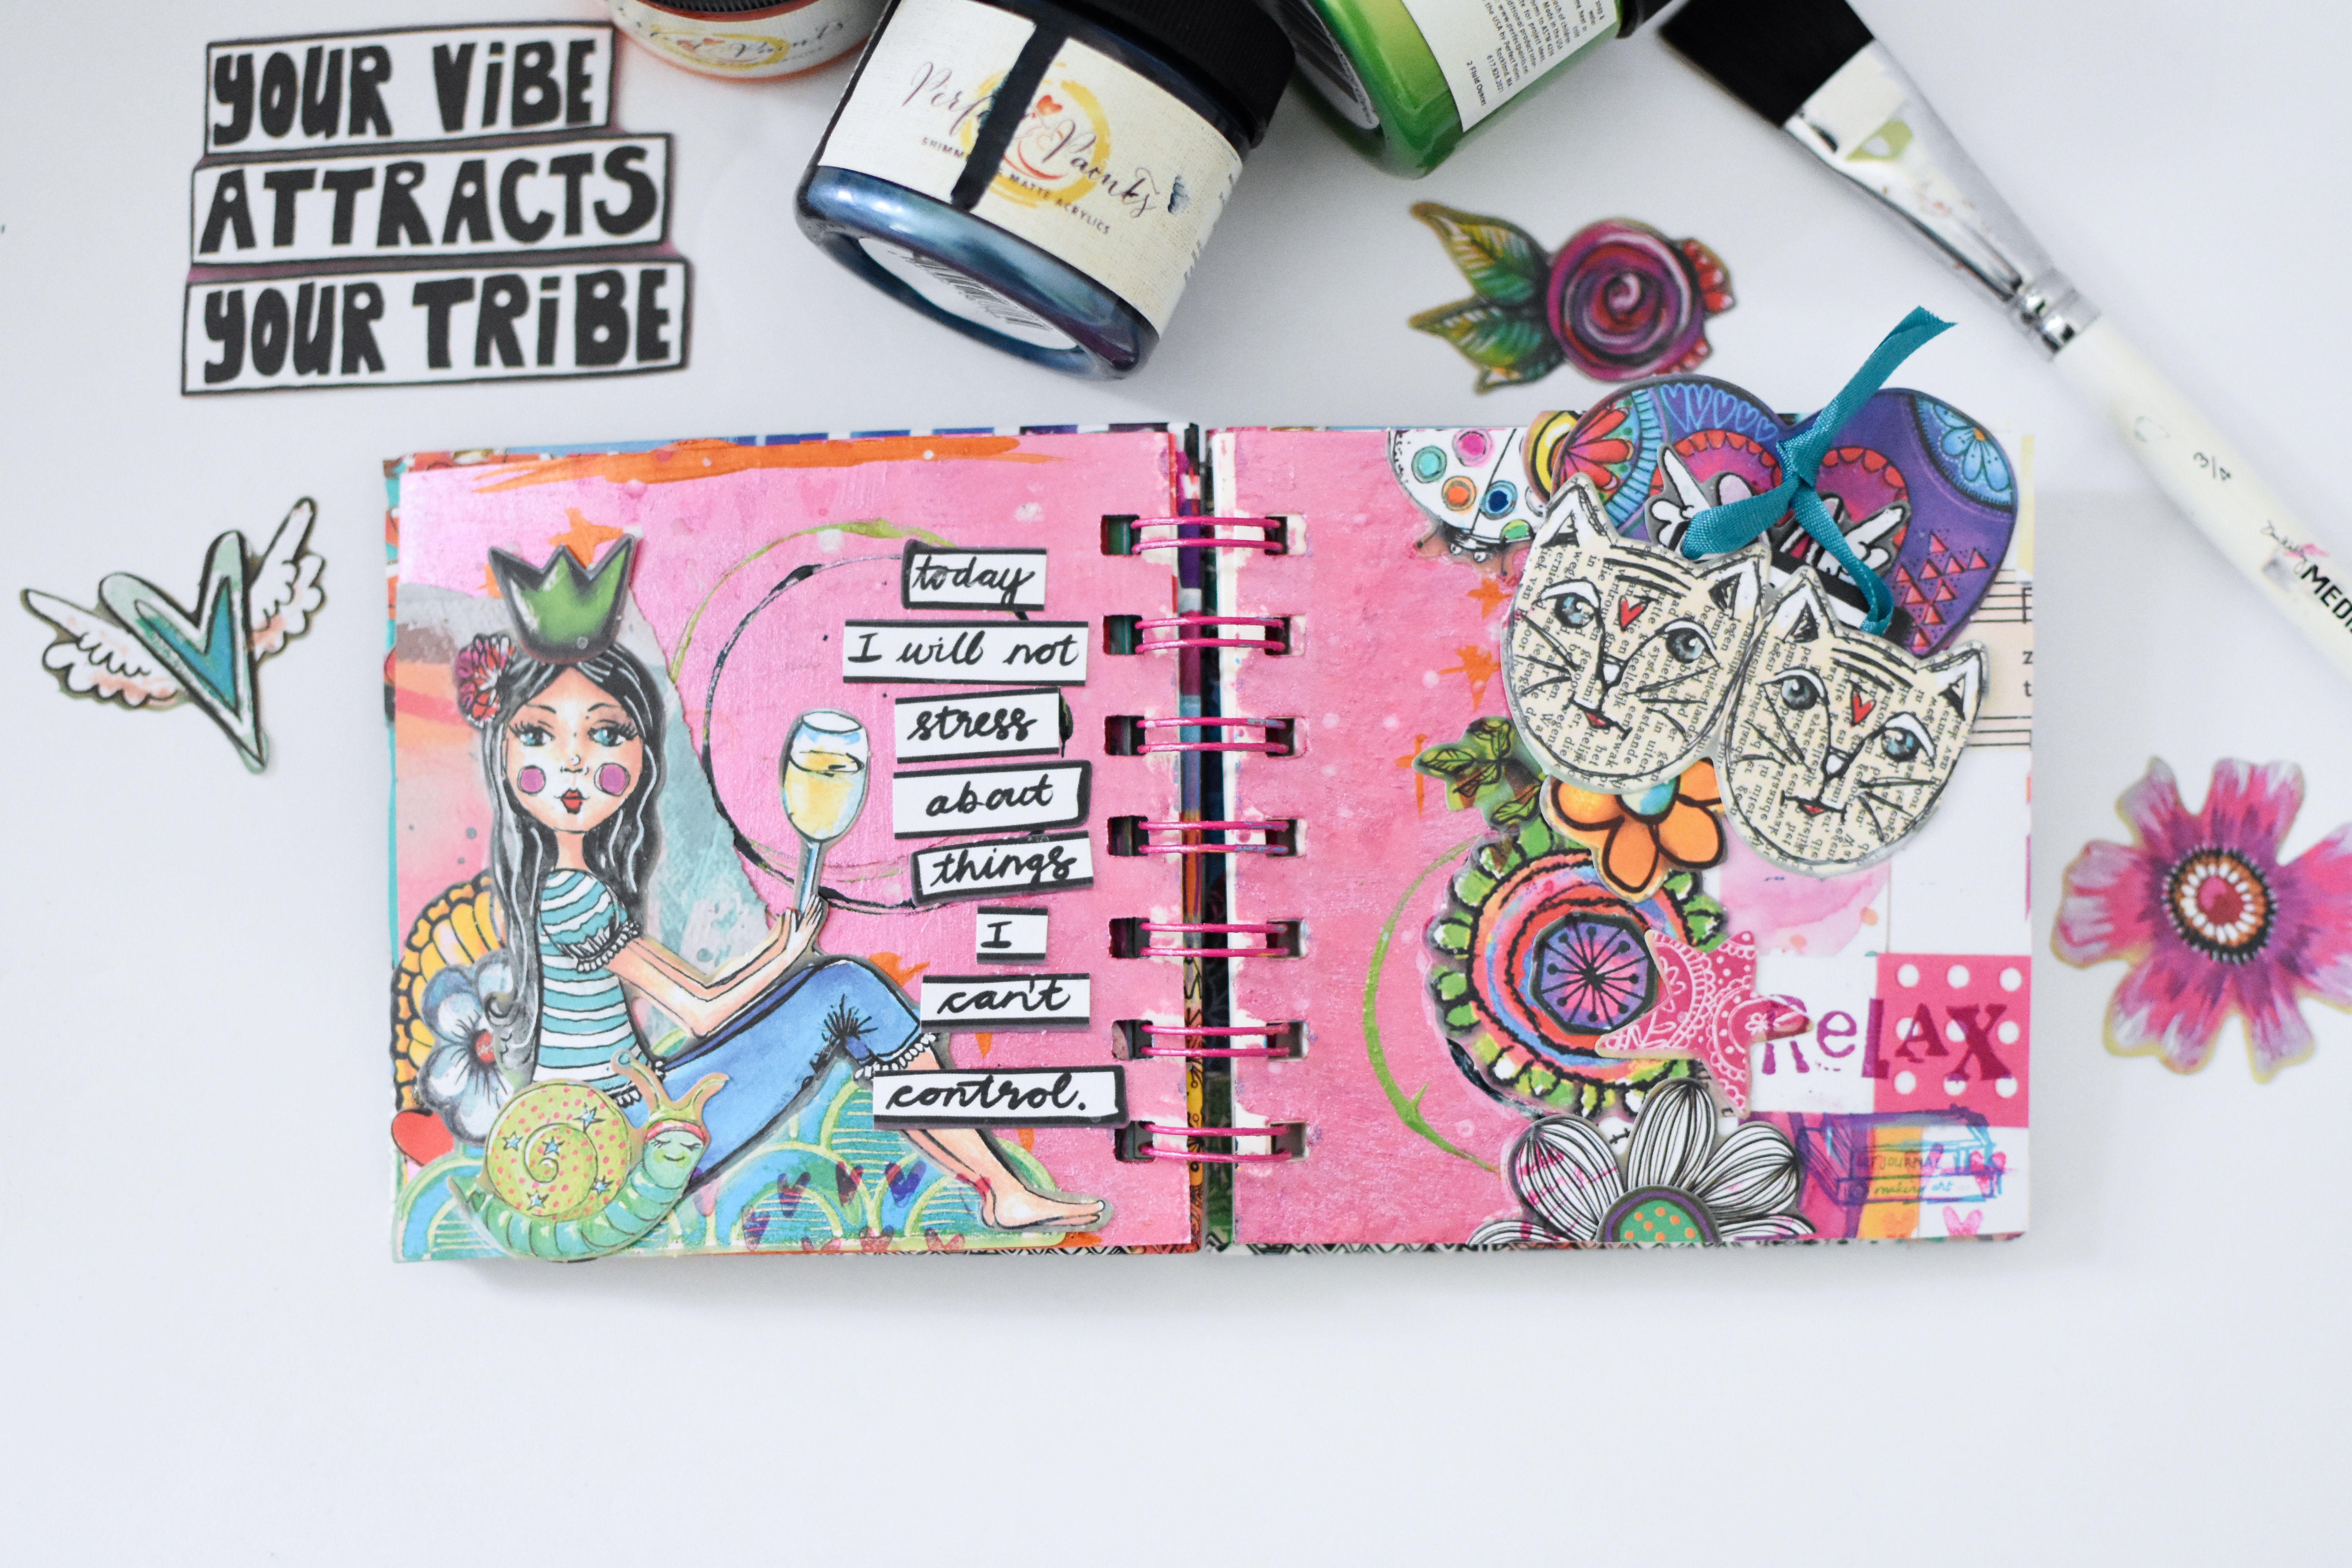
Good morning, friends! Nicole here with a few art journaling spreads I created. I don't normally play in art journals, but I was looking for something different to do...so I thought I'd grab a few Shimmering Matte Acrylics and my art journal to see what would happen... I am using a variety of products from Art by Marlene for this spread. Her products are super fun and easy to work with. 

And what happened was...I HAD SO MUCH FUN! Seriously, I can't wait to create a few more art journal spreads. It was Friday night, and I just wanted to play with paint. To begin, I grabbed four Shimmering Matte Acrylics in the colors of Spring Green, Cajun Pumpkin, Bohemian Blue, and Peony. Next, I painted both pages using the Peony Shimmering Matte Acrylics.
After the paint dried a bit, I used a cap to make circles using all the Shimmering Matte Acrylics.
After I finished making a few circles, I grabbed a small pointed paint brush to create some orange plus signs in the background.
I let this dry a bit before gluing down all the fun die cuts! Super simple techniques, but a great way to add color to your journaling spreads!
Are you a fan of playing in art journals? This is a first for me, and I think I'm hooked. Can't wait to share a few more creations with you in the upcoming months.
I managed to tuck a few hidden embellishments throughout the art journal...for fun.
What do you think? Think you're ready to give art journaling a try? You won't know if it's something you'll enjoy until you try it out for yourself.

I truly hope you find this project inspiring, and I hope I inspired you to try something different! Thank you so much for visiting today.

Nicole


Saturday, March 01, 2025

LUCKY/SIMPLE STORIES

Good morning, friends! I'm loving the nicer weather!! All of the windows are open, the music is playing, and I am crafting up a storm! Today, I'm sharing a layout I created using Simple Stories' St. Patrick Day Simple Set. I've had this in my stash for a year and finally have a picture to use with it! This is such a cute little collection! Loving the touch of pink!


The embellishments are super fu! I especially love the lephrehaun footprints and hat with the colorful clovers. 


I popped up the "so very lucky" banner using foam squares and stamped the "I'm so lucky" sentiment inside the cloud to fill it in.


I matted the photo onto one of the journaling cards to create a nice frame for the photo. Also, I cut the rainbow sticker in half to spread it out across the layout, added the glover and sentiment.


What do you think? Isn't this so cute? I love the soft color scheme. It's just so pretty! Check out this set, here.


Thank you so much for visiting today! I hope you have a great weekend!

Nic

Monday, January 27, 2025

JANUARY CITRUS TWIST PROJECTS

Happy Monday, friends! It's that time of the month where I share my monthly creations using the digital collections from Citrus Twist. Today, I'm sharing projects using the Hellos & Goodbyes digital collection. Loving all the elements in this collection. It reminds me of the older Citrus Twist days and I'm here for it!

We celebrated another year with our good friends who live in the neighborhood. We are a small group, but mighty! LOL...We do know how to have fun at home...
I added a few flowers from previous collections to layer over the flower die cut to add dimension. The baubles embellishments are from Trinity Stamps. They look so pretty in the center of the flowers. I popped up the "Focus on the good" sentiment using forma squares. 

I wanted to include the number "24" somewhere on the layout, but couldn't decide where to put them... so in the end, I decided to add them to the butterfly. The die cuts in this collection are beautiful. LOVE them all. I combined new and old die cuts to create this lovely layout.

 I stamped the "this" word onto the journaling card to fill int he white space and added the heart die cut at the bottom. Also, I turned the "every ending is a new beginning" journaling card into a tag. I think this layout turned out beautifully and I enjoyed the process of creating this layout. 

For my second project, I was going for a monochromatic theme. I stamped the big title at the top using Simon Hurley's ink. His inks go perfectly with the Citrus Twist color schemes. 

My goal for the bottom was to create a collage of gorgeous embellishments to fill in the white space. You know I love playing with embellishments. I layered two butterfly die cuts together to add dimension and the gems are from Trinity Stamps. They have a great variety of gems, pearls, clay embellishments, and baubles. 

And here is my third project I created using various collections! I've been wanting to scrapbook these cute pictures of my kitty, enjoying story time. 


I had so much fun layering up all of these layouts with pretty embellishments! They all turned out so cute and I hope I inspired you in some way. Thanks for visiting!

Nic

Friday, December 27, 2024

DECEMBER CITRUS TWIST PROJECTS


Good morning! Hope you had a wonderful Holiday. Today, I'm sharing my layouts I created for Citrus Twist this month. I love each and every one of them...and I think that's because each one includes a story. I really need to get back to journaling more!
The embellishments are so pretty. I clustered several embellishments together to bring this layout to life. The mushrooms are so adorable. I used foam squares to add dimension to them.

For my next spread, I used Edward's 9th grade school picture. Isn't he handsome? I wanted to include a bit of journaling about what he's been doing at this stage of his life. Notice how I used four different patterned papers on this layout? Don't they look great together and the drooping leaves at the top really makes everything pop.


We recently had family photos taken to celebrate my grandmother's 88th birthday! The picture looks beautiful against the floral print paper. I especially love the bird and flowers! Sooooo pretty!


Thank you for visiting today and I hope you have a wonderful weekend!
Nic