Good morning! Nicole here with a fun project I created. I've been wanting to decorate a bird house for a few years now...not an outside bird house, but something for my craft room. When I saw the
Birdhouse from Mintay, I thought it was time to play!
To begin, I glued all the wood pieces together using
wood glue. Next, I let it dry for about an hour. After that, I applied a good amount of
white gesso all over the birdhouse using a paintbrush. I let it dry over night.
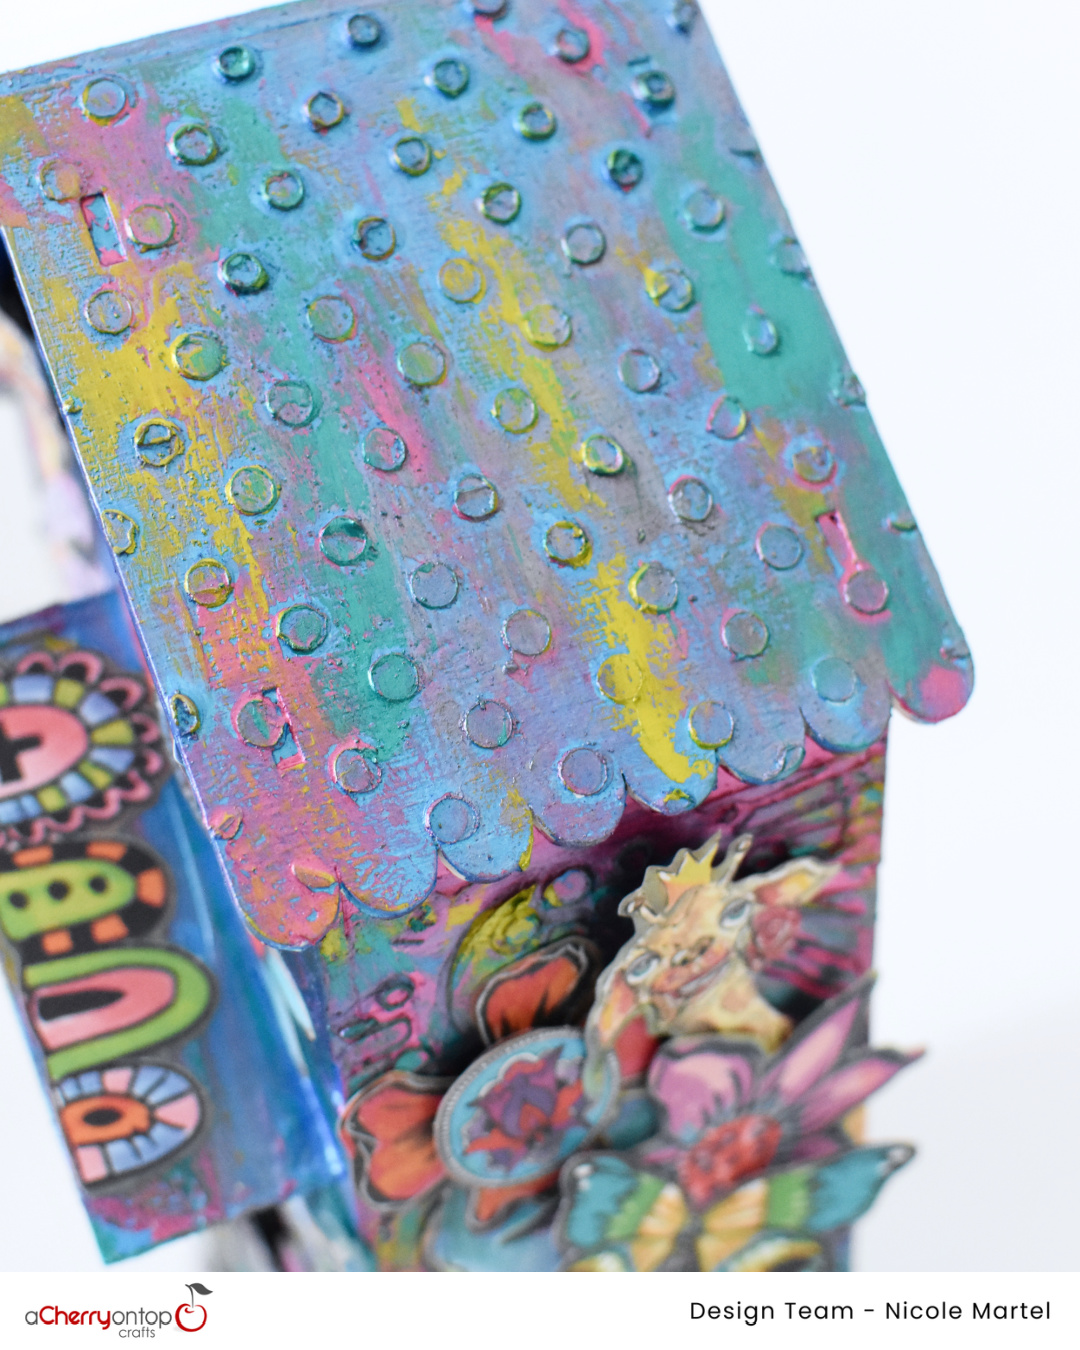
After the gesso was completely dries, I grabbed a variety of floral, polka dots, and geo shape stencils to created the patterns using a palette knife to pull the clear modeling paste through the stencil. I used the stencils all over the birdhouse to add texture. Before I painted the birdhouse, I placed the die cuts on the birdhouse to get an idea of the design and exact colors I wanted to paint the birdhouse. Blue is my favorite color...so I started with the blue. Once the paste was completely dry, I used
sponges to paint with the
stencil butters all over the birdhouse. The textures from the stencil and modeling paste look amazing! I used my fingers to layer the colors over the texture sparingly, waiting for each color to dry first.
I continued adding color until I was happy with the birdhouse. I totally forgot to take another photo of the birdhouse with all the colors!! But you get the idea...
I used glue to glue down all the die cuts. You can use a
gel medium for this as well. This was so much fun to make...My fingers were messy, but it was worth it. When I was finished, I notice the inside was not painted...so I sprayed inside using
Mixed Media Gloss Spray.
Here is a close up of all the colors used throughout the birdhouse so you have an idea. Isn't this so pretty!? I'm loving all the texture as well.
Here is a close-up of the side of the birdhouse. I layered a variety of die cuts using Art by Marlene's
Golden Collector's Book. There are so many fun creatures and elements in this book and the die cuts just pop out of the pages making it super easy to play with... No fussy cutting needed!
For the other side, I just layered it up with more fun elements...I used foams squares to pop some of the elements up to add texture and dimension.
Here's a closer look at the top with all the layered die cuts. SOOOO Fun.
This little cluster makes me feel like a kid again...so fun, and cute. What do you think? Are you inspired to make one of your own? It's so much fun.
Thank you so much for visiting today. I hope you found this project inspiring!! Click here for the full list of products used.


2 comments:
Post a Comment