Showing posts with label STENCILS. Show all posts

Tuesday, June 30, 2026

SO MUCH TO SMILE ABOUT/MY CREATIVE SCRAPBOOK

Hello everyone! June was a blur...seriously, this month flew by. Today, I'm sharing this layout I created using My Creative Scrapbook's sketch for June. It's such a fun sketch and I love how this turned out.

Initially, I planned on creating a collage layout, but then I started moving the chipboard frames around the layout and came up with this design! I love the cluster of flowers and the stenciled background. Isn't this so pretty?

I love using sketches to help jumpstart my ideas! You can turn it sideways, flip It upside down or simply take a few things from it to use on your projects.

I love how the chipboard pieces tie this layout together. What do you think? You can see the full tutorial through my YouTube channel. Click here to see this month's kit. Mention my name for a free gift! Thank you so much for visiting today!


Saturday, September 06, 2025

Book Fair/MY CREATIVE SCRAPBOOK

Hello, friends! I have some exciting news to share. This month I am guest designing for My Creative Scrapbook. The main kit includes lots of fabulous products from Simple Stories' Book Fair collection. If you've been on the fence, why not grab a kit today...you will receive just the right amount of products to document your back to school memories or your love for reading! Be sure to mention my name before checking out to receive a free gift! Click here to take a look at the kit.

I painted this chipboard album from Prima Marketing using a variety of paint by Perfect Paints. Next, I used the modeling paste and acrylic paints to create the fun cameras. I love playing with stencils and so this was so much fun for me.
I have a certain way that I set the pages up for this fun mixed media album. On the left-side of the page, I add a fun cluster of embellishments and on the right, there's either a photo or flip page element and occasionally a journaling card.
I kept this album pretty simple with lots of layers and pretty embellishments!
To add dimension to the stickers, I used foam squares to pop them up off the page.
Since I was getting low on die cuts, I fussy cut the stack of books and flowers from the cut-apart sheet. This is such a great way to stretch your products!
This cluster of embellishments makes  me happy. I just love them all stacked up together in this beautiful cluster. 
I created a flip page by cutting two 4x6 journaling cards so they were still attached and folded in half. Next, I mounted it to the page and added the picture and embellishments.
Here is the inside of the flip page. That little owl is too cute for words. I plan on writing a few of the books we read together on the card for our book club!
Here is a simple cluster I created using stickers and foam squares. I added a few enamel dots from my stash.
This boy is always by my side...even at night while I'm reading... Isn't Paco the cutest? I cut the sentiments from journaling cards to frame the photo. Next, I added the tag and foam sticker clips.
This is a simple page I created using a few die cuts, and foam stickers. LOVE that little wormy. Seriously, this kit is so fun!
For those of you who do not have a digital cutting machine, this kit comes with a pre-cut image and I just love it!! I heat embossed the image using gold embossing powder. Then, I glued it to the page and added some embellishments to add dimension so the page wouldn't appear too flat.
More layers...and cute owl. This is my favorite spread from this little mini. And I think the blue background really makes the embellishments pop.
I created another flip page element by cutting the journaling cards and folding it in half. Next, I mounted the top portion behind the photo to create the flip. 
What do you think? Isn't this super cute. It's been awhile since I created a fun mixed media album and it felt good to make this adorable mini. 
Thank you for visiting today and don't forget to check out the kit, here! If you would like to see the full tutorial of how this came together, I'll have the process video up on my YouTube channel tomorrow. Click here to check it out. Hope you have a great weekend!

Nic


Sunday, August 17, 2025

BE TRUE TO WHO YOU ARE/A CHERRY ON TOP

Good morning, friends. Nicole here with another handmade card I created using Pinkfresh Studio's Be Fearless stamps, stencils, and metal dies. I have been in the mood to play with my layered stencils...and I have so many beautiful stamps and stencils that I have yet to play with...they were just sitting on my shelf... I tend to buy pretty stamps and stencils and not use them... I'm just waiting for the right time, you know?
To begin, I stamped the flowers using black ink onto white cardstock using my Misti. Next, I used the Be Fearless layered stencils to color in the images. I used Peach Fuzz, Coral Reef, Passion Fruit, Grassy Knolls, and Key Lime ink. After that, I used the metal die to cut out the flowers using my Big Shot machine.
I used the Stitched Circle metal panel to create a fun background and inked around the edges using the Grassy knoll ink. Next, I mounted down the flowers using foam and layered the "Be true to who you are" sentiment onto the card using foam strips.

To complete the card, I added a few gold glitter drops and ribbon. This card was so much fun to make. I totally enjoyed the process...I just love playing with layered stencils! Shop for products through my affiliate link, here. Click here to watch the full process video for more tips and techniques and thank you for visiting today!

Nicole 


Tuesday, August 05, 2025

BIRTHDAY HUGS CARD/A CHERRY ON TOP


Good morning, friends! I spent this past weekend making birthday cards, and I cannot wait to mail these out to my friends and family members for upcoming birthdays! I mass produced several cards using the same product, but different colors. This card came together fairly quickly and I'm excited to share my process with you!

To begin, I placed a piece of white cardstock inside my Misti and then I placed the Nothing but the Best stamp onto the cardstock to get the image lined up. Next, I used black ink to stamp the floral images onto the cardstock. After that, I used a the Nothing but the Best stencils, blending brushes and ink to color in the images.
I used created a fun medallion background using a metal panel. Also, to add dimension to the card, I popped the flowers and Birthday Hugs sentiment up using foam. Then, I added the glitter drops to complete the card. I just love how beautiful this card turned out. I especially love the airy look to this card. 
Check out my process video here for more tips and techniques on how this beautiful card came today. Please click here to shop for products used through my affiliate link. Thank you so much for visiting today!

Nicole


Monday, July 07, 2025

YOUR SMILE MAKES MY DAY/49 & MARKET

Hello, friends! I'm loving all the new collections by 49 & Market. Seriously, they are amazing! I especially love the Rust & Revs collection. It's perfect for masculine layouts...and even beach layouts!
I used a stencil and polishing plasters to create the stenciled background. I love this stencil! The different polishing plasters look amazing in the background and they match perfectly with this collection.
I used a variety of rub-ons throughout the layout. These rub-ons are absolutely beautiful! The clockwork chipboard is from Brutus Monroe. They add a great deal of dimension to this layout with the enamel dots added to the center.
I layered a variety of embellishments together to frame the photo nicely.


I created the tag using a scrap piece of patterned paper and a metal die. Isn't this the perfect masculine layout? I just love everything about it. This collection is available at A Cherry on Top. Click here to see this beautiful collection through my affiliate link. Thank you so much for visiting today!

Nicole

Monday, June 23, 2025

SUNNY MIXED MEDIA SPREAD/PERFECT PAINTS

Hello, friends! Nicole here with a fun layout I created using the Perfect Clear Texture Gel and the Shimmering Matte Acrylics to add stunning details to the layout. It's been awhile since I played with my acrylic paints and oh my goodness...I just love the combination of the Ballet Slipper, Bright Gold, and the Cajun Orange Shimmering Matte Acrylics together. Isn't this so pretty? This makes such a cool insert page for my 6x8 summer album.
To begin, I taped the stencil down over the paper to prevent them from slipping. Next, I applied a thin, even layer of thePerfect Clear Texture Gel through the stencil using a palette knife. Next, while the stencil and gel was in placed, I used a palette knife to add a bit of the Cajun Pumpkin Shimmering Matte Acrylics all over in a dabbing motion. After that, I wiped the palette knife and repeated the same process adding the Ballet Slipper and the Bright Gold Shimmering Matte Acrylics.
I love how much texture the Perfect Clear Texture Gel adds to the background and the images are so crisp and beautiful!
Just look at all the beautiful details on this spread. I'm super thrilled there weren't any smears with the letters and numbers! The Perfect Clear Texture Gel is actually perfect if you ask me!

I hope you found this fun tutorial helpful. The Perfect Clear Texture Gel is a wonderful medium and as you can see, it works beautifully with the Shimmering Matte Acrylics. Thank you so much for visiting today!

Nicole

Saturday, May 17, 2025

How to Make a Thinking of You Card/Perfect Paints

Good morning, friends! Nicole here with two mixed media cards I created using the newest polishing plasters in the shop! Loving the new additions!! The colors are beautiful. I've been meaning to send a friend a "thinking of you" card for sometime now and thought I would make one to send to her this week. And I just love how pretty they turned out...and mostly, they were super simple to make!

To begin, I cut two panels from watercolor paper to measure 4x6. Next, I taped the panel down on the glass mat to prevent the paper from moving. After that, I taped the stencil over the panel. Then, I used a palette knife to pull the Sangria and Boho Blue Polishing Plaster through the stencil-one at a time.
I let the polishing plaster dry before mounting the card down on the A2 card base. I did need to trim the panel down a bit to fit on the panel. I decorated the card with ribbon, die cuts and gems. I just love how pretty and simple this looks.
After I created this card, I decided to make another one using the Nature's Patina and Clover Honey Polishing Plaster.

Are you ready to make a few mixed media cards of your own? I'm sure your friends will love receiving a handmade card in the mail. It would be a nice surprise. Thank you for visiting today!

Nicole


Wednesday, April 23, 2025

HAPPY BIRTHDAY ART JOURNALING SPREAD/A CHERRY ON TOP

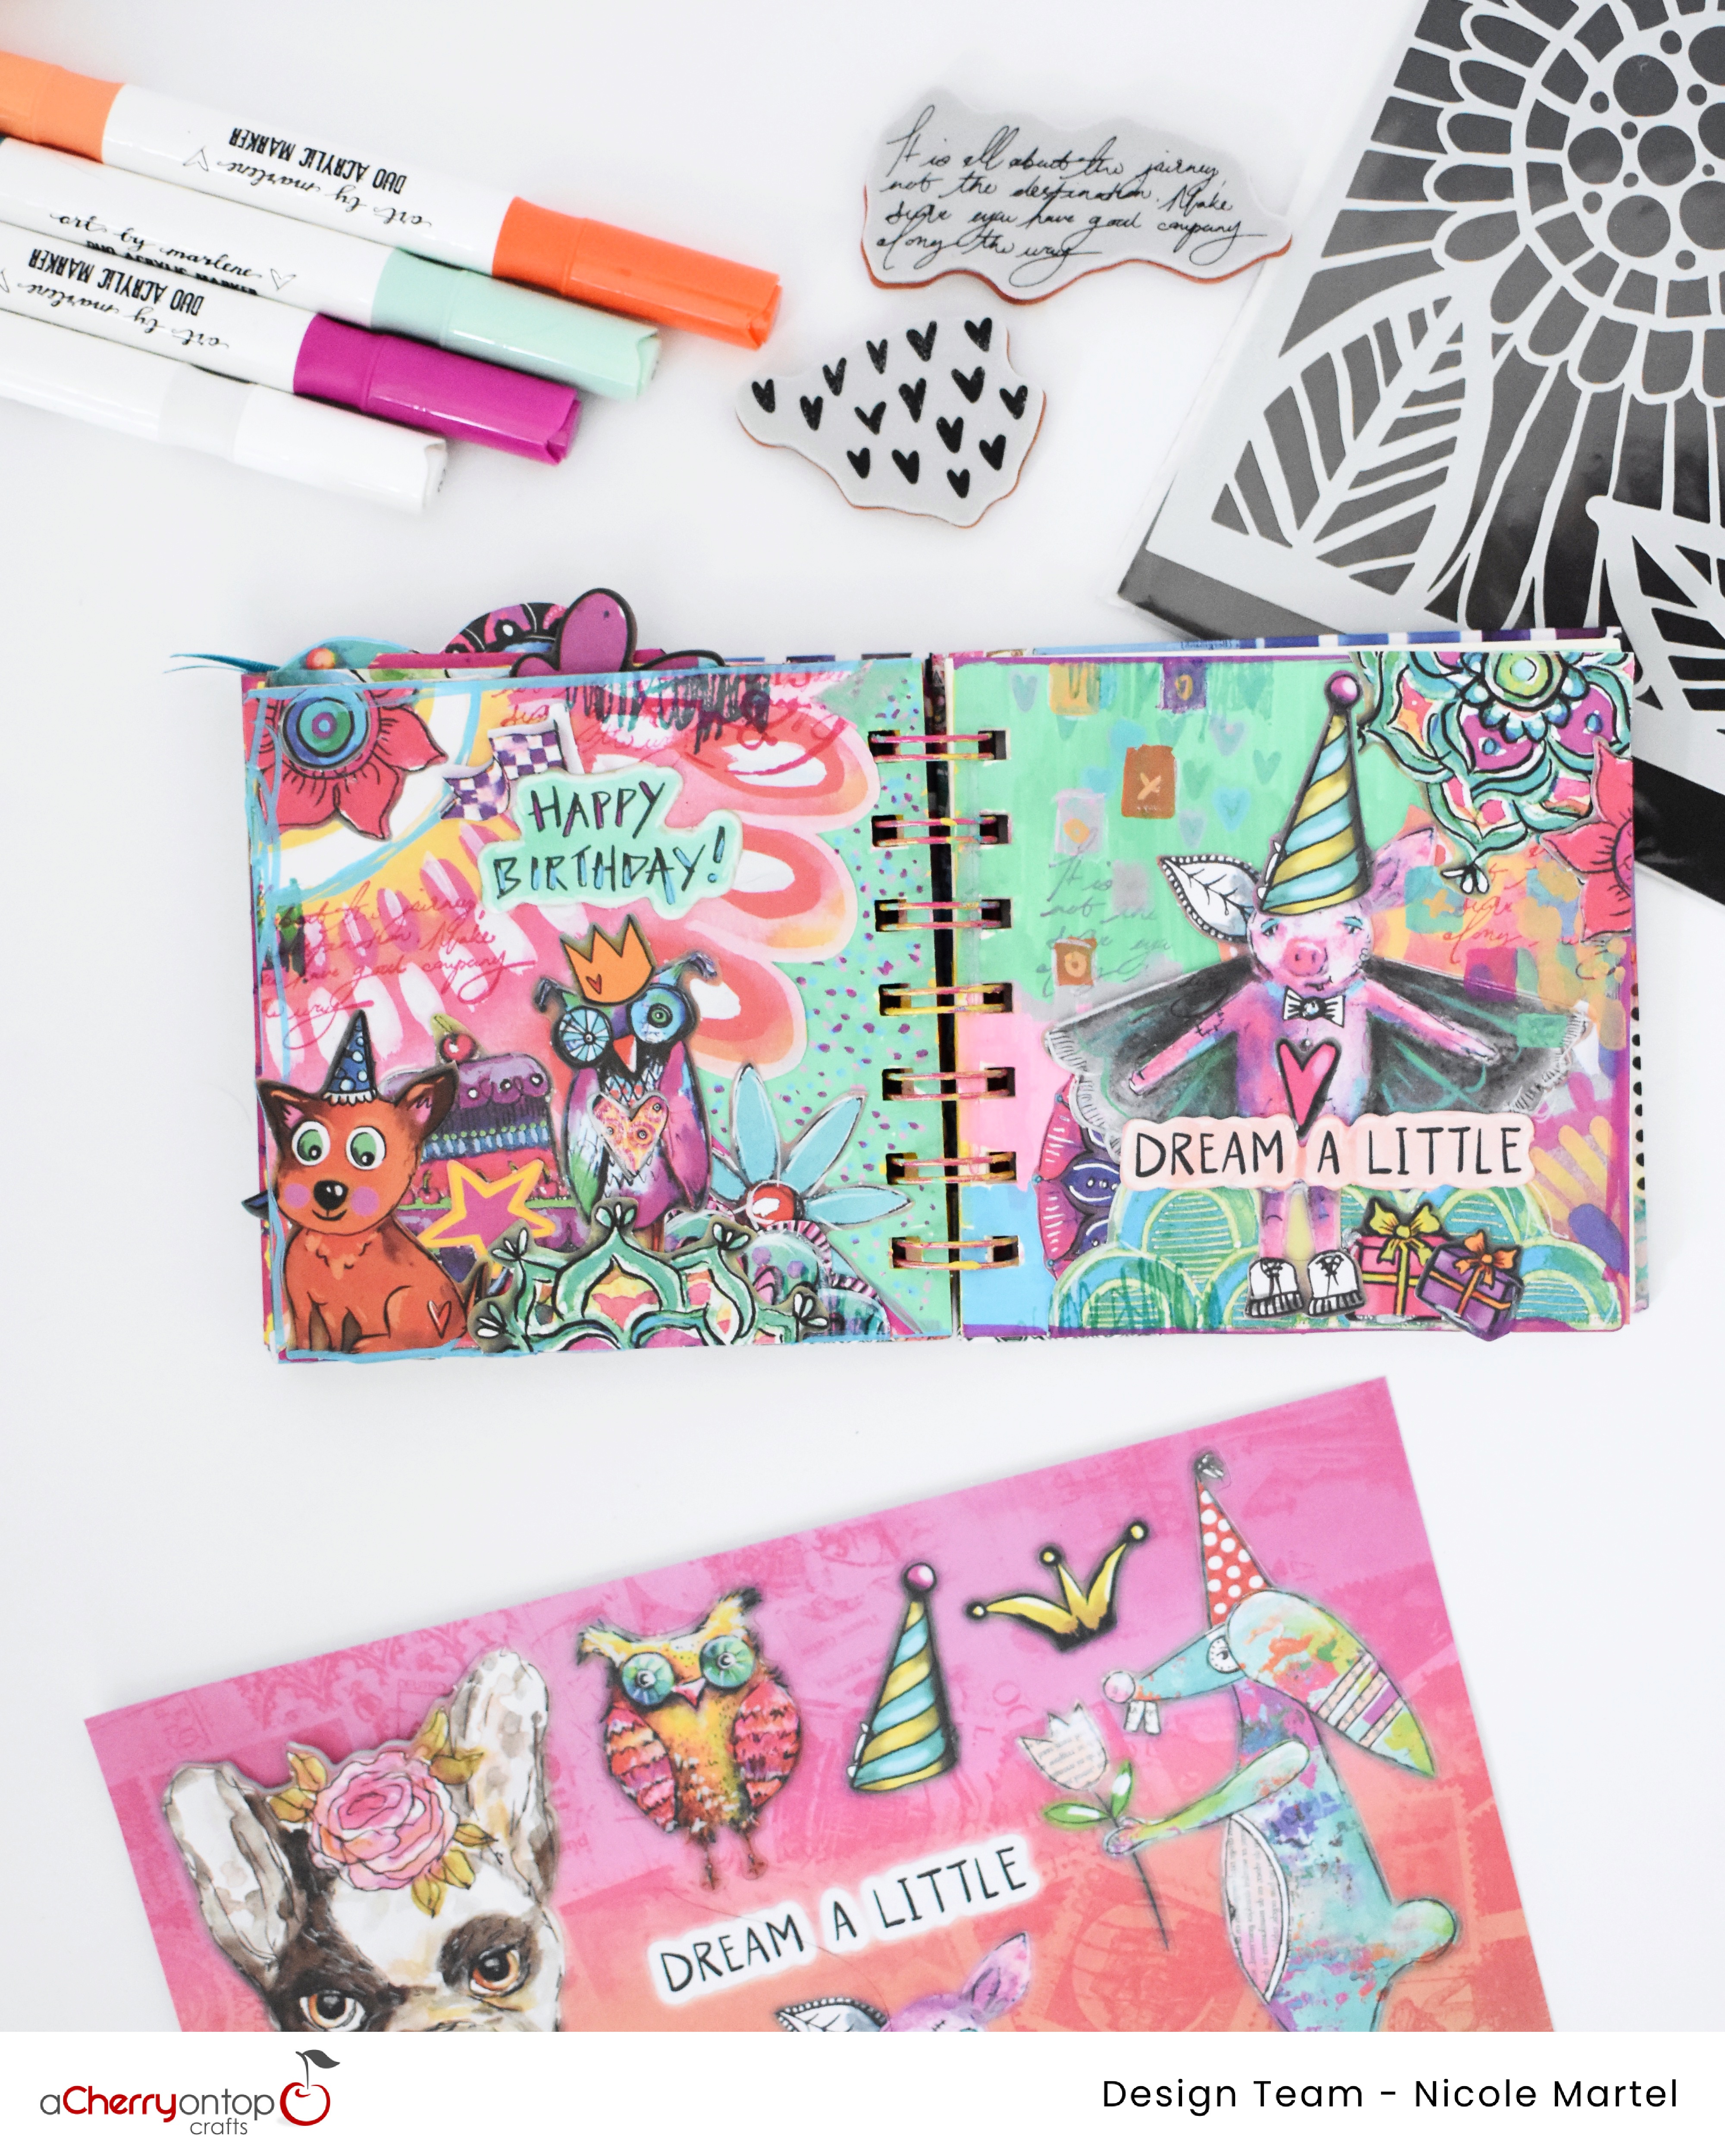
Good morning, friends! Nicole here with another mixed media art journal project. This past month, we celebrated my neice's third birthday. I came home and created this fun art journal spread using stamps and stencils to create a fun background. One thing I realized while creating this spread is that I definitely gravitate towards things that I like in real life... Such as pigs and animals in general, and Art by Marlene fits my personality! I love funky stuff...and I like playing with bright, colorful products. I think that's why I'm hooked on art journaling! It's freeing...
To begin, I used a pencil to draw marks on the plain art journal page to create a pattern for the background. Next, I colored in the triangles using the Duo Acrylic Markers. This markers are fantastic!!! I love them so much. Next, I cut the patterned paper from the Golden Collector's Book into a fun photo corner and glued it down in the journal.

After that, I moved the fun die cuts around to figure out the placement of all the magical elements. These fun die cuts come inside the Golden Collector's Book.

Once I was satisfied with the placement of the little guys, I glued everything down. I used the white marker to trace around some of the die cuts to make the images more defined so they don't get lost in the background.
I stamped some journaling scripts and hearts to the background. You do not need a block for the stamps. Simply, press the stamp into the ink pad and then press the stamp down on the page using your fingers to press down to ensure the images transfer to the paper. I probably should have done this before gluing down the elements...but to fix this issue, I covered the areas I didn't want to cover with scrap pieces of paper and it worked out. After that, I used the markers to create a variety of dots to fill in the white space.

I stamped the hearts down and then traced them using the markers to change the hearts to multi-colors. I used my fingers to dabb off the excess paint from the hearts to lighten them. Next, I used the stencil to create the little blocks with the markers. I used my finger tips to dabb off the excess to lighten the paint so it blended in the background. Since the acrylic markers are opaque, I used an alcohol marker to color the die cut sentiment pink. 


I hope you found these pages delightful! I had so much fun playing in this journal! Click here to see all the products used and to shop through my affiliate link. Thank you for visiting today.

Nicole

Wednesday, April 02, 2025

HOW TO MAKE A BIRDHOUSE/A CHERRY ON TOP

Good morning! Nicole here with a fun project I created. I've been wanting to decorate a bird house for a few years now...not an outside bird house, but something for my craft room. When I saw the Birdhouse from Mintay, I thought it was time to play!

To begin, I glued all the wood pieces together using wood glue. Next, I let it dry for about an hour. After that, I applied a good amount of white gesso all over the birdhouse using a paintbrush. I let it dry over night.
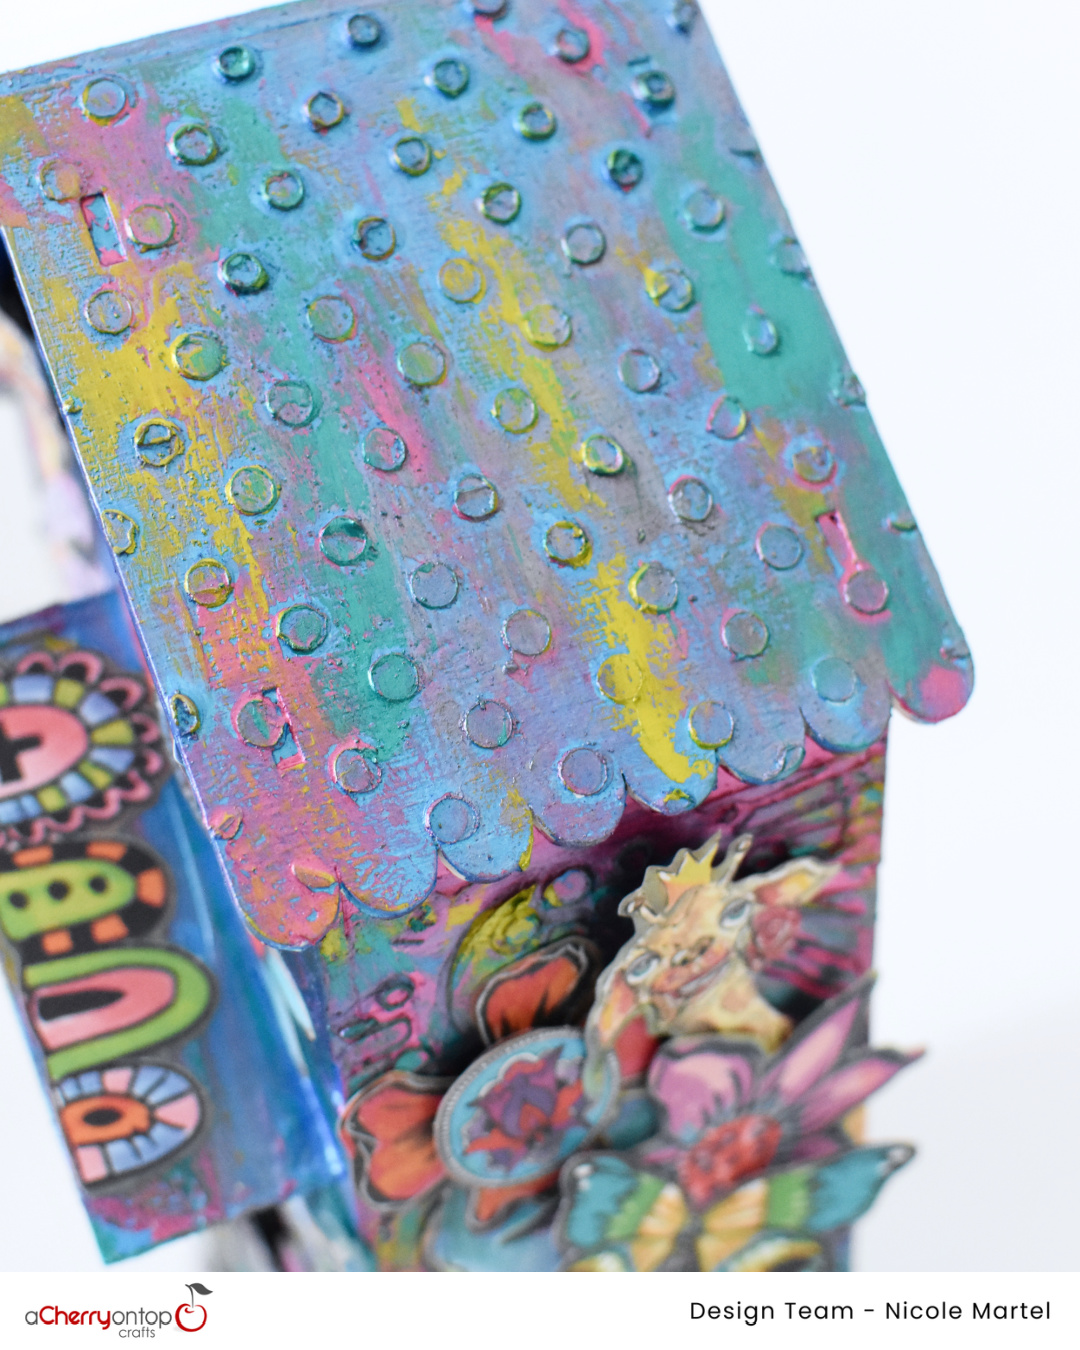
After the gesso was completely dries, I grabbed a variety of floral, polka dots, and geo shape stencils to created the patterns using a palette knife to pull the clear modeling paste through the stencil. I used the stencils all over the birdhouse to add texture. Before I painted the birdhouse, I placed the die cuts on the birdhouse to get an idea of the design and exact colors I wanted to paint the birdhouse. Blue is my favorite color...so I started with the blue. Once the paste was completely dry, I used sponges to paint with the stencil butters all over the birdhouse. The textures from the stencil and modeling paste look amazing! I used my fingers to layer the colors over the texture sparingly, waiting for each color to dry first.
I continued adding color until I was happy with the birdhouse. I totally forgot to take another photo of the birdhouse with all the colors!! But you get the idea...

I used glue to glue down all the die cuts. You can use a gel medium for this as well. This was so much fun to make...My fingers were messy, but it was worth it. When I was finished, I notice the inside was not painted...so I sprayed inside using Mixed Media Gloss Spray.

Here is a close up of all the colors used throughout the birdhouse so you have an idea. Isn't this so pretty!? I'm loving all the texture as well.
 

Here is a close-up of the side of the birdhouse. I layered a variety of die cuts using Art by Marlene's Golden Collector's Book. There are so many fun creatures and elements in this book and the die cuts just pop out of the pages making it super easy to play with... No fussy cutting needed!

For the other side, I just layered it up with more fun elements...I used foams squares to pop some of the elements up to add texture and dimension.

Here's a closer look at the top with all the layered die cuts. SOOOO Fun.
This little cluster makes me feel like a kid again...so fun, and cute. What do you think? Are you inspired to make one of your own? It's so much fun.

Thank you so much for visiting today. I hope you found this project inspiring!! Click here for the full list of products used.

Nicole