Showing posts with label BELLA BLVD.. Show all posts

Thursday, October 09, 2025

6X8 Scrapbooking Layouts Using Bella Blvd.s' Documented Collection

Hello, friends! I'm guest designing for My Creative Scrapbook again this month and I'm so excited to share my creations with you! The main kit includes lots of fabulous products from Bella Blvd.'s Documented collection. It's a fun kit filled with bright beautiful colors, perfect for documenting everyday memories. Be sure to mention my name before checking out to receive a free gift! Click here to take a look at the kit.

I had a great deal of fun creating this rainbow colored spread. I used a heart stencil and ink to create the colorful background. Click here to see the process video on how this came together! It was super fun to make. The colors make me so happy! 
I used foam strips to pop up the flowers and glued a few glitter drops to the center of the flowers to add some sparkle.

I clustered a few chipboard embellishments and die cuts together to frame the photo at the bottom...and to help pull it together.

I absolutely love the cluster of flowers on this layout. It was a super quick and easy layout. Layering embellishments is my thing...and this couldn't be more perfect. The process video can be seen, here.


I included a little bit of journaling at the bottom to fill in the white space.
Here is a closer look at the pretty flowers. The glitter drops really make the flowers shine!

LOVE the design of this layout. I really wanted to use the big chipboard title and after I thought about it, I decided to use two different patterned papers and add the photo and the majority of the embellishments at the top...to allow space at the bottom for the large title. I just love this... it's such a great design!
Be sure to check out My Creative Scrapbook to grab your kit today! Also, I have a process video on how I set up the 6x8 Chipboard album using this month's kit. You don't want to miss it...It's so good! Click here to see the process video after you grab your kit. Thanks so much for visiting today!

Nicole


Friday, May 02, 2025

LOVE IS A 4 LEGGED WORD FLIPBOOK/A CHERRY ON TOP

Hello, friends! I'm so excited to share my flip book with you today... We just got a new puppy last month and he's the cutest! Meet Paco, the newest addition to our family! When I saw Bella Blvd.'s Bow Wow collection, I just knew I had to have it. It's so dang cute! I'm using Simple Stories' Flipbook to create this adorable mini of my fur baby.

For the cover, I added chipboard stickers, and layered stickers and placed them across the bottom of the album. Next, I glued the "Love is a 4 Legged Word" sentiment above the puppies. After that, I tied the bow around the cover of the album. Isn't this cover darling?

I added the chipboard sticker behind the cover of the album and placed the "Dogs make me happy" sticker over the metal piece that holds the album pages together. Next, I cut the patterned paper to measure 4x6 and decorated it with a die cutand sticker.
Next, I cut three 3x4 journaling cards out so they were still attached and I folded the right-side in to create a flip page. I printed the photo to 3x4 and mounted it to the front of the flip page and added the die cuts.

This is such a quick and easy way to create a flip page. And I think it makes the album more fun to flip through.

I cut the squares from the cut-apart journaling sheet and created another flip page element. Next, I added some stickers. As you can see, I had so much fun making this album. Making minis is my favorite thing to do. Loving the bright colors in this collection. The colors make me happy! What about you?
Mini albums don't need to be complicated. Pick a format and follow it through. As you can see, I include a fun die cut page on the left-side of the album and photos on the right-side. That way, I can use as many cute stickers and die cuts as possible without pulling the focus from the adorable pictures.

I cut the clear cuts specialty sheet to measure 4x6 and added some die cuts and stickers to create a fun insert page.

I backed these adorable pictures using the die cut frames and overlapped them to create this cute little page. Isn't Paco the cutest pup ever? He's got such a perfect personality and we love him. He's a perfect fit for our family.
Are you ready to make a flipbook of your own? They are super simple to work with and in just a few hours, you have a cute album full of your precious memories. Click here to shop for the Bow Wow collection through my affiliate link. Thank you so much for visiting today!

Nicole

Wednesday, December 04, 2024

BROS/A CHERRY ON TOP

Good morning! Nicole here with another project I created using Bella Blvd's Teen Vibes Carson collection. I just love this collection. There are so many fun papers and embellishments to choose from. The embellishments in this collection is perfect for little boys or teens.
Edward just celebrated with his buddies not too long ago and one of the moms sent this photo to me... These boys have been friends since pre-school! I love watching them grow up to be decent human beings.

Bruh, you all know how much I enjoy playing with embellishments, and I went to town with them on this layout. Let's take a closer look at all the embellishments and how nicely they look in clusters.
I layered a variety of tags at the top, tucking a variety of embellishments here and there. I used a few foam squares to pop up some of the die cuts, and puffy sticker embellishments to add dimension. That little slice of pizza is super fun, isn't it?! The tags were created using patterned paper and metal die tags.

That "BROS" die cut is perfect for the title. I popped it up using foam squares and added the smiley face puffy sticker to the center of the "o". 

Initially, I wasn't going to use the "friends" die cut at the bottom, but after moving the embellishments around at the bottom, I thought it worked out. I wanted to kind of break up the patterned paper a bit since it's a lot... And I just love it. What do you think?


What do you love about the Teen Vibes Carson collection? The die cuts are spot on for boys...don't you think? Click here, to see the entire collection! Thank you for visiting today!

Nic

Sunday, November 24, 2024

BRUH MINI ALBUM/A CHERRY ON TOP

Good morning, friends! Nicole here with another project I created using the Teen Vibes Carson collection from Bella Blvd. I love making little tag albums because they are super simple with the right collection and metal die tags/elements!
To create this tag album, I selected The Guys Paper, Stars Acetate Sheet, Let's Talk, Streaming Paper, Daily Details Paper. I cut them down in long strips so they would go through my Big Shot.

I used my Big Shot to create tags using the Shaker Tag Book and Foldable Shaker Tag Metal dies from Pinkfresh Studio. I love using different size tags because it just makes the album more fun!

I used the metal tag to cut the cut-apart journaling cards into fun tags. I cut pictures using the same tag to mount behind the paper to make it more sturdier. The Basic Multi-Hole Punch came in handy for making the holes a little bigger if needed to go through the ring clip.
I love my magnetic Platform because I don't need to tape down the dies to the paper...It makes cutting super easy.
After I finished cutting out my tags and photos, I gathered ephemera, chipboard, puffy stickers, and enamel dots that I wanted to use to embellish the tags. This is my favorite part because I absolutely love playing with all the fun embellishments.

What do you think? Isn't this so cute. I can't wait to give this little Bruh tag album to my son... He's going to roll his eyes at me, but he will appreciate it later in life.
I hope you found this tag album inspiring! I absolutely love the Teen Vibe Carson collection. It's the perfect collection for teenage boys! Click here, to see all the products used for this mini. Thank you so much for visiting today.

Nicole 

Monday, November 04, 2024

GAME OVER/A CHERRY ON TOP

Hello, friends! I'm super excited to share my first layout I created using the Teen Vibes Carson collection from Bella Blvd. As soon as I saw this collection, I just knew I had to have it all... It's the perfect collection for my 14 year old!
To begin, I trimmed the Skater Paper to measure 8 1/2x11 for the base. Next, I cut the Control Freak paper to measure 7 1/2x10. I mounted it down to the base at an angle, letting the top corner touch the base, while letting the bottom hang over a bit. I cut the white cardstock to measure 6x11 and placed it across the layout. I love the design with the papers tilted!
I matted the 4"x4" photo and placed it to the center of the layout. Next, I added the sentiments from the Teen Vibe Carson Ephemera Words to the right. After that, I added a few die cuts to the left-side of the layout from the Teen Vibe Carson Ephemera Icons. I used foam squares to pop some of the die cuts up to add dimension.
I layered a few more icons at the bottom and I placed the French fries slightly over the slice of pizza to add dimension. LOVE the Always Hungry Bella-Pops. They are super cute!
What do you think? Isn't this the cutest layout? I To complete the layout, I added the border strip at the top from the Teen Vibe Carson Doohickey Stickers. I'm thinking of another cute project using this very same collection later this month...be sure to stop by later this month to check it out! Click here to see the full collection! Thank you so much for visiting today!
Nicole

Sunday, February 06, 2022

LOVEABLE/CLIQUE INTERNATIONAL

Good morning friends! I created this adorable layout last night using my Bella Blvd. stash. It feels so good using up my stash...making old product new again!


What subjects have you been documenting lately? I feel like all of my layouts are Moxie related...my dog. ;)


I used so many die cuts on this layout. I lost count. But they are my absolute favorite embellishments. They really made this layout fun! Loving all of the elements on this layout.


I used a few foam squares here and there to add dimension to the layout. Lot's of layers and pretty embellishments and love went into this layout.


I wasn't sure where to place the adorable dog house sticker, but I think it looks OK where it is. 


I added a cluster of tags, pieces of scraps and other embellishments at the side of the photo to fill in the white space. What do you think? We are out of this collection in the shop, but we do have some Chloe Sampler kits for our kitty loving friends! Thank you so much for visiting today!

Saturday, January 22, 2022

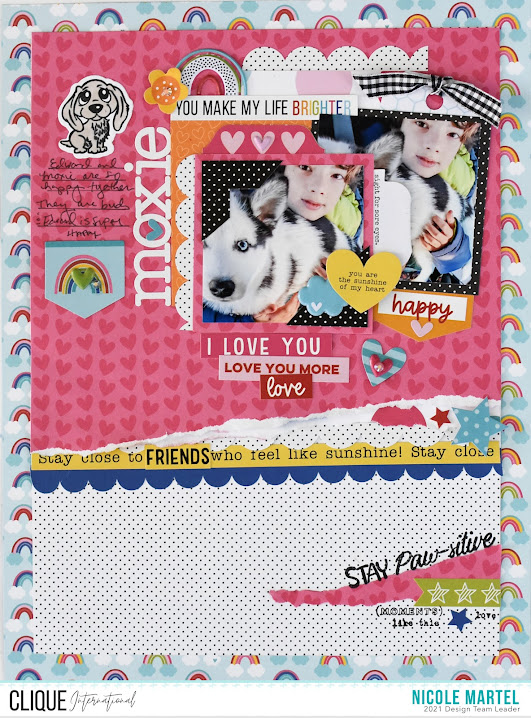
MOXIE/CLIQUE INTERNATIONAL

Hello friends! I have a colorful layout to share with you today. I finally used my You are My Sunshine Sampler Kit from Clique International. This sampler kit is filled with lots of beautiful embellishments and papers from Bella Blvd. It's such a happy collection! 


You can probably tell... I love playing with embellishments! Especially stickers and die cuts! They are my favorite. I layered a few of the embellishments using foam squares to add dimension.


I love this photo...my son was in the back seat with his dog and I happened to hold my camera up to take a picture behind me...trying to catch them off guard and this is what I got! Now, if I was facing them...I would have gotten such a sweet photo!


Initially, I wasn't sure what to do with the left side of the layout. I knew it needed something... so I decided to add some journaling with the rainbow die cut and the doggie that I made using a stamp and die!


I really like the paper tearing techniques that I used on this layout. Super fun!! And of course more stamping. Stamps make great fillers for all paper crafting projects! 


There are a few of these kits left. Grab them before they are gone. Click here to see the entire kit! Thank you so much for visiting today!


Wednesday, January 19, 2022

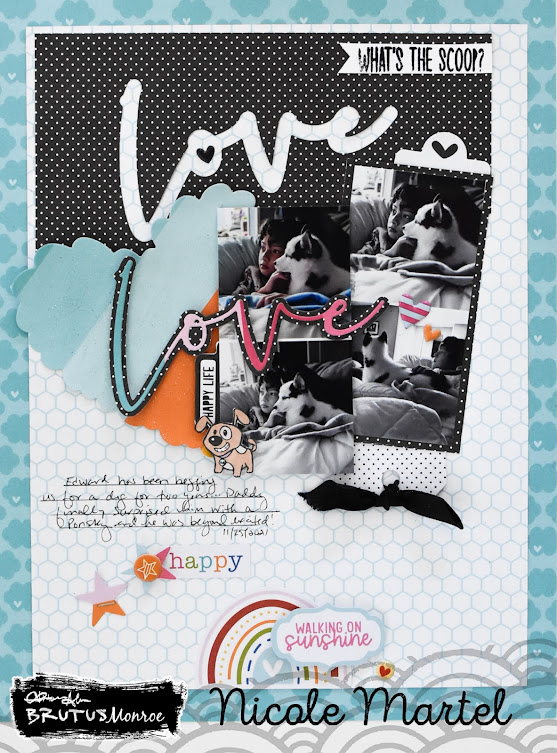
LOVE/BRUTUS MONROE

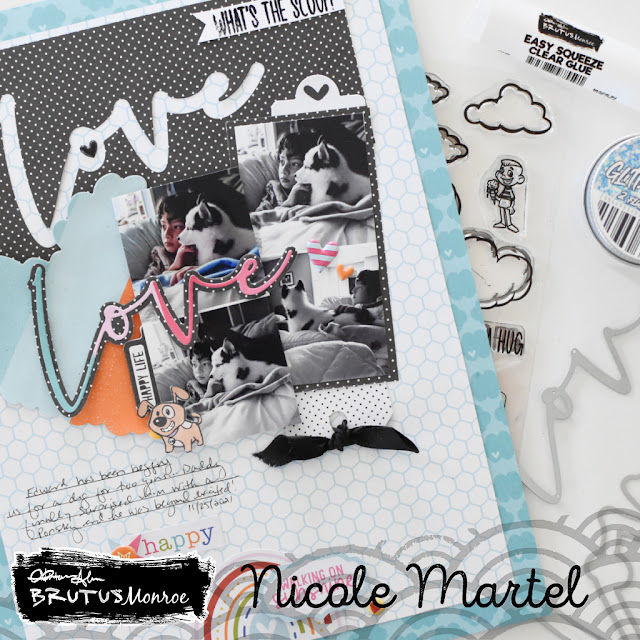
Hello! I couldn't wait to scrapbook these adorable pictures of Edward and Moxie. These two...they just melt my heart. Can you see the love? This dog is so spoiled and LOVED.


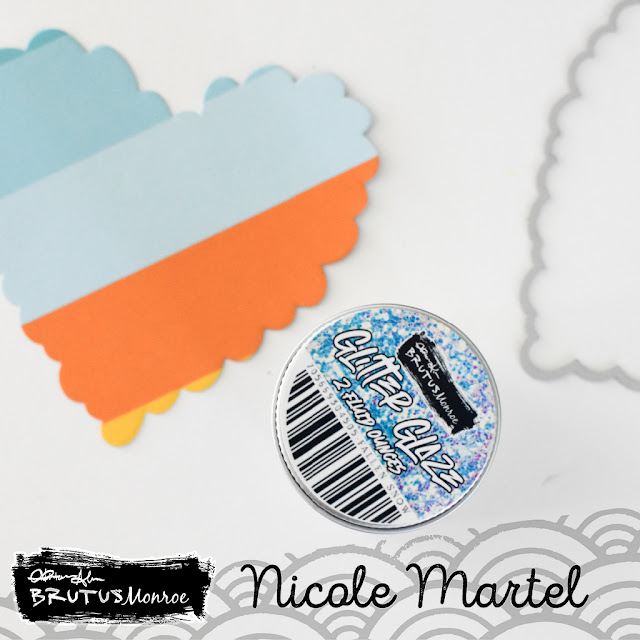
To begin, I matted the 71/2x10 honeycomb patterned paper to the center of the cloud printed paper that is 8 1/2x11. Next, I used the Heart Petals Metal Die to create the heart by running it through my Sizzix machine. 


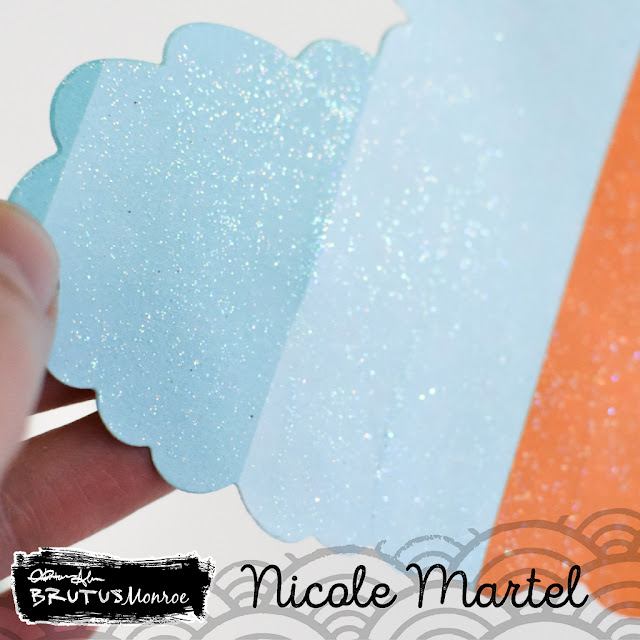
I used my finger to smear on the Glitter Glaze all over the heart to add some shimmer! If you're not a fan of glitter...I promise you, once this glaze is dry, the glitter isn't coming off...unless you rub really hard. And it looks so pretty!!


The Heart Petals die comes with the "Love" sentiment and an "XO". I used my Sizzix to create the die cut for my layout. There's another piece to create the shadow... It looks so great! And don't forget...you can always use those scraps for your layout. I used the leftover to create a fun back drop at the top of the layout. I love when I'm creating something and an idea pops in my head and it totally works! Those are the best moments. Wouldn't you agree? My crafty friends understand... my other friends, not so much. LOL


I glued the love die across the photo to create some layers using foam squares.


The little doggie from the Life is Sweet stamp set was stamped onto white cardstock and then I colored it in using alcohol markers and fussy cut him out using scissors. Isn't he the cutest? :) I love him. :)


I used a ruler and pen to journal my story at the bottom and then added a few stars etc. to fill in the white space. 


What do you think? Isn't this layout adorable? This layout truly made me smile when I was finished... I just love the overall design and color scheme... Every now and then, I surprise myself. I don't always like what I make, but I LOVE this. 


Thank you so much for visiting today! Click here to shop at Brutus Monroe through my affiliate link. The price you pay will not be higher, I may receive compensation for your purchase! 

**This post may contain affiliate links. That means that I may receive compensation if you purchase through the links I have provided. The price you pay for the product or service is not higher, but I may get compensated.**