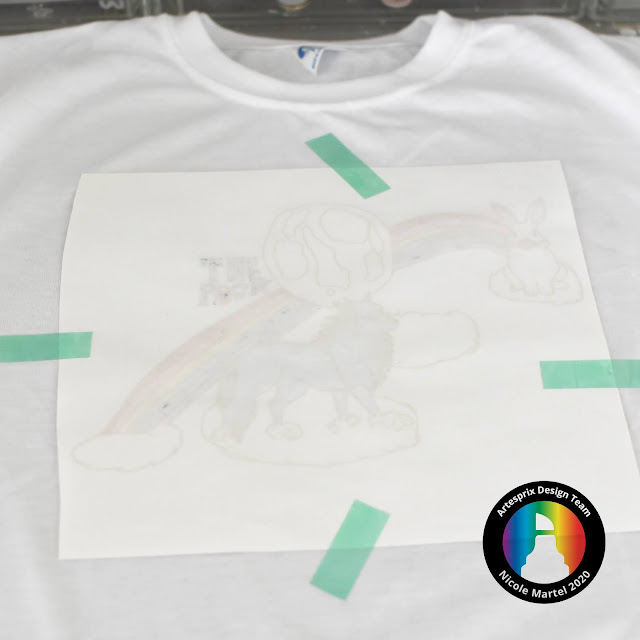
Step 1. To begin, I traced the entire drawing using a Black Iron-on-Ink Sublimation Marker. After I outlined all of the images, I colored in the rainbow and the animals using Artesprix's Gnomie Botanical Sublimation Markers. In my opinion, the images really stand out with the black outlining. If you are going to use just the color markers, the images may not be as crisp.
I used scissors to trim around the edges of the paper so that it would fit better on the t-shirt. Once I was satisfied with the placement of the art work, I secured the design (face-down) to one side of the Poly-T Shirt using heat tape. Be sure to secure all sides of the image using heat tape to avoid slipping because if it's not secured, you may get a ghost image.
Place the Artesrpix Protective Paper in-between your shirt to prevent your design from transferring through to the other side of your garment. Now, you are ready to create a "Sublimation Sandwich", from bottom to top:
- Artesprix Protective Paper
- Artesrpix Poly T Shirt with design secured (face-down) on top, with Artesprix Protective Paper inside
- Artesprix Protective Paper
Don't forget to set your Artesprix heat press timer for 35 seconds at 370 degrees. Place "Sublimation Sandwich" in the heat press. After pressing, allow the item to cool before handling. Also, make sure the knob is tight. You want as much pressure possible so that the heat press is hot enough to really make the images and colors pop.
Lift a small piece of the Protective Paper to take a peep test to make sure the image transferred completely. Gently, remove the protective paper from the item to reveal your unique vivid design!
And here he is wearing his new t-shirt! When I showed him the shirt, he gave me the biggest smile. But, then he had to ruin the moment by telling me it only took me four months to make him a shirt... LOL. Most importantly, he loves it and I am impressed by my skills!


No comments:
Post a Comment