Showing posts with label PAINT. Show all posts

Wednesday, March 26, 2025

MIXED MEDIA ART JOURNALING SPREAD/PERFECT PAINTS

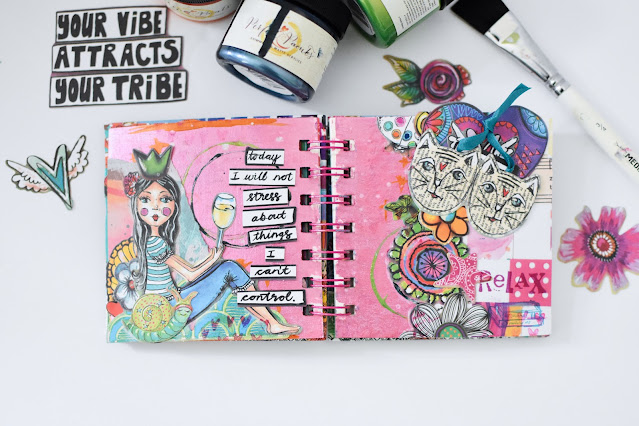
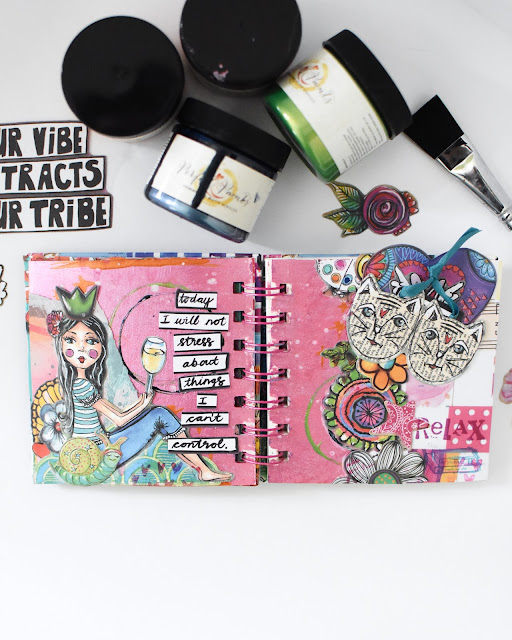
Good morning, friends! Nicole here with a few art journaling spreads I created. I don't normally play in art journals, but I was looking for something different to do...so I thought I'd grab a few Shimmering Matte Acrylics and my art journal to see what would happen... I am using a variety of products from Art by Marlene for this spread. Her products are super fun and easy to work with. 

And what happened was...I HAD SO MUCH FUN! Seriously, I can't wait to create a few more art journal spreads. It was Friday night, and I just wanted to play with paint. To begin, I grabbed four Shimmering Matte Acrylics in the colors of Spring Green, Cajun Pumpkin, Bohemian Blue, and Peony. Next, I painted both pages using the Peony Shimmering Matte Acrylics.
After the paint dried a bit, I used a cap to make circles using all the Shimmering Matte Acrylics.
After I finished making a few circles, I grabbed a small pointed paint brush to create some orange plus signs in the background.
I let this dry a bit before gluing down all the fun die cuts! Super simple techniques, but a great way to add color to your journaling spreads!
Are you a fan of playing in art journals? This is a first for me, and I think I'm hooked. Can't wait to share a few more creations with you in the upcoming months.
I managed to tuck a few hidden embellishments throughout the art journal...for fun.
What do you think? Think you're ready to give art journaling a try? You won't know if it's something you'll enjoy until you try it out for yourself.

I truly hope you find this project inspiring, and I hope I inspired you to try something different! Thank you so much for visiting today.

Nicole


Wednesday, November 01, 2023

THESE ARE THE DAYS/PERFECT PAINTS

Hello, friends! Nicole here with a layout I created using beautiful product from 49 and Market along with the Vintage Mercury Shimmering Matte Acrylics. I had so much fun playing with the paint on this layout. I'm going to share some fun and easy ways to use the paint in simple ways that take no time at all.


To begin, I painted the wood veneer sentiment and heart using the Mercury Shimmering Matte Acrylics. I just love this color...it's so beautiful and it looks so pretty on this layout. I painted some of the flowers too, but the big one didn't work for this layout. I opted to use the smaller one instead.


Next, I matted my papers together and used a paint splatter tool to splatter some of the paint all over the paper. I love the gold and wanted to add a few gold specks onto the paper.


After the paint was completely dry, I mounted down my photos and embellishments, adding lots of layers and texture.


I fussy cut the little flower to add to the wood veneer to help pull this little corner together. Initially, I was going to add the labeled journaling at the bottom, but it kind of got lost...so I decided to place it below the banner.


I did not plan on adding the photo at the top, but I felt like there was too much white space at the top...so I matted the photo with the frame die cut to see if it would work and I just love it. It really pulls the layout together. And notice how the "wide open spaces" word strip has a gold border. Doesn't it look nice? It's so easy to do with the paint. Simply use a paint brush to brush the paint around the edges.


Loving all the butterflies on this layout and the vintage feel. I used a few foam squares to pop the butterflies up off the page to add dimension.


What do you think? It's beautiful right? What are your favorite Shimmering Matte Acrylics? We'd love to know. Comment below! Thank you so much for visiting today.

-Nic

Monday, October 16, 2023

OCTOBER LOVE/PERFECT PAINTS

Good morning, friends. Nicole here with a fall layout I created using the Ballet Slipper Shimmering Matte Acrylics. This layout took a different turn as I was creating, but that's OK!

To begin, I tried dry brushing the acrylic over the stencil, but the paint smeared underneath the stencil.
I decided to use a silicone brush to smear the paint all over the white cardstock and you can see some of the hearts... so I decided to use it for a border for the layout.
Next, I painted a few pieces of wood veneer.


I am happy with the turn of events for this layout and the pink boarder adds a nice touch to the layout with the pink wood veneer leaves.
Isn't that paint beautiful!? It adds just the right amount of shimmer.

I love how versatile paint is... and it doesn't need to be complicated... Just started painting and enjoy the process.

You can see all of the gorgeous Shimmering Matte Acrylics by clicking, here. You'll want them all, I promise you. :)


Thank you for visiting today and I hope this colorful layout brought a smile to your face! Hope you have a great week.

-Nic

Wednesday, December 29, 2021

YOU ARE A STRAIGHT UP GIFT TO HUMANITY CARD/THE CRAFTER'S WORKSHOP

Hello friends! It's been too long since I really played with my watercolors... so that's what I did and it felt sooooo good, getting messy. I'm going to share with you how to make these cards step by step and hopefully, it will inspire you to try this technique on your next project!


To begin, I mixed the Scarlet Colorsparx with water and painted a piece of watercolor paper that measured 2 1/2x3 3/4. I used a heat gun to speed up the drying time.


Once the base was completely dry, I pulled the Light and Fluffy Modeling Paste through the TCW935 Secret Garden stencil, making sure to apply a good amount of the paste and pull the paste from top to bottom in one fluid motion to prevent streaks.


 I used a card to go around the edges to smooth any excess paste from the edges.


After the Light and Fluffy paste was completely dry, I painted the patterns using a variety of Watercolor powders. The colors used on this card include: Scarlet, Lime Green, Marigold, Orange, Orchid and Cerulean Blue.


After the watercolor was completely dry, I used my fingers to rub acrylic paint all over in different areas. I had no idea how pretty acrylic paints would look against the watercolor!! Seriously, the combination is fantastic!


After the acrylic paint was completely dry, I mounted it to a 3x4 card. Then, I stamped the sentiment onto white cardstock and added it to the card with a few gems.


 Isn't this so cool!? I just love it. Thank you for visiting today!


Friday, September 10, 2021

BACK TO SCHOOL MIXED MEDIA TRAY/FOUNDATION DECOR/THE CRAFTER'S WORKSHOP

Good morning! Nicole here with a fun home decor project I created to get the little man excited for 6th Grade! As I type this up, I pray that they do not decide to do another year of virtual learning. I need him in the classroom. He is supposed to start on September 8th. We shall see...


I used Foundation Decor's Back to School kit to create this fun piece for my home. The stencils and mixed media mediums are all from The Crafter's Workshop. To see the full tutorial on how I created this Back to School Tier Tray, please visit The Crafter's Workshop blog, here.


The Time for Class Schoolhouse can be found here!


I glued fabric behind the windows and doors to make them look like curtains. Super cute. :) This was such a fun project and I enjoyed every minute of it.


The notebooks, flash card and pencil is all from the Sept Kit. It is available, here.


I plan on writing "Welcome 6th Graders" on the chalkboard as soon as I get some chalk. The other board will say, "Good Luck!"


Isn't this the cutest thing? I bought the Back to School Gnomie from Esty. Thanks so much for stopping by today!


Tuesday, January 05, 2021

LAUGHTER MIXED MEDIA LAYOUT

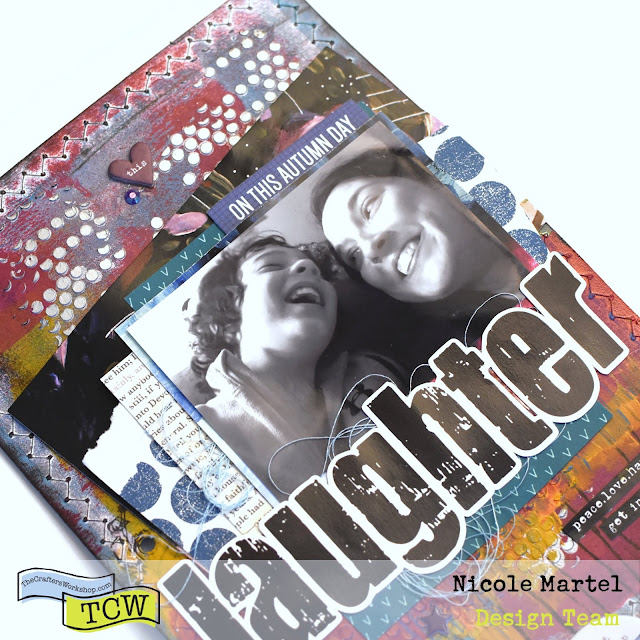
Hello! This year, I'm going to make it a colorful year. I love playing with paint. Therefore, I am going to try using my Gel Plate by Gel Press more often. It's so cool and after you get the hang of it, you can really create some wonderful backgrounds for your projects.


Disclaimer: "The Crafter's Workshop Provided me with Product to create this project. The opinions I share are solely my own."

To create this layout, I used a gel plate to add lots of bold colors for the background. And then I used the TCW361 Tiny Circles stencil and Platinum Modeling paste to add several metallic dots in the background. I just love how the paint looks!! It's so cool.


To see the full tutorial on how this came together, please visit TCW's Blog!


I've had the big "Laughter" die cut from Pretty Little Studio in my stash for some time... I really love the font and how it looks against all the colors.


I added a few stickers, chipboard and gems at the bottom to help pull it all together. I love embellishments!


Thank you so much for visiting!


Tuesday, December 15, 2020

PLAY HARD MIXED MEDIA LAYOUT

Hello stencil lovers. I have a new addiction! I've been playing with my gel plate from Gel Press, getting messy and having so much fun. Seriously, this was such a fun spread and it was very therapeutic for me. I created this little by little for a few nights in a row. I'd add something and come back. I am going to try this the next time my mojo isn't quite there... sometimes, it really helps to just sleep on it.


Disclaimer: "The Crafter's Workshop provided me with product to create this project. The opinions I share are solely my own."

To begin, I dropped a small amount of acrylic paint onto the gel plate and then used a brayer to smooth out the paint. Then, I placed the journal page face down on the plate and smooth over the page using a brayer. I repeated this process several times with different color paints until I was happy with the result. While I was applying paint to the page, I'd rub off the excess behind the page... I thought it would be a good idea... create two projects at the same time using the same technique. Come back on January 5th to see the other layout I created!

Once I was done with the background, I grabbed some Light and Fluffy Modeling Paste and the TCW809 Ocean Window 12X12 stencil to create a fun design. I really like how the Light and Fluffy looks against the pretty colors! I used a palette knife to pull the Light and Fluffy through the stencil.


After it was completely dry, I used the Gel Medium to glue down the patterned papers and embellishments. I like using the gel, rather than a tape runner because the gel really holds everything in place.


Here are some close-ups. I'm so pleased with how this turned out and the colors!! It's so happy... After I was finished gluing down everything, I rubbed black ink along the edges to give it more of a distressed look.


I really like how the background turned out with the use of the gel plate. You cannot get this look just painting directly onto the cardstock. And this technique is super easy to do. Anyone can do it... you just have to jump in and START. :)

Thank you so much for visiting today!