Wednesday, April 28, 2021

I LOVE BOOKS

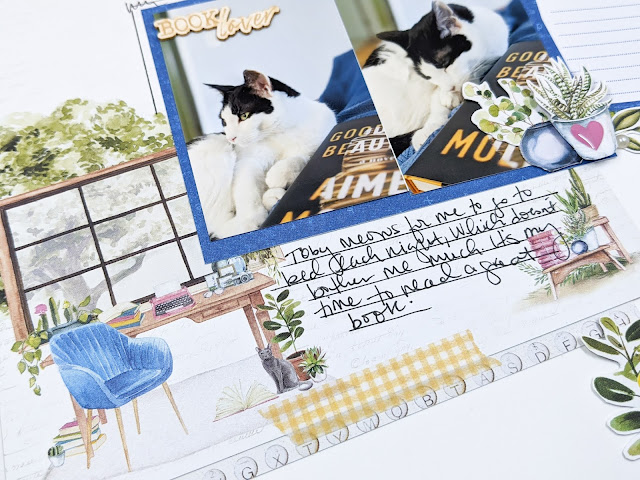
Good morning! I finally found some time to edit some photos for a variety of projects I created. And I'm excited to share this layout with you today!


Have you seen the Limited Edition Book Club Kit? I just love it so much!! I especially love the patterned papers in this beautiful collection. It's super cute and it's still available in the shop. Grab it now... before it sells out.


I did a bit of fussy cutting for this layout... the books, pots, journaling card and greenery were all cut from the papers. I used foam squares to pop them on the paper for added dimension. 

To complete the layout, I cut the book image from a sheet of patterned paper and then added the stamp along with the chair and plants to fill in the white space at the bottom. What do you think? Isn't this kit adorable? I just love everything about it! 


Thank you for visiting today!


Monday, April 26, 2021

HELLO MARCH

Hi all! Nicole here with another scrapbooking spread I created using the Zero Fucks, Mondays, and Bella Flora Stamp Sets.


For this spread, I used a few of my favorite photos from March! Whew, March flew by and May is around the corner! To begin, I printed off all of my photos in small sizes and then cropped them. Then I placed them onto the spread.


I stamped the LIVE and LOVE sentiment from the Zero Fucks Stamp Set onto the page using Distress Oxide inks. Then I added a "smile" sticker and stamped the "Who says Monday's have to suck? BE A REBEL kick ass anyway" below the sticker to fill in the white space. This sentiment can be found in the Mondays Stamp Set!


I couldn't help myself. I had to find some way to use the Thanks for not being an asshole sentiment from the Zero Fucks Stamp Set. My son can be one at times... and I don't even feel bad saying it. Ha.


I used the Bella Flora Stamp Set to create the flowers along the side and bottom left-side of the spread. Then I colored them in using alcohol markers. Aren't they pretty? I think they add a nice touch to the spread!


Since I couldn't find any patterned paper to go with the color scheme of this spread, I stamped the Bella Flora florals on a scrap piece of cardstock and then colored the flowers in using markers. Once I was happy with the image, I cropped it to use as a fun piece of patterned paper next to the photo.


 Thank you for stopping by today!


Sunday, April 25, 2021

JUNE PLANNER SPREAD

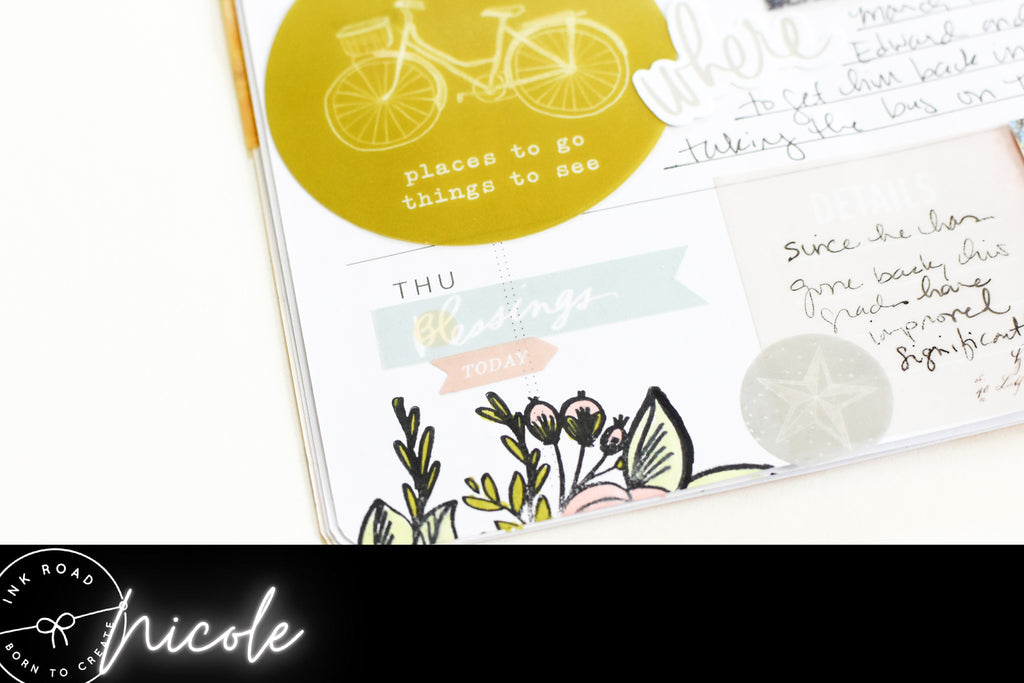
 Hello everyone. Nicole here with a fun planner page spread! I just got my new planner and the Journal Stories Collection is perfect for decorating your planner spreads!

To begin, I placed a few stickers from the Journal Stories Collection randomly down on the spread. Then I colored the images in using alcohol markers.


I decorated the corner bottom corner of the spread with some more fun stickers. Love how pretty these Everyday stickers look, clustered together!


I placed the "weekend" clear sticker from the Joy Sticker set at the top and then stamped "celebrate" above it using a light pink ink pad. 


Next, I used the Alphabet Stamp set to stamp "June" above the "celebrate" sentiment and then I colored it in using an alcohol marker. I added a few chipboard pieces from the Bom Dia collection and stamped the "reach for the stars" sentiment from the Space Travel  stamp set.

I cut the label from the patterned paper and then folded it in half and stapled it to the bottom left-side of the spread. Then I added the "happy" sticker dot that fits perfectly in the circle within the label. :)

As you can see...I have no plans yet for June. Honestly, with COVID-19 still lingering around, I'm not sure that I'll be doing much in June! :)


Thank you so much for visiting today! Don't forget to check out the shop to see the Journal Stories Collection in full. It's beautiful and not only is it perfect for planner spreads, it's great for documenting your travel memories.


Wednesday, April 21, 2021

BELIEVE

Good morning friends and family! I hope your week is off to a great start. I'm off today...doing some catch up on blog posts and assignments for the next few weeks. Lots of fun stuff coming up on the blog! Hopefully, you'll be inspired. :)

Just recently, my sister and her hubby took their little darling to Disney for the first time and he had a blast. I just love these photos. You can see the pure joy on Henry's face. :)


To create the background, I used the Shape Landscape stencil from The Crafter's Workshop and a few different inks from Catherine Pooler. It's such a fun background!! And super simple to do... sometimes, I don't want to spend too much time to create a fun background and this was perfect. 


I used lots of papers, stickers and embellishments from Simple Stories to create this layout. The Disney Collection is a few years old and I was excited to have some left in my stash to record this wonderful memory!


Isn't Henry the cutest? I just love his cute little face.


Thanks so much for visiting today!


Tuesday, April 20, 2021

EVERYDAY IS A FRESH START

Hi all! Nicole here. Wouldn't you agree...Everyday is a fresh start? I'm gonna be honest, February was not a fun month in my household. There were a lot of tears and yelling...it was a stressful month for all of us. Thankfully, Edward is now on a hybrid schedule for school and things have been much better! So... you get to see all the glory little snippets from our month. LOL... And lots of fun ways to use those stamps to fill in white space.


I always start by placing the photos down first... they are placed down wherever... It really doesn't matter how you do it. Just get those photos down. Then I add a few embellishments here and there.


The last thing I do is add my stamps and journaling to fill in the white space. I used five different stamp sets on this layout!! They really come in handy. I used the Basic Sentiments Strips to create the "I love you" snippet. And I used the Purr Babies (retired) stamp set to create the kitty in the box with the paw prints and "You've Cat to be kitten me" to add a play on words in my spread. In my opinion, It makes it more playful.


I stamped the Everyday is a fresh start sentiment from the Mondays stamp set across the top of the spread to fill in the space. Also...I felt the spread needed a title of some sort.


I seriously love the fist with the "PUNCH TODAY IN THE FACE..." sentiment from the Mondays stamp set. It's perfect. And I couldn't help myself... I used the "HAVE A NICE DAY SOMEWHERE ELSE" sentiment from the "WHAT DOESN'T KILL YOU" stamp set.


My son has been crafting at my workspace. Not sure how I feel about it... I don't think I can afford this hobby for the both of us. HAHA. The Crafting makes my day" sentiment is from the Susie stamp set.


Are you ready to get your stamp on or hit the shop after seeing all these fun stamps?! They are so fun and they certainly add to the humor of this spread!

Thanks so much for visiting today!


Friday, April 16, 2021

ADVENTURE PICTURE FRAME CREATED WITH ARTESPRIX SUBLIMATION PRODUCTS!

Nicole here! As promised… I have something that goes with the “Beach House” Sequin Pillow CaseI made earlier this month. No, I didn’t make another pillow case, but I made a Picture Frameto go with the Sequin Pillow Case It’s a beach theme and I just love it! My husband rolled his eyes at me

when I got so excited and showed him both of the projects I created. He thinks I’m crazy and I might be...a little. :)


To create this Artesprix Picture Frame, you will need the following:

Materials:


Step by Step Instructions:


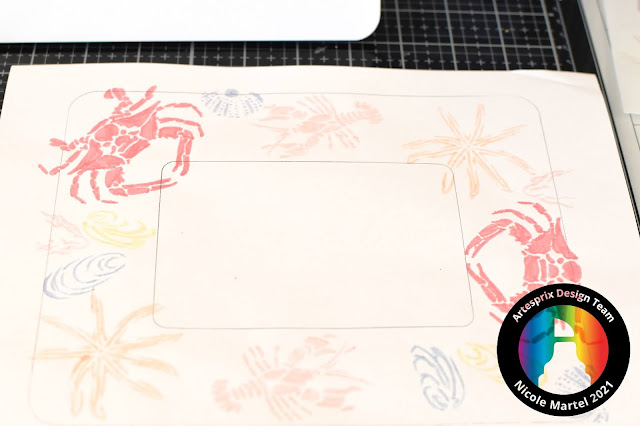
Step 1. To begin, I used the Artesprix Picture Frame as a template to trace on white cardstock using a pencil.


Step 2: Next, I used the Original and Pastel Sublimation Markers to color in the sea creatures using the

Gulf Coast Creatures Stencil. 


Step 3: I used the heat tape to secure image in place over the paper and then cut two pieces of Artesprix

Protective Paper and create (as Artesprix likes to call it) a “sublimation sandwich,” which means you place

your project facing the top between two sheets of protective paper.


Step 4: Set your heat press to 400 degrees Fahrenheit and timer for 30 seconds. Make sure you place your project in your heat source with the design on top of your sublimation sandwich. You want your design facing towards the top of the heat press. After your timer has completed, make sure to let your project cool down on the Protective Project Mat before handling it. 


Step 5: Gently remove the protective paper from the Artesprix Picture Frame to reveal your vivid design!

Assemble picture frame as desired, vertically, or horizontally. Place protective mylar film in the picture framebefore assembling. Embellish as desired!


If you haven’t seen the Sequin Pillow Case that matches this frame, click here to be inspired! Don’t

forget to stop by the shop to pick up yours today! Click here to shop through my affiliate link!


These products are so much fun. Give them a try… you WILL love them! I promise.

Thanks so much for visiting today!


Tuesday, April 06, 2021

YES, PLEASE!

Hi everybody! I'm up on the blog today over at The Crafter's Workshop with this adorable layout I created using the Texture Tile stencil, Watercolor Paper, and some ColorSparx Watercolor Powder. Fun stuff!


I love the ColorSparx Powders because you can add a little or a lot of powder to get whatever shades you want! I found it interesting that the yellow powder looked more green, but when I applied it to the watercolor, it was a pretty yellow!


It's easy to use stencils with ink and blending tools. And super simple for those who don't want to play with modeling paste and other mixed media products. 


I used Pinkfresh Studio's  Some Days Collection to embellish this adorable layout. :) I'm totally loving the yellow background on this layout!


Thanks so much for visiting today!