Showing posts with label INK ROAD. Show all posts

Tuesday, January 18, 2022

MIXED MEDIA CARD/THE CRAFTER'S WORKSHOP

Hi everyone. I'm back with another mixed media card I created. I'm not normally a card maker, but sometimes, I do make them and when I get an idea...I just run with it! Who would have thought that watercolors and acrylic paint looks very cool together!? I'm going to show you...

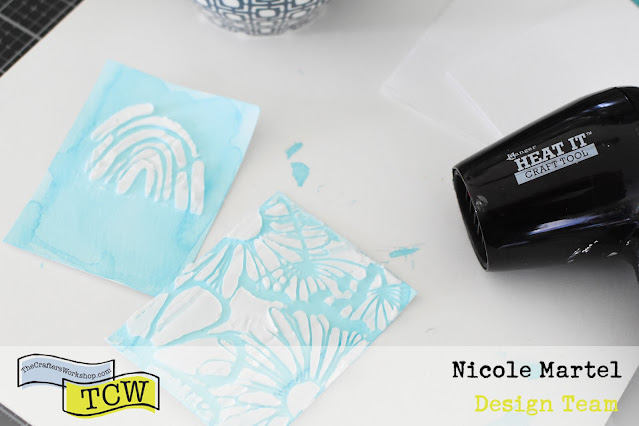
To begin, I cut a piece of watercolor paper to measure 3x4. Next, I mixed the Cerulean Blue watercolor powder from the TCW9057 ColorSparx Set with water and painted the front of the card to create a light blue background. I used a heat gun to dry it and then repeated the process once more to get a vibrant background.


Then I taped the TCW948 Framed Flowers stencil over the watercolor so it would stay in place. Then, I used used a palette knife to pull the Light and Fluffy Modeling Paste through the stencil. To prevent streaks, simply work from the top, down... in one fluid motion.


 I used a heat gun to speed up the drying process.

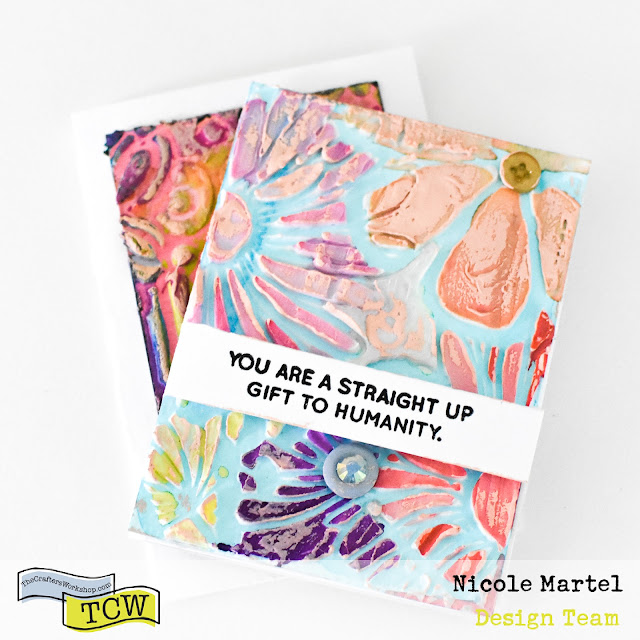
Once the Light and Fluffy Modeling Paste was completely dry, I colored in the flowers with a small paintbrush using a few pretty ColorSparx. I used Scarlet, Lime Green, Cerulean Blue, Orange, Orchid, and Marigold.


If you find that the watercolor is too runny on the watercolor paper, pick up the excess with the tip of a paper towel to remove the water. Repeat the process with each color.


After the card was completely dry, I glued down the buttons, gems. I stamped the sentiment onto white cardstock and then mounted it to the card with foam squares.


I felt that the card was missing something... a bit of color/texture...so I grabbed some acrylic paint and lightly smeared the acrylic paint all over the flowers using my finger. It's amazing how much texture the paint adds to the card. I'm super pleased!!


What do you think? Isn't this beautiful? I'm seriously trying to refrain from locking myself up in my room all day to play with more cards. HAHAHA...Maybe later.

Thank you for visiting today!


Wednesday, December 29, 2021

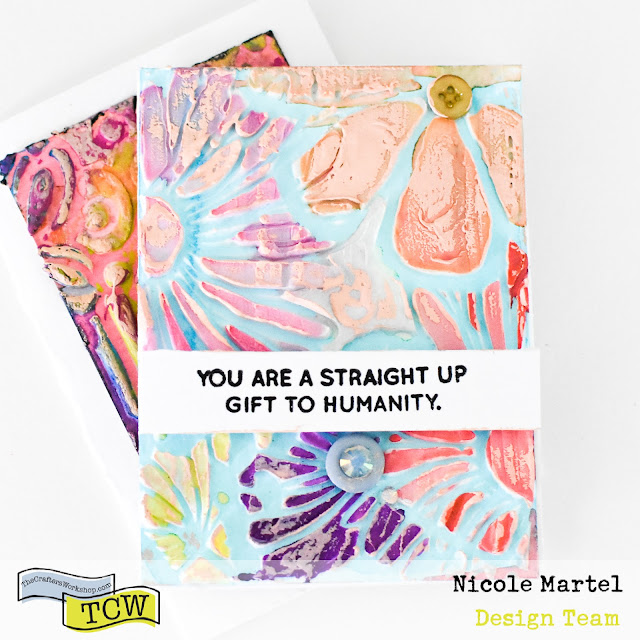
YOU ARE A STRAIGHT UP GIFT TO HUMANITY CARD/THE CRAFTER'S WORKSHOP

Hello friends! It's been too long since I really played with my watercolors... so that's what I did and it felt sooooo good, getting messy. I'm going to share with you how to make these cards step by step and hopefully, it will inspire you to try this technique on your next project!


To begin, I mixed the Scarlet Colorsparx with water and painted a piece of watercolor paper that measured 2 1/2x3 3/4. I used a heat gun to speed up the drying time.


Once the base was completely dry, I pulled the Light and Fluffy Modeling Paste through the TCW935 Secret Garden stencil, making sure to apply a good amount of the paste and pull the paste from top to bottom in one fluid motion to prevent streaks.


 I used a card to go around the edges to smooth any excess paste from the edges.


After the Light and Fluffy paste was completely dry, I painted the patterns using a variety of Watercolor powders. The colors used on this card include: Scarlet, Lime Green, Marigold, Orange, Orchid and Cerulean Blue.


After the watercolor was completely dry, I used my fingers to rub acrylic paint all over in different areas. I had no idea how pretty acrylic paints would look against the watercolor!! Seriously, the combination is fantastic!


After the acrylic paint was completely dry, I mounted it to a 3x4 card. Then, I stamped the sentiment onto white cardstock and added it to the card with a few gems.


 Isn't this so cool!? I just love it. Thank you for visiting today!


Saturday, December 25, 2021

HAPPY BIRTHDAY CARD/THE CRAFTER'S WORKSHOP

Happy Christmas friends! I'm back with a fun mixed media card I created with the TCW943 Garden Tile  stencil. I have been wanting to use this stencil for sometime now. I really like the pattern.  I thought it would be pretty with three different shades of purple inks... so I decided to create this monochromatic birthday card!


To begin, I made a card from white cardstock to measure 3x4 when folded. Next, I taped the stencil down using washi tape. 


Then, I started blending the colors from the darkest at the top, to the lightest towards the bottom.


To complete the card, I stamped the happy birthday sentiment from Ink Road's Amazing Human stamp set onto a scrap piece of white cardstock using purple ink and then cut it out and mounted it to the bottom of the card. Then, I glued the buttons and gems. Super simple, but very pretty! I always need a card...especially birthday cards, which I need to make more of!


Thanks for visiting today and I hope you have a wonderful Christmas day!


Saturday, October 30, 2021

YOU'RE SIMPLY CRAFTASTIC JOURNAL/THE CRAFTER'S WORKSHOP

Hello friends! I hope you're having a great week so far. Today I'm sharing this super fun art journal I created using a variety of stencils, stencil butters and the newest Full Size Journal Die from Sizzix that Eileen Hull designed! After playing with the kit that Eileen sent to me to play, I had to buy it! You can use it for all kinds of different journals. I decided to make a crafty journal to sketch out my ideas etc. 


For the full tutorial, please visit The Crafter's Workshop's blog by clicking here to see yesterday's post.

This journal was super fun to make. I used The Crafter's Workshop's TCW840 Sun Valley, TCW935 Secret Garden, TCW936 Messy Writing and TCW948 Framed Flower stencils and lots of inks from Catherine Pooler to blend in the images. I used stencil butters for the inside journal covers.


This book fits A5 journals perfectly. I bought a few Kraft Journals from Amazon really cheap and altered them.


The stamp sentiment is from the "I Arted" stamp set from Ink Road. I decided to stamp it in black to make it pop against all of the pretty colors.


I glued the heart acrylic within the sun. Elle's Studio has them in their shop and they are available in a variety of colors and shapes!


Here is how it looks with the books inside the journal. Super pretty!!


This turned out super cute. Cuter than what I initially had in mind. Love when that happens!


Here are the journals I altered. The stencil butters are sooooo vibrant and shiny. SOOOOOO BEAUTIFUL!


Think you're ready to make one of your own? I'm already itching to make another one. It's something different for me...and I just love it. Thanks so much for visiting today!


Monday, September 27, 2021

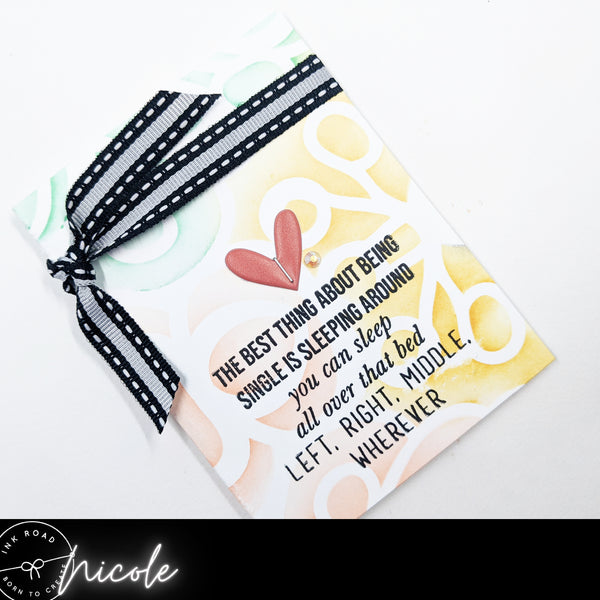
THE BEST THING ABOUT BEING SINGLE/INK ROAD

Hello friends! I have a fun mixed media card I created using the Single and Savage stamp set from Ink Road and The Crafter's Workshop's TCW935  stencil.


To begin, I cut a piece of white cardstock to measure 6x8 and then I scored it in half. Next, I used inks and blending brushes through a stencil I had in my stash to create the fun background. Then, I added the sentiment in black. 


Next, I used a knife to cut a slit between the fold of the card so that I could feed the ribbon through the inside of the card.


Here is what it looks like...


I do this so the ribbon isn't bulky against the card. And I used a min stapler to staple the ribbon in place before tying the ribbon. I stapled a puffy heart sticker above the sentiment to fill in some of the space.


To complete the card, I glued a tiny gem next to the heart.


If you would like to see the entire stamp set, click here! Thanks so much for visiting today.


Monday, September 06, 2021

GOOD HEART BAD MOUTH CANVAS ZIP CASE/INK ROAD

Hello friends! I have been making fun projects to celebrate the kids going back to school... I think I'm more excited than Edward. I am thinking about sneaking this in his bookbag for his first day of school... I'm sure he will be like WTF because he does not like marvel... I know... Something is wrong with him. I love marvel movies and characters! Come see how I created this adorable Poly-Canvas Zip Case using Artesprix's Sublimation Markers and the Good Heart Bad Mouth and Full Circle Stamp set. It’s super cool and I had a lot of fun making it.


Materials:

Ink Road Stamps: Good Heart Bad Mouth, Full Circle Vol3:Heros

Original and Pastel Sublimation Markers

Sublimation Ink Pad

Poly Canvas Zip Case

Plain Copy Paper

Heat Tape

Protective Paper

Heat Source: Artesprix Heat Press, Dry Iron, or Home Iron

What are Artesprix Sublimation Markers?

Magic Ink that transfers their beautiful colors from plain copy paper to a polyester product with a heat source. Iron-on-Ink Markers are the way to personalize sublimation, which is specially formulated inks that transfer only when activated with heat.

Step-by-Step Tutorial:

Step 1. Place the Poly Canvas Zip Case on a piece of plain copy paper and trace the outline using a pencil to determine the area that you have to work on. 


Step 2. Stamp the images onto the copy paper using Sublimation Ink. 


Step 3. The ink may look a little muted...that's OK! Once it goes through the heat press, the colors will be vibrant!


Step 4: Use the Sublimation Markers to color in your images. I used a fine tip black sublimation marker to go around the circles a few times. to make them bolder. 


Step 5: I used a tracing application on my phone to take a picture of the stamp. Then I was able to flip it to mirror and trace the image over my phone for the text! Super cool!! And you can zoom the screen to make the text larger. I wish I had discovered this application sooner!


Step 6:  Using the Artesprix Heat Tape, tape your blank down to your design. Next, Create your sublimation sandwich. Cut two pieces of Protective Paper to cover your project on the top and bottom. Place a small piece of protective paper inside the canvas to prevent the ink from bleeding through the canvas. 

Sorry! I forgot to take pictures... but here's what it would look like on a different project I create...


Step 7. Turn your heat press on and set the temperature to 400 degrees Fahrenheit and the timer for 45 seconds.


Step 8. Place it inside the Heat Press (making sure the zipper is placed on the outer edge of the heat press) and close the machine. The Heat Press will beep indicating that your project is finished!


Step 6. While wearing protective gloves, lift the handle and remove your Poly-Canvas Zip Case. Place it on the Protective Project Mat and give it about 2 minutes to cool down. Gently remove protective paper to reveal your vivid design!


Thanks so much for stopping by today!