Monday, November 21, 2022

MIXED MEDIA CARDS/THE CRAFTER'S WORKSHOP

Good morning friends. I’m sharing two floral cards I created with a few 6×6 stencils and ink. I love creating these types of cards because it’s so therapeutic for me…and I just enjoy it!

Disclaimer: “The Crafter’s Workshop provided me with product to create these projects. The opinions I share are solely my own.”

To begin, I placed the TCW992 Festive Flowers Stencil over the card base and started blending with the yellow ink. Next, I grabbed another piece of white cardstock and then I blended different color inks through the TCW983 Apple Blossom stencil to create flowers and then cut them out using scissors. I used foam squares to mount the flower to the center of the card and added a splash of white spray mist and embellishments to complete the card. So pretty!! I used a black pen and ruler to doodle around the card.

I used the same process to create the second card. The background was created with the TCW1047 Banana Leaves stencil and TCW984 Dogwood Pair stencil.

This card was super fun and simple to make. I can’t wait to make a few more using the bird stencils!

I hope you were inspired today! Don’t forget to visit the shop to check out all of the beautiful stencils available! Thank you so much for visiting today.

-Nic

Friday, November 18, 2022

WINTER SNUGGLES/TANDIART

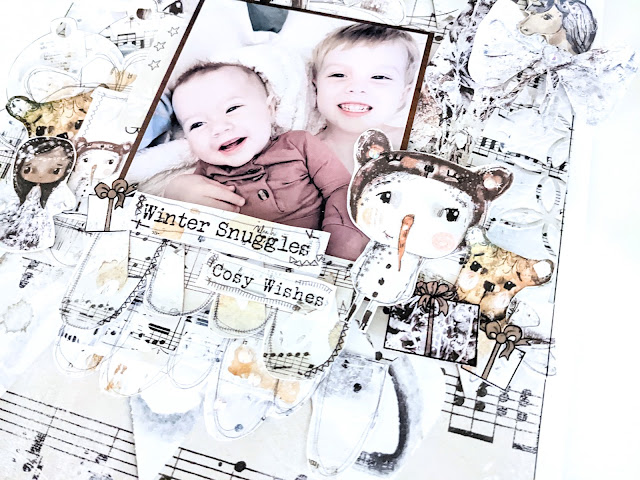
Happy Friday, friends! Today I'm sharing a layout I created for Tandiart using their Winer Snuggles digital collection! For those who haven't tried using digital collections, you don't need anything fancy... All you need is a color printer, good quality cardstock and a pair of scissors! It's really that simple. And...it's more affordable thank purchasing paper collections from the store. 


I love this collection so much. There are so many adorable elements to this collection and my favorite include the angel, bears and snowman. Oh...and the unicorn! Isn't this layout magical?! I cut bits and pieces from the Winter Snuggles Advent Calendar. I chose to do this because the prints are smaller.


I stamped a star onto a scrap piece of printed paper and fussy cut it to use for the top of the tree. I popped the bow on top of the second tree using foam squares and added the unicorn for fun...looking down at the cute little kiddos. 


I wanted to add some presents...so I stamped presents on scrap pieces and fussy cut them to use. I colored the ribbon on the packages using a brown marker to bring out the colors in the photo/bear and angel. I think it is perfect!

I use foam squares to add the sentiments to add dimension. I also popped up the first scalloped border using foam squares.

Seriously, isn't this the cutest layout? I just love this so much and I can't wait to give it to my sister! 

Don't forget to stop by Tandiart's Esty shop to check out all of her beautiful collections. She has stickers too!

-Nic


Thursday, November 17, 2022

BELIEVE IN THE MAGIC/STUDIO FORTY

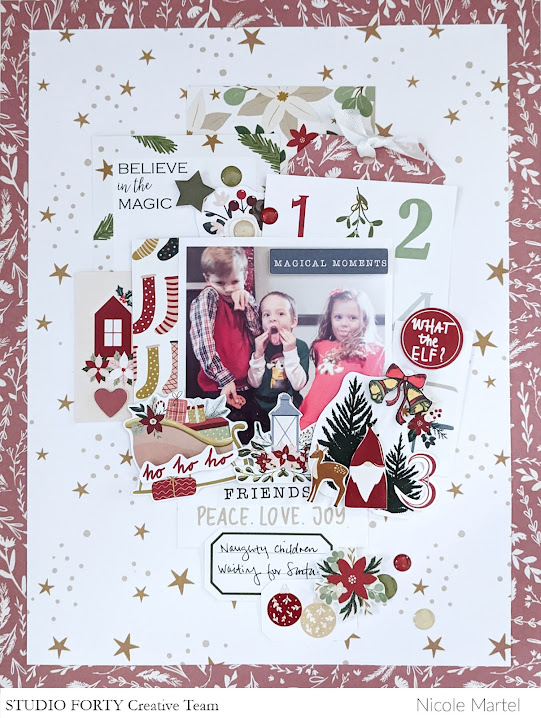
Hello friends. I'm sharing another layout I created for Studio Forty using their Together Collection. My first holiday layout of the year. :) I've had this photo for like ever...and have never used it on a layout. This is such an oldie, but goodie! It brings a smile to my face...Edward with his cousins. 

I did a lot of fussy cutting with the elements you see at the bottom of the photo. I cut a few of the elements from journal cards and die cuts to trim them down.

 The bell was stamped and colored in with markers! Then I carefully cut the bell from the paper.


I think it adds just the right touch above the cluster of embellishments!


I layered a few stickers and die cuts at the bottom. The poinsettia was cut from a journaling card and mounted on the journaling label with a foam square to add dimension. 

I made a tag using the patterned paper and a metal die and added a few chipboard pieces and sticker dots at the top. I JUST LOVE THIS LAYOUT! I hope you do, too. :) Thanks so much for visiting today.

-Nic
Friday, November 11, 2022

LOVE THIS/PINKFRESH STUDIO

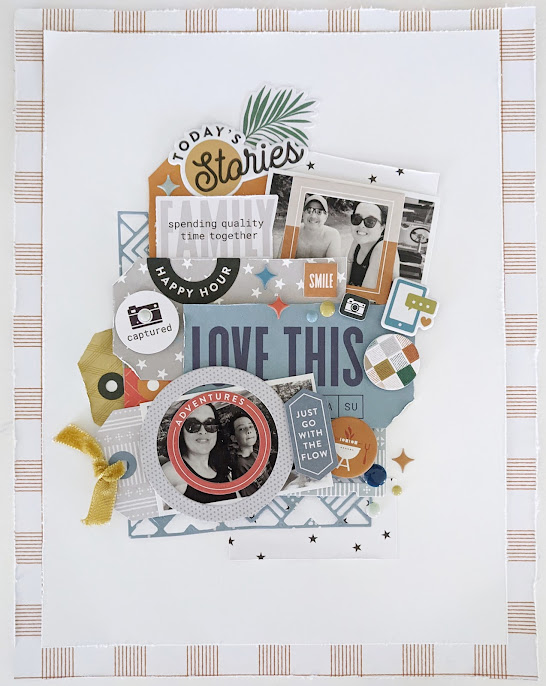
Happy Friday, friends! I am off work today and I found some time to create this layout for Pinkfresh Studio's monthly challenge. This month is all about texture!


Initially, I was going to use stencils to create a fun mixed media background, but I didn't like how it turned out so I tore the layout up and started another...and this is how it turned out. I'm so pleased with this layout! I love it so much.


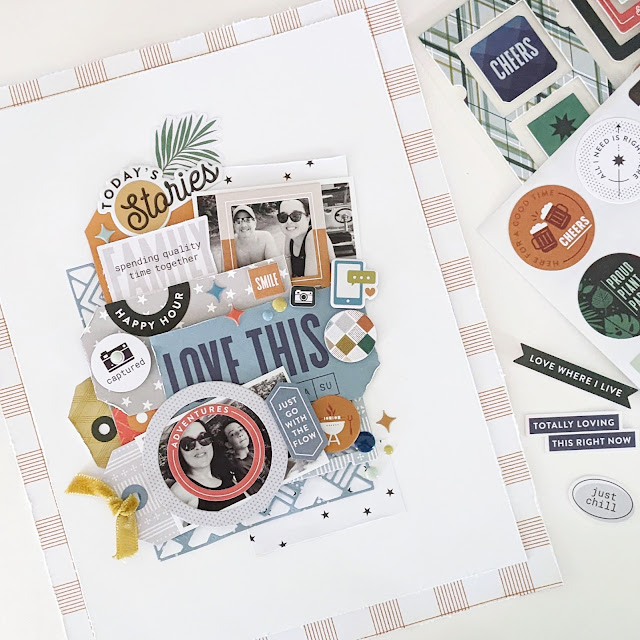
I distressed the edges of the tags and scraps of paper. Lots of dimension on this layout, too. Aren't the embellishments fun. I absolutely love Pinkfresh Studio's products. Maybe, one of these years, I'll be invited to join their team. THAT WOULD BE FREAKING AWESOME...JUST SAYING.


Love how playful this layout is and all the circle elements.


What do you think? Cute, right!? There's still plenty of time to join in on the challenge. :) 

Check it out here. Thanks so much for visiting today! I appreciate my readers! Thank you for following me all of these years. 

-Nic

Monday, November 07, 2022

FAMILY/THE CRAFTER'S WORKSHOP

Happy Monday friends and family. I'm sharing this layout I created using The Crafter's Workshop Leafy Collage stencil and Simple Stories' Harvest Market Collection!


To create the background, I colored the white cardstock using a light orange ink and a blending brush so that when I inked the stencil, I would not get white lines... I wanted the orange to kind of blend in with the colors and embellishments on this layout.


I alternated the colors going down the layout to create depth to the leaves. I love how pretty the two oranges look against each other. It's subtle, but it's there!


I cut the tags from the cut apart sheet and added the ribbon and twine.


The colors are so pretty! And the embellishments are too pretty not to use. I had to refrain from using them ALL. I know, it looks like I used them all, but I didn't. :)


I used foam squares to pop up some of the die cuts and stickers to add dimension. Everything came together so beautifully. I'm super happy with it. Thank you so much for visiting today!

-Nic

Friday, November 04, 2022

MIXED MEDIA ART JOURNAL/TANDIART

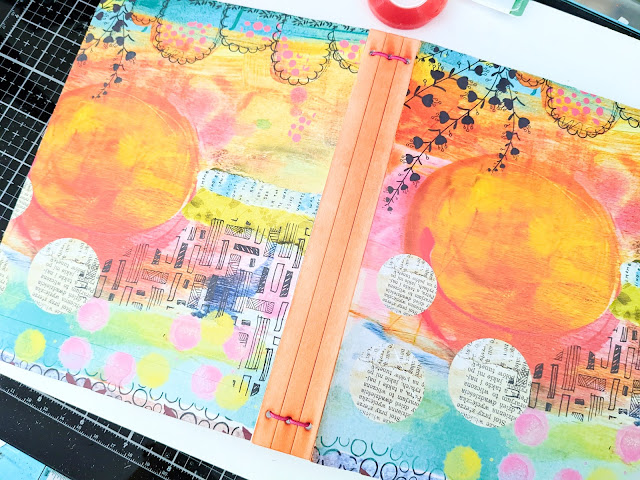
Good morning! I'm back with a fun tutorial. Today, I'm going to share how easy it is to make your very own art journal using the Pumpkin Patch digital collection from TandiArt. I had a lot of fun making this and the colors make me happy! 

To begin, I used Sizzix's Full Size Journal dies by Eileen Hull to cut the mat board pieces.  Next, I printed the digital print onto a letter size sticker photo paper. I printed two sheets. One for the front and back of the journal.
Next, I carefully covered the boards with the print. I used scissors to trim the excess from the edges.
Then, I used a blending brush and orange ink to color the spine of the book.
 I selected a color that would look similar to The orange print.

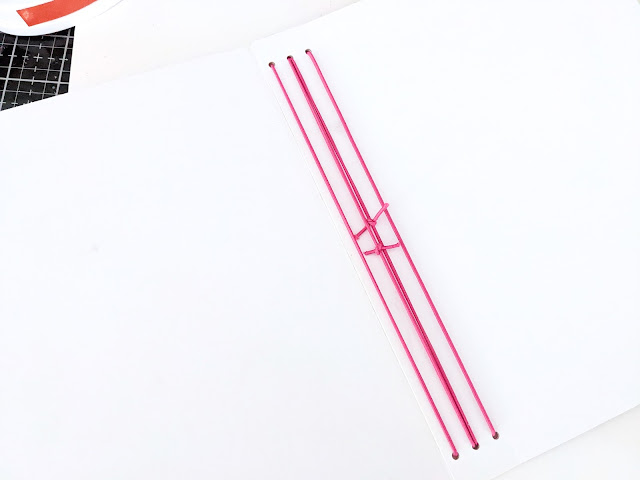
Next, I used some elastic pink string to bind the book together along with strong tape to hold the two pieces together.
The Red Liner Tape is super strong and works well for this journal. I applied a generous amount of tape along the spine. Then, I added the other piece over it to hold them together.

Finally, I was ready to add the string so that I had something to hold the journals in place. Be careful when adding the string. Make sure the string is in a row...so it looks neat.

Once the string has been added, simple tie the pieces into a Knott and trim the excess. This journal holds A5 journals. I purchased them on Amazon!


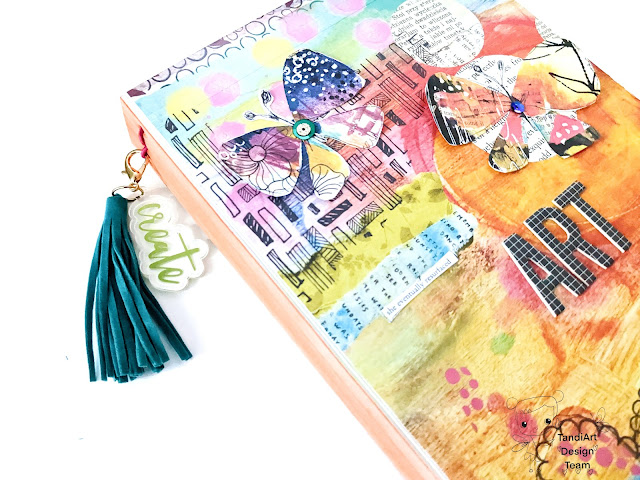
I printed a few butterflies and added some embellishments to add dimension. Tandiart has stickers you can use instead of the digital prints, too. The colors are absolutely beautiful!


Isn't this o pretty!? I love the colors so much and the butterflies. Click here to check out Tandiart's digital products! Thank you for visiting today.

-Nic

Wednesday, November 02, 2022

YOU'RE SEW SPECIAL/BRUTUS MONROE

Hello, friends! Have you seen the adorable stamps this month? O.M.G., I freaking love the elves. Seriously, I can't wait to use them all. :)

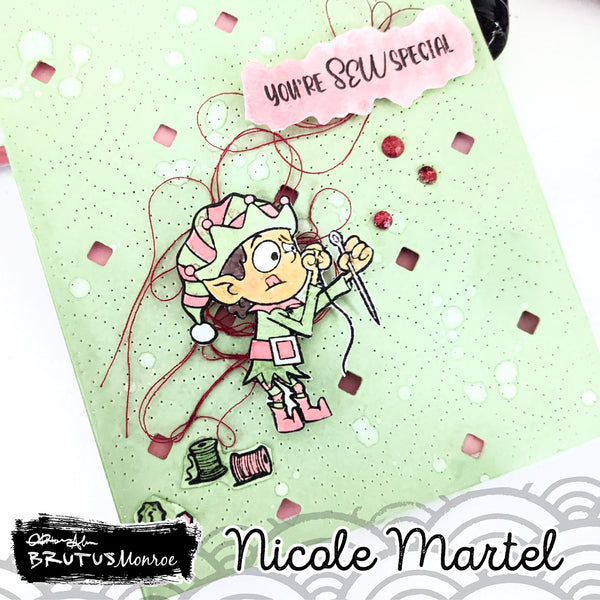
I knew immediately how I was going to use this little guy... and that tongue. HAHA, I just love it. To begin, I used a metal card panel to add the stitching background and diamonds, Next, I sprayed each panel with Chroma Mist. The colors are so pretty!

After that, I set the panels aside to dry and used my Misti to stamp the little elf onto watercolor paper. Then, I used tiny watercolor brushes to color the image using the Chroma Glaze.

I ended up adding another layer of color to make it more vibrant after the first layer was completely dry. I used my Karin markers to color his face and hands.

After I glued down the red string and mounted the pieces onto the card base using foam squares, I splashed some white Chroma Mist all over to add some snowflakes. I made sure to cover the pieces I didn't want to cover with a scrap piece of paper.*

Isn't he the cutest!? He makes me smile. :)

Thank you so much for visiting. Be sure to check out all of the adorable elfies in the shop

-Nic