Showing posts with label AMERICAN CRAFTS. Show all posts

Monday, July 21, 2025

WONDER TRAVEL ALBUM/PAIGE EVANS ADVENTUROUS COLLECTION

Good morning, friends! Nicole here with a few new pocket pages and 6x8 layouts I added to my sister's album. I have been working on an album using pictures from her trip to London and it's been so much fun. For this album, I am using Paige Evan's Adventurous collection. There are so many fun elements in this collection and it's perfect for this album.
I am a sucker for chipboard frames so I decided to cluster a variety of chipboard frames on this 6x8 layout. I backed the chipboard with a few photos, added some ephemera, rub-ons and enamel dots and that's it! I try to make these pages simple to help finish the album quicker.
I cut the floral acetate sheet to measure 6x8, punched some holes in it and added the big alpha foam stickers and chipboard sentiment. LOVE how pretty this looks! It made such a pretty insert page for the album.

I kept the pocket page spread simple so that the main focus is the pretty photos. I only added very few embellishments.

Here's my last spread for the day. I used a chipboard frame to frame the photo and added a variety of flowers behind the frame to make it pretty. I added the "Delights" rub-on directly onto the photo and added a label sticker so my sister can write the name of the floral place she visited. I had so much fun making these layouts and I hope she loves this...Check back in a few more weeks to see a few more pages from her trip! Also, I shared a process video on how I set this album up yesterday on the hop. Click here to check it out and don't forget to subscribe to my channel for more inspiration coming your way! Click here, to shop for the Adventurous collection through my affiliate link. Thanks for visiting today!

Nicole

Wednesday, July 02, 2025

ADVENTUROUS LAYOUTS/A CHERRY ON TOP

Hello, friends! Nicole here with a few more travel layout spreads I created using Paige Evan's Adventurous collection. Today, I'm going to share a few fun ways on how I include layers to add dimension and beauty to my layouts to make them unique and fun.

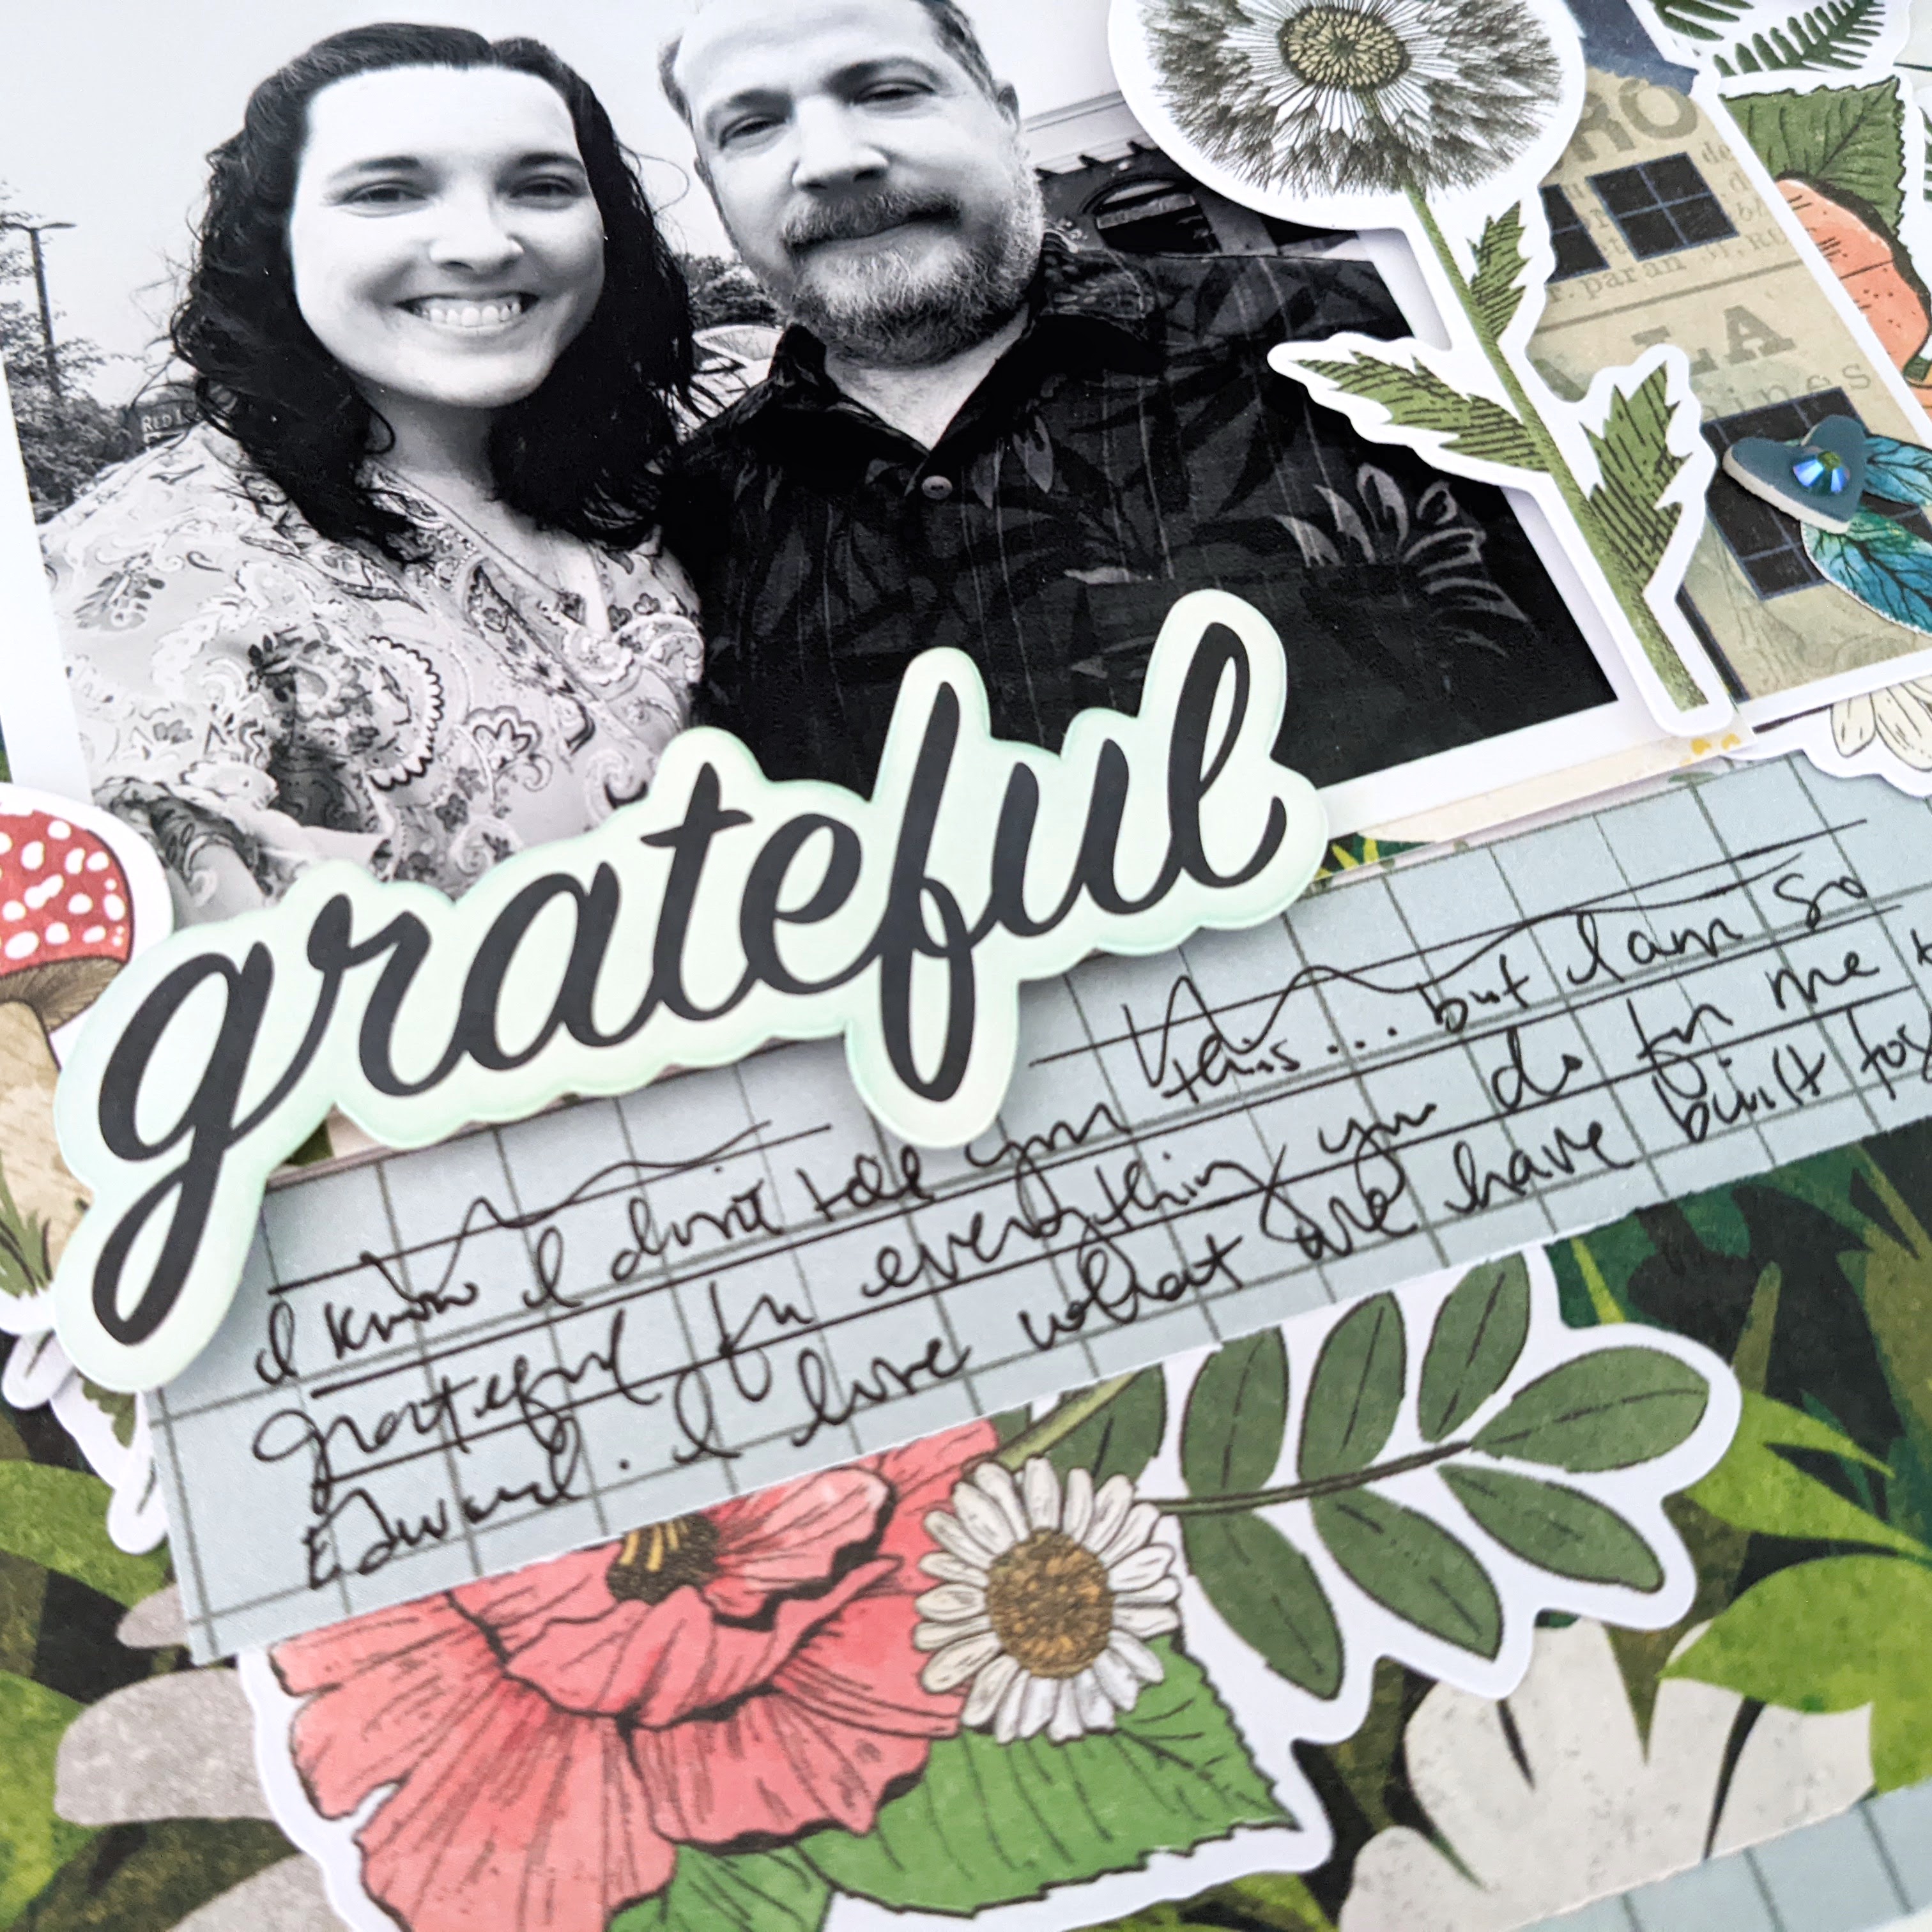
Theres a variety of layers on this layout. If you look closely at the very top and bottom of the layout, you'll notice how I cut the chipboard circle in half to use as a fun cluster pair with the floral stickers. At the top left-side of the layout, I cut out two mini labels from the patterned paper, punched holes through the one tag and added string to make it more fun. I layered two border stickers below the photos and fed some string through the label sticker and stapled the string at each end.
Here is another spread similar in design. However, I decided to play with the large foam sticker alphas. They are so pretty with the gold foil. I glued the puffy sticker ice cream cone 
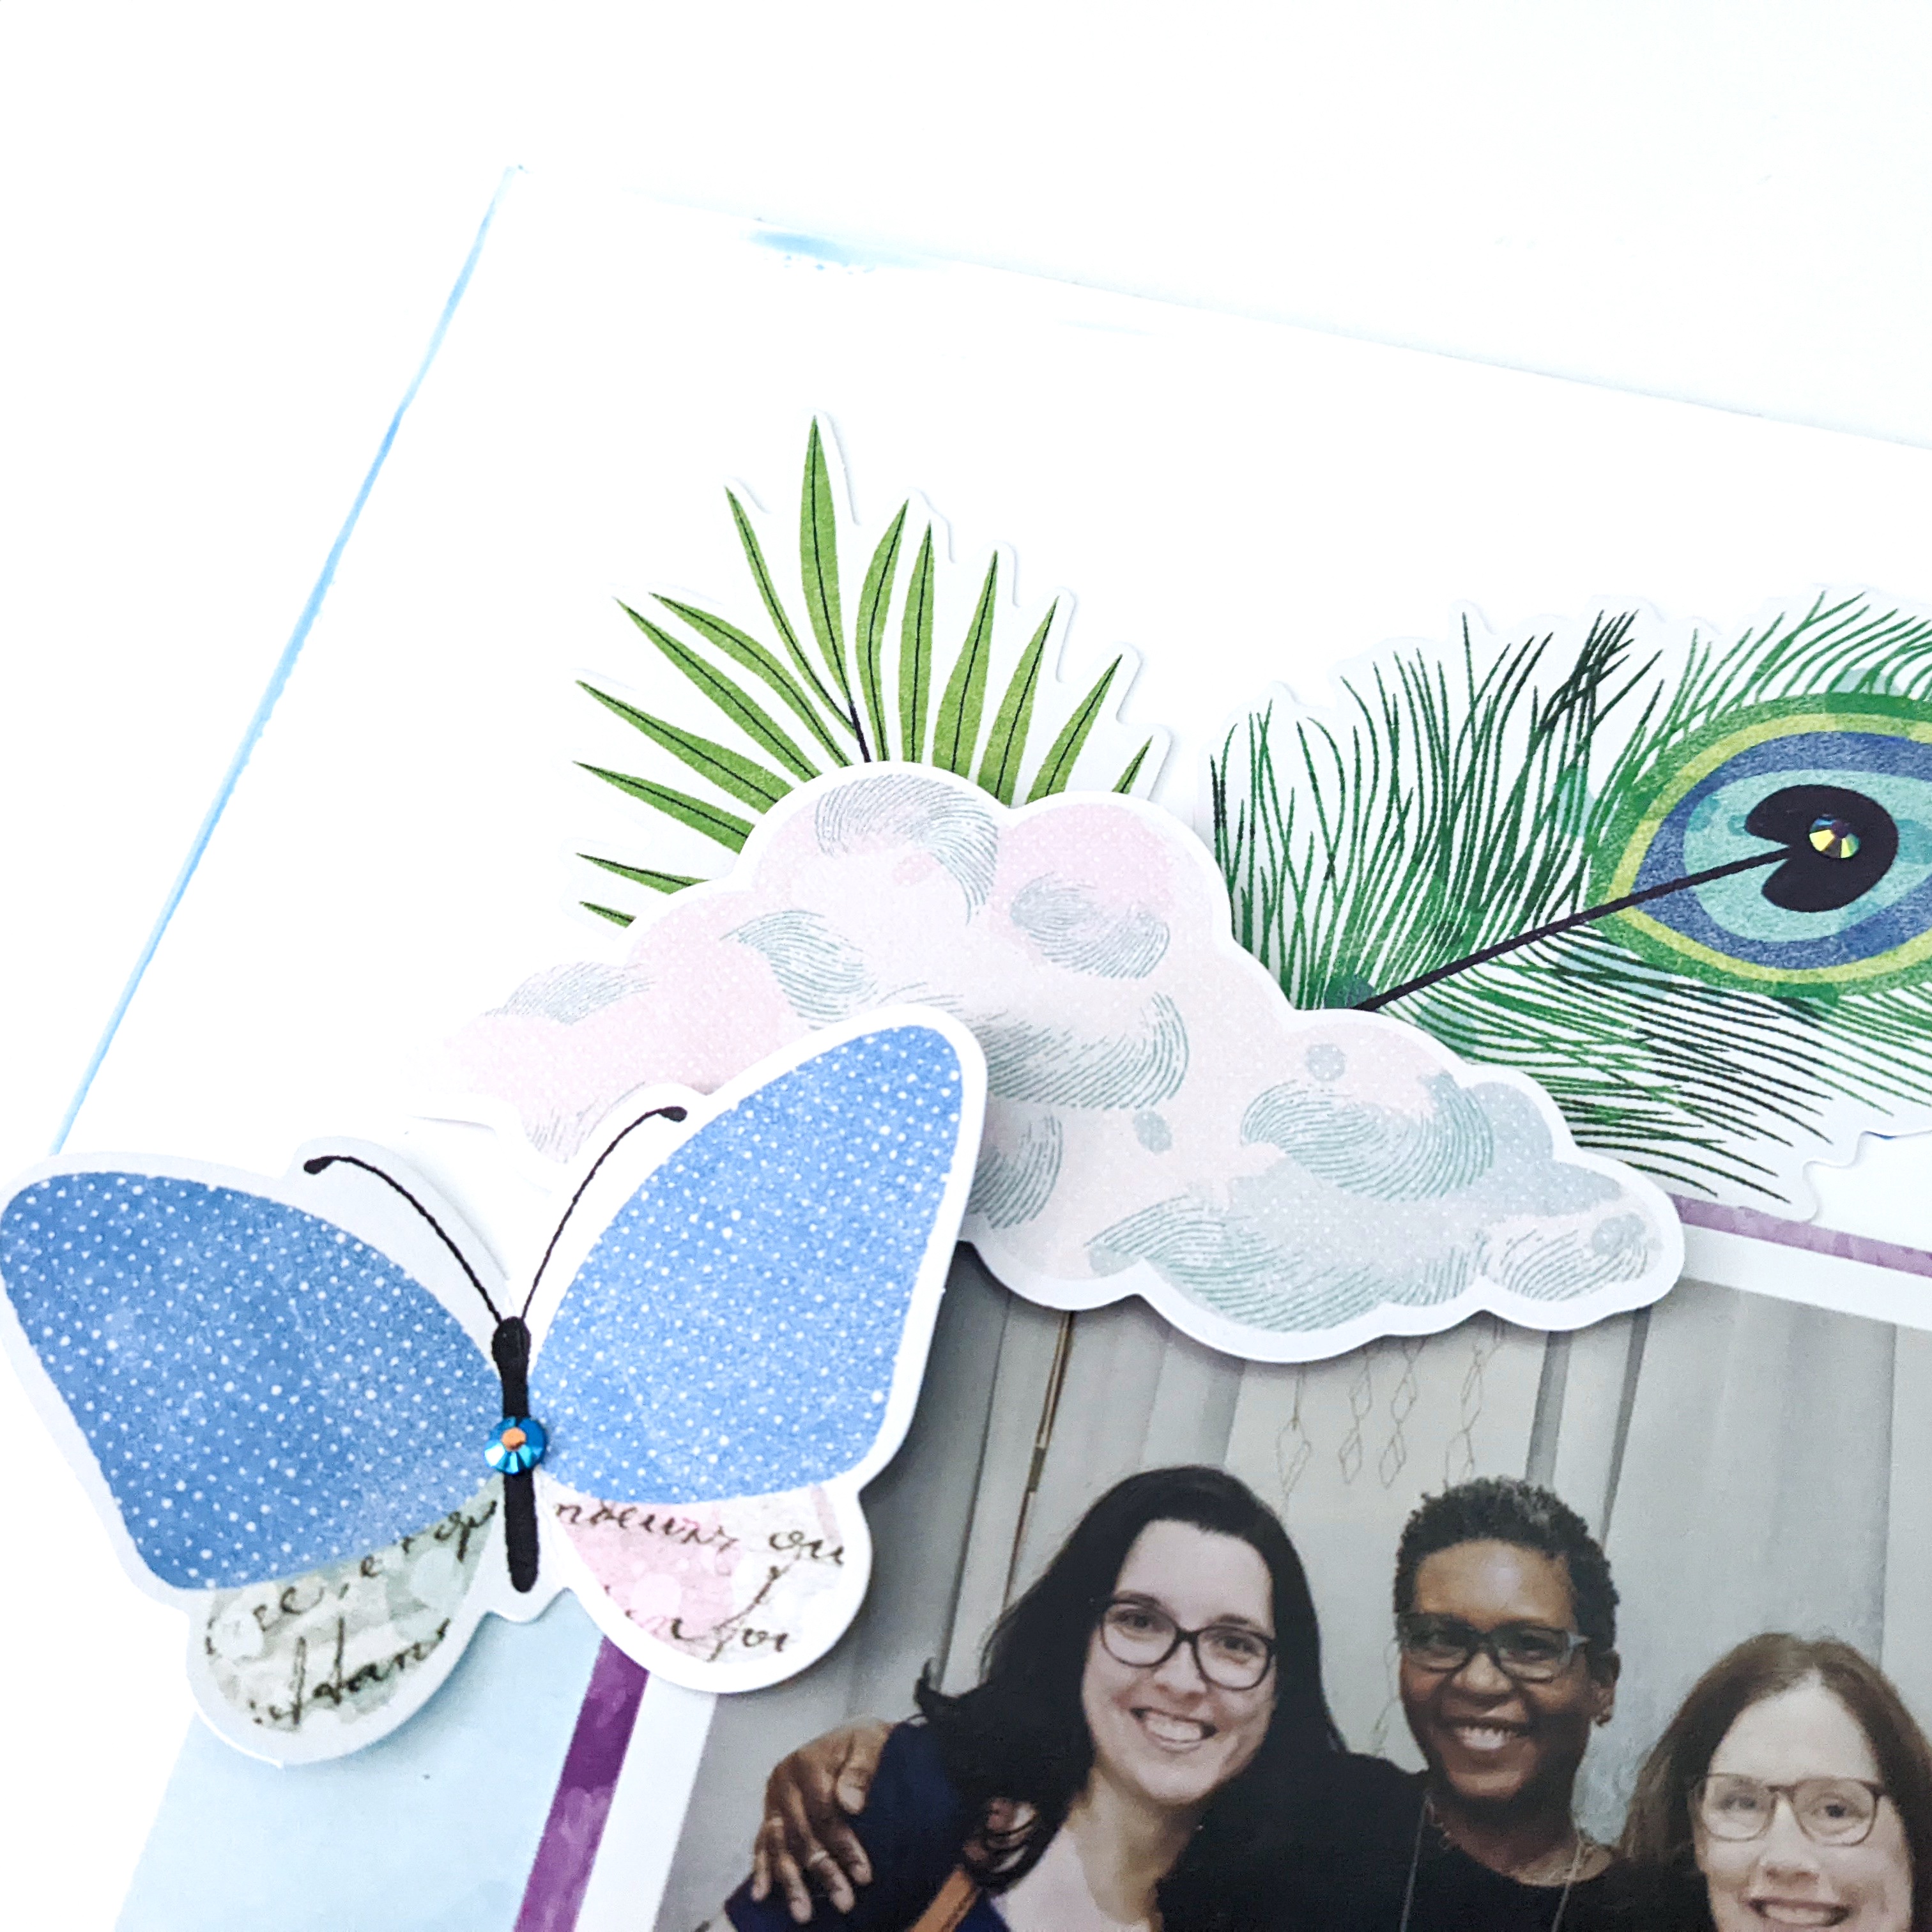
puffy sticker to the alpha, added the plane sticker and fussy cut the little buildings from patterned paper to tuck between the letters. Super fun! I used foam stickers to layer a few of the flowers at the top corner of the layout.
I kept this design pretty simple focusing on the photos. I LOVE the floral print and gold foiled sentiment patterned paper...they are so much prettier in person.
Rub-ons make great additions to photos! I added a few throughout this pocket page spread. Can you spot them all? Aren't they beautiful?
I hope you found these pages inspiring. I can't wait to give this to my sister! It came together nicely, and I just love it...even though it is pretty girly for me...lol. Thank you for stopping by today!

Nicole

Wednesday, October 02, 2024

REASONS TO SMILE FLIP BOOK PAGES/A CHERRY ON TOP

Hello, friends! Nicole here with a few more pages I created using the Reasons to Smile collection from Shimelle. This collection makes me so happy with all the rainbow colors. This is going to be one HAPPY flip book when I’m done.
I used the 4x6 cut-apart journaling card to include journaling and then I added some foam stickers and washi tape and other stickers to make it fun.

I added a strip of washi tape down the left-side of the photo and then added the vellum floral sticker on the photo. Isn’t it beautiful? I just love these vellum stickers! I used foam squares to pop up the camera and stapled the sentiment onto the photo.
I cut 4 3x4 journaling cards to include in the pocket pages. I used foam squares to pop up some of the embellishments to add dimenstion.
I cut the “Put Yourself First” sentiment from a journaling card and stapled it to the photo because I just love this sentiment so much. And it’s foiled in gold…so pretty!
I used this collection to scrapbook Edward’s first day of school. The backpack paper is perfect for this layout and the books…
I really like the “remember” foam square. I tucked a variety of stickers and die cuts and both sides of the photo to fill in the white space.

For the next spread, I layered two flower die cuts using foam squares and added the pink bubble gem to the center.
I added a vellum floral sticker to the bottom of the paper to help frame the photo and then added the “feeling good” sentiment using foam squares to add dimension.


Finally, the last page is a page using a picture of me sitting outside, reading. I love to read and had fun with this spread.
I added a few die cuts to the 4x6 journaling card at the top to make it fun. And I added a few book stickers and die cuts at the bottom. I especially love the little teacup. Super cute.


Have you picked up this collection yet? It’s super fun and the more I play with it, the more I love it! Click here to see the full collection. Thank you so much for visiting today.


Nic

Friday, October 21, 2022

GRATEFUL

Just sharing this gorgeous layout I created using American Craft's patterned paper and die cuts from Vicki Boutin. I am loving the color scheme and all of those gorgeous flowers!! I went a little overboard with the die cuts.


Since the "Grateful" die was really bright white and I didn't think it looked right against the dark colors, I used a blending brush to add some green ink to it. :)


Aren't these die cuts beautiful? I just love them so much. They have been in my stash awhile... sometimes, I have a hard time using my favorite collections...I'm trying to break that habit. 


More flowers on the right-side and I really wanted to squeeze that house on here somehow... I really enjoying layering embellishments on my projects. They make me happy.


I used a butterfly and sentiment metal die from Brutus Monroe to create the butterfly and sentiment at the top of the layout to fill in the white space.

And I popped the dragonfly up sing foam squares to add dimension. Love how whimsy this turned out.


What do you think? It's a lot, I know... :) Thanks for visiting me today, friends!
-Nic


Monday, August 01, 2022

THERE'S SUNSHINE IN MY SOUL/THE CRAFTER'S WORKSHOP

Good morning friends. I am squeezing in my last summer layout before I start working on some fall projects! I was excited to finally use the TCW2323 Shell Collection Slimline Stencil. It’s so beautiful.


To begin, I selected a few ink colors using colors from the embellishments. I tried to keep the colors close so that the layout wold have a nice flow. I used a different brush to blend in each color at the bottom of both pages. I do not recommend using the same brush…you don’t want the colors to mix.


I always get excited lifting the stencil to see the full revel underneath the stencil… Isn’t this beautiful. The details are so lovely.

I really enjoyed making this layout. The colors are so pretty and they make my soul happy! The stenciled border at the bottom really makes this layout pop. What do you think?!


I think I’m going to try this technique more often for my layouts. The stencil just add so much more details.


Thank you so much for visiting today. Don’t forget to check out the variety of slimline stencils available. They are truly my go to stencil these days and they work great in Memory Planners!


Friday, June 24, 2022

GOOD VIBES/BRUTUS MONROE

Good morning friends! Last month, mom and I went to the American Craft Council to meet our friend Cindy for the very first time! I know Cindy from social media when she used to scrapbook. She was one of my favorite designers and today she is one of my favorite jewelry makers! You can check out Cindy's website, here.


To begin, I taped down the star stencil down on the far right-side of the cardstock. Then, I used a palette knife to cover the stencil with a variety Chroma Glaze. I was going for a whimsical background and I really like how this turned out. 


I should have added some tape along the edge to prevent the lines...but I covered it up by rubbing some glaze all around the layout. :) 


After the glaze was completely dry, I stamped the little hearts in black ink between the stars and glued down the gems to add a bit of sparkle.


Then I added a few die cuts from Vicki Boutin to embellish the layout. I love her die cuts so much and I think they look great with the stars!


Most of the time, I like to hand-journal on my layouts, but there was too much I wanted to write so I printed the journaling on paper instead and added it below the photo. I used a blending brush and ink to color a piece of white cardstock and then stamped the rainbow onto the paper and fussy cut it to use as an embellishment. I used the same technique for the shooting star and stamped the sentiment below the journaling.


What do you think? I just love the color scheme and overall feel of this layout!


I hope I inspired you today to play with Chroma Glazes. They are super easy to use and fun to play with! Grab these products before they sell out through my Brutus Monroe affiliate link. The price you pay is not higher, I may get compensated for promoting their product. Click here to shop at Brutus Monroe through my affiliate link.


Sunday, December 26, 2021

READ/AMERICAN CRAFTS

Good morning! I'm sharing a layout I creating using the Stitched Together Kit that's available at Clique International. The patterns in this kit is absolutely beautiful and I just love the color scheme. 


It makes me so happy to see my nephew's love of books because his Aunt Nicole is an avid reader, too! My sister said he just propped himself up in the chair and grabbed a few books and was flipping through the pages. So freaking adorable!


I'm not sure how I feel about the plastic ephemera...  but I used them...and I kind of like how they look.


The die cuts are so cute... I especially love the kitty and bunny rabbit. :) I decided to place them on top of the book with the birdie, just for fun. 

I used the "cozy, simple, happy" sentiment from a cut-apart sheet and I cut the square from a patch-work paper to frame the photo. I really like how everything looks so great together... Let's not forget the gold thicker alphas with the pink shadow. Seriously... this thicker set is so pretty.


This kit is still available in the shop. Click here to grab yours today! Thank you for visiting today!