Showing posts with label FOUNDATIONS DECOR. Show all posts

Wednesday, May 04, 2022

ENJOY THE LITTLE THINGS/TCW

Good morning friends! Nicole here with a fun piece I created for my craft space. April showers bring May flowers! How about a little floral project to brighten your day. 


First, I colored the wooden sun pieces with Gamboge stencil butter using my fingers. I love finger painting! :)


Then, I grabbed the TCW2300 Gentle Leaves Slimline Stencil and the Turquoise Stencil Butter to create the leaves. I let the stencil butter dry before repeating the process all over the stencil to prevent smearing.


Next, I created the flowers using the TCW2320 Meadow Slimline Stencil and FuchsiaOrchid, and Ocean stencil butters. I used a light tack tape to cover the flowers after they dried before moving to the next color to prevent smearing. It's time consuming, but so worth it...


Finally, after all of the colors have been applied, I removed the stencil very carefully so that nothing smeared and OMG...I love this piece so much.


I added the gems to the flowers and then the banner sentiment. Isn't this lovely? Thank you so much for visiting today.

Wednesday, February 23, 2022

MIXED MEDIA RAINBOW

Good morning friends! I thought I'd share a pretty project with you today! We just celebrated my son's 12th birthday on the 21st and I thought I'd make something new for his birthday Tier Tray. I decided I wanted to play with a variety of stencil butters to make a fun, colorful rainbow. I'm super happy with how this turned out.


First I grabbed a few stencil butters I wanted to use for the rainbow.


Next, I used my fingers to smear on the stencil butters. I found this process so satisfying and soothing... just getting inky and having so much fun. I snapped a piece in half...but that's no biggie. I used the gel medium to glue it back together.


After the stencil butter was completely dry, I used the TCW2302 Star Sparkle Slimline Stencil to create the stars.


I cleaned the palette knife and stencil between each color and added stars to each piece.


I seriously love how creamy the stencil butters are! Super easy to spread. So awesome. I decided I wanted to change the color of my birthday frame. I covered the center using a low tack tape and then I used my fingers to smear the stencil butter all over the frame.


Here is a closer look at the rainbow. Isn't this so pretty? I love how the colors look all together. It has bit of a funky vibe going on.


Don't forget to check out the new slimline stencils and the stencil butters here! Thank you so much for visiting today.

Thursday, November 18, 2021

MIXED MEDIA TIER TRAY FOR NOVEMBER/STUDIO FORTY

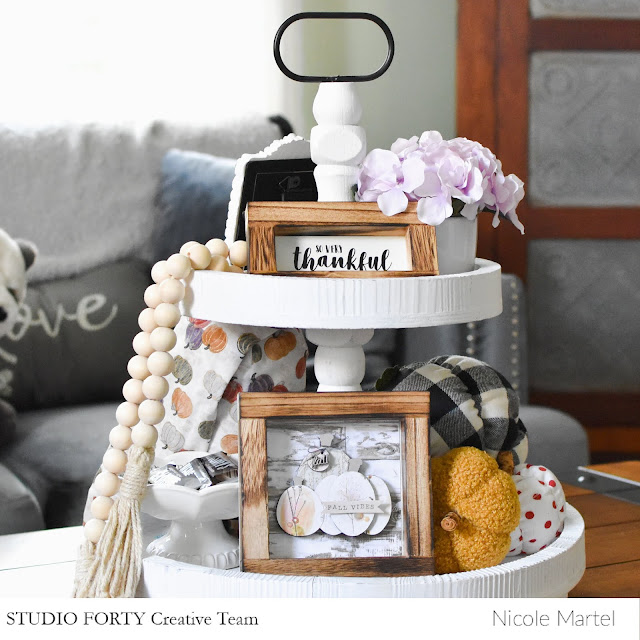
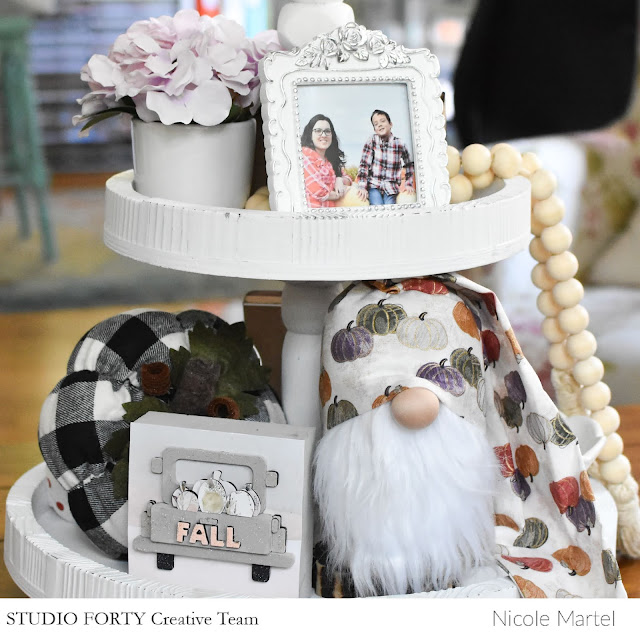
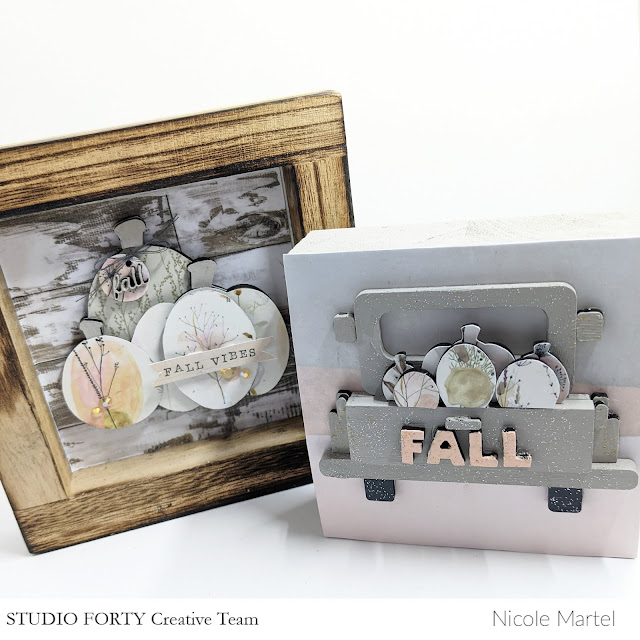
Good morning friends! Today I'm sharing a few pieces I created for my tier tray this month using some papers from Studio Forty's Herbarium Collection and Foundation Decor's Pumpkin Frame/Truck Tray Kit. It's super cute and I hope you like it!


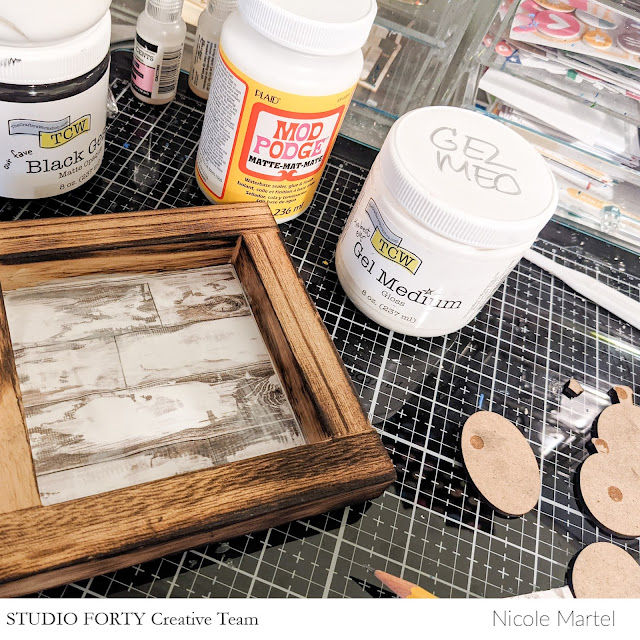
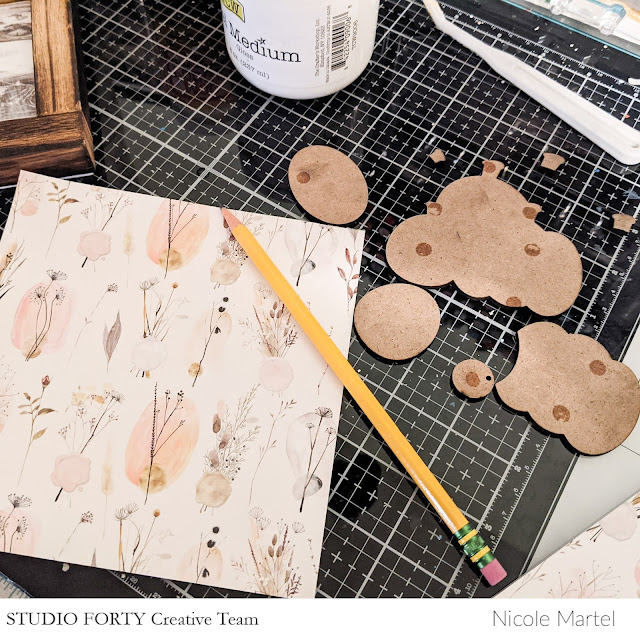
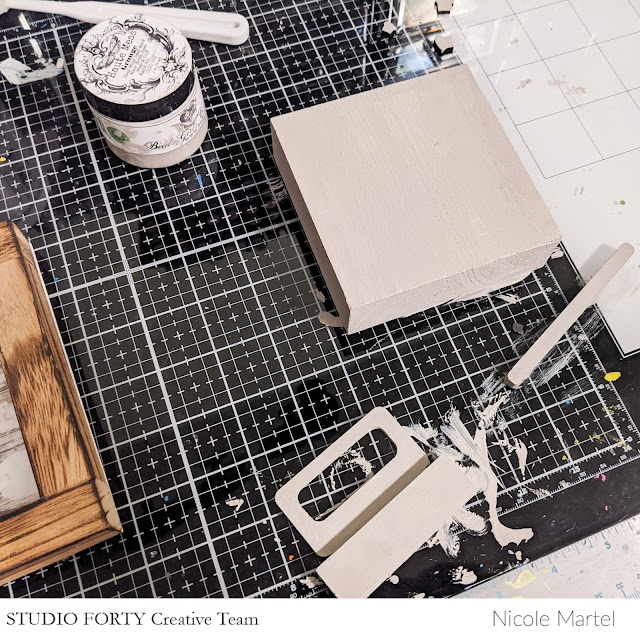
While these wood crafts look simple, I can assure you, a lot of love and time went into each piece. :) To begin, I cut the patterned paper so that it would fit within the frame and then adhered it using Mod Podge. 


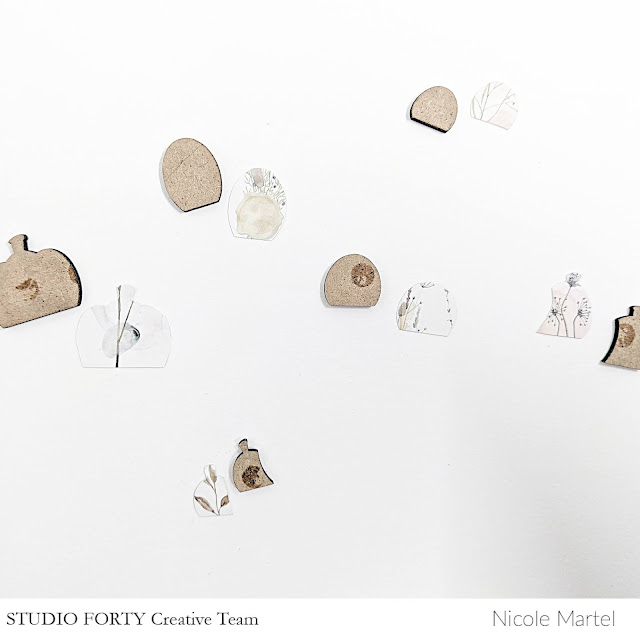
Then, I traced the pumpkin wood chips onto the patterned paper and cut them out. This process took a bit of thinking because I wanted certain flowers... LOVE this paper! It is my absolute favorite.
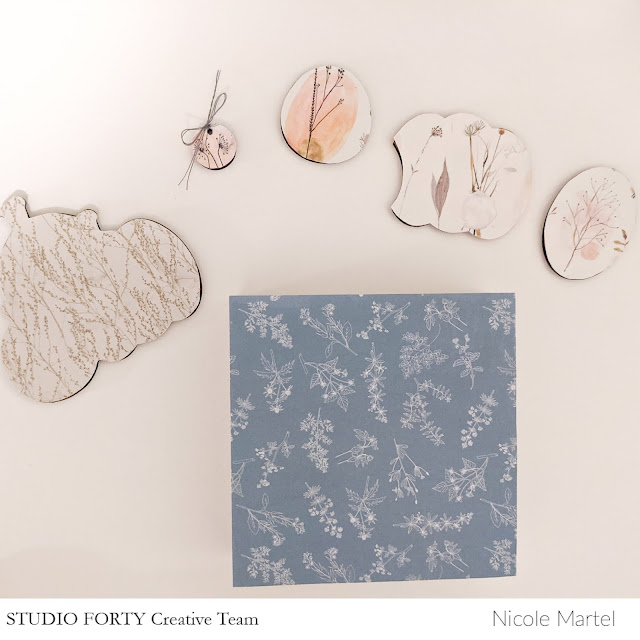
Next, I used Matted Gel Medium to adhere the paper to the wood chips. Initially, I was going to use the blue backing for the frame and then I changed my mind... Here are all of the pieces. You can see how I cut the flowers to fit properly. Aren't they lovely?

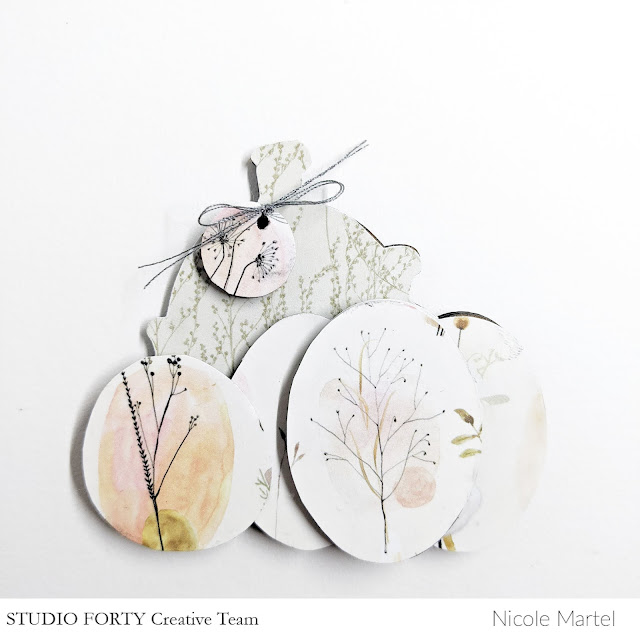
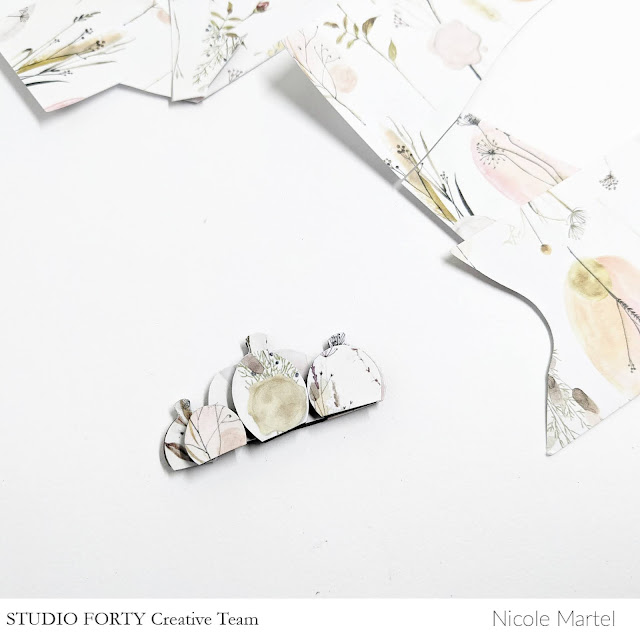
I glued them all together and added some string to one of the chips.


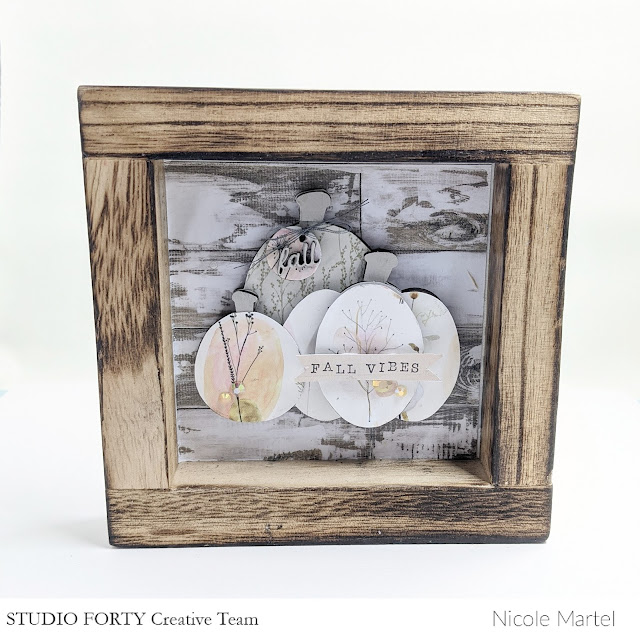
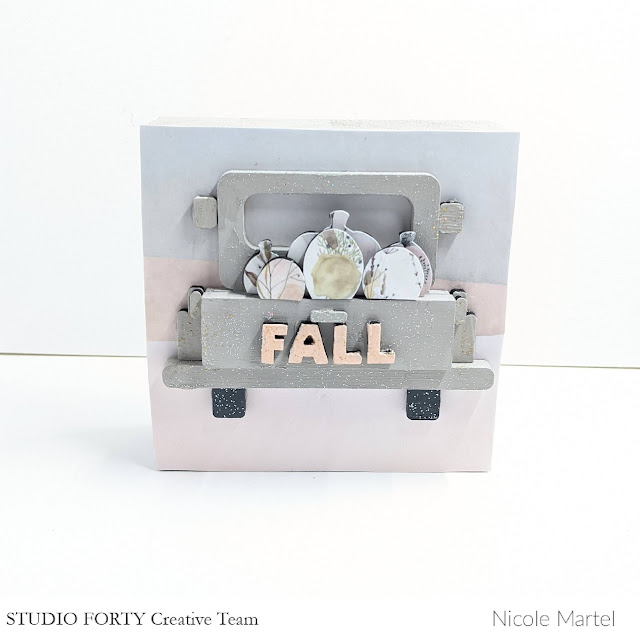
To complete the piece, I cut the "fall vibes" strip from patterned paper and mounted them to the pumpkins using foam squares and then I added a few gems. I just love how this piece turned out!

For the next piece, I painted all of the pieces using a light brownish/gray acrylic paint and let the pieces sit to try. The tires were painted with black acrylic paint


While this was trying, I carefully traced the patterned papers to the tiny pumpkins and then I cut them out.

Next, I glued the pieces together using a Matte Gel Medium.

Before assembling the pieces together onto a 4x4 wooden block that was covered with patterned paper, I added glitter all over the wood chips to add a bit of shimmer. Then I glued all of the additional pieces together for the truck.


I had so much creating these pieces and I hope you found this post inspiring! I try to create different things for our fans to give you different ideas on how to use Studio Forty's products! 


Click here to grab some goodies! Save 10% on your purchase with coupon code: NICOLE10. Thank you for visiting today!


Tuesday, October 19, 2021

HAPPY HALLOWEEN TIER TRAY/ THE CRAFTER'S WORKSHOP AND FOUNDATION DECOR

Hi friends! This post is for all of our Tier Tray lovers. I am not a big fan of Halloween...but I made this for my son. Just because I don't like Halloween doesn't mean I have to ruin the fun for him. :)


To create this fun mixed media tier tray I used the Halloween kit from Foundation Decor's Tier Tray series, Candy Collector Ghost, and lots of mediums and stencils from The Crafter's Workshop. Click here to see the full tutorial on The Crafter's Workshop's blog.


I used the Gauze and Jack-o-Lantern stencils to add texture to the ghost and to create the pumpkin smile on the wooden block. The hat pieces and tiny pumpkin was painted with Stencil Butter. The colors are so vibrant and gorgeous! 


I love this picture I took of Edward and I a few Halloweens ago. He was surprised when I picked him up from Y-Care dressed as Princess Leia. And he made the perfect Harry Potter with his little owl. 


I hope I inspired you to grab a tray and start playing with mixed media products because it is super fun!! More fun than making layouts...just sayin. Thank you for visiting today!


Friday, September 10, 2021

BACK TO SCHOOL MIXED MEDIA TRAY/FOUNDATION DECOR/THE CRAFTER'S WORKSHOP

Good morning! Nicole here with a fun home decor project I created to get the little man excited for 6th Grade! As I type this up, I pray that they do not decide to do another year of virtual learning. I need him in the classroom. He is supposed to start on September 8th. We shall see...


I used Foundation Decor's Back to School kit to create this fun piece for my home. The stencils and mixed media mediums are all from The Crafter's Workshop. To see the full tutorial on how I created this Back to School Tier Tray, please visit The Crafter's Workshop blog, here.


The Time for Class Schoolhouse can be found here!


I glued fabric behind the windows and doors to make them look like curtains. Super cute. :) This was such a fun project and I enjoyed every minute of it.


The notebooks, flash card and pencil is all from the Sept Kit. It is available, here.


I plan on writing "Welcome 6th Graders" on the chalkboard as soon as I get some chalk. The other board will say, "Good Luck!"


Isn't this the cutest thing? I bought the Back to School Gnomie from Esty. Thanks so much for stopping by today!


Tuesday, July 20, 2021

SUMMER TIME TIER TRAY

Hi everyone. I have another fun summer themed tier tray to share with you. I created this fun project using a variety of stencils and mediums from The Crafter's Workshop and the Tier Tray and Kit is from Foundation Decor. If you haven't had a chance to check out their Tier Tray Kits, you are missing out! They have the cutest kits and beads... add some stencils and mixed media mediums to them and the possibilities are endless.


 I have a tutorial on how I created these pieces up on The Crafter's Workshop's Blog. Check it out here!


I used acrylic paints from Bad Girls Couture to paint the wooden pieces from the Lemonade Stand Kit. Once the pieces were completely dry, I used stencils to create the pretty patterns on each piece. The Summer Lemon was purchased separately.


Seriously... isn't this the cutest Lemonade stand ever? I just love it so much. :) The clear stickers are from Studio Forty and the "Hello Summer" speech bubble chipboard embellishment is from Elle's Studio.


I used a gel medium to clue the pieces down. I love using gel mediums because they are super strong once dried.


I struggled with this lemon... I spent a lot of time on this piece... it just didn't come easy for me, but I like the end result!


I decorated the back using another stencil and paint... just for fun. It was meant to be a fish, but it didn't work out... LOL.


Thanks so much for visiting today! See the full tutorial here!


Saturday, July 10, 2021

SUMMER TIER TRAY

Good morning everyone! I'm sharing a fun piece I created for my home. I just started doing tier trays this year and it has been so much fun! Foundation Decor sells a variety of fun kits to go with your tier trays. I just love them. I really love the soft color palette in the Journal Stories paper pack and I thought it would look really great with the wood pieces. 


To begin, I painted the blocks using a light orange sherbet acrylic paint. These paints are from Bad Girls Couture. I love their colored paints! 
 
Once the paint was completely dry, I traced the blocks onto patterned paper and cut them out. I used matte gel to glue all of the pieces together.


I added a clear floral flower from the Lazy Days Collection and a few gems to the "Hello Summer" frame to make it more fun.


I placed another transparency sticker below the sunglasses and added a sticker dot for fun. ;)


Here are some close-ups of all of the pieces. I'm so pleased with how this turned out. I'm loving this so much!


Don't forget to check out the Journal Stories Collection and Lazy Days before you go. Both collections are perfect for documenting those special summer/vacation memories or if you're not a paper crafter, they are perfect to use for DIY (Do It Yourself) projects for your home!

Click here to grab some goodies! Save 10% on your purchase with coupon code: NICOLE10. Thanks so much for visiting today!