Thursday, November 25, 2021

HOLIDAY/CLIQUE INTERNATIONAL

Good morning friends! I just started creating Christmas projects and it's been a lot of fun...especially since I don't normally enjoy scrapbooking the holidays! I had the perfect photos to go with Vicki Boutin's Warm Wishes Christmas Collection and I couldn't wait to use them! I'm so excited to share it with you...


Before I started this layout, I had to really think about the design. All I knew is that I wanted it to feel like  a Christmas layout... and really capture the holiday. And, I really wanted to use a variety of Christmas ornaments. 


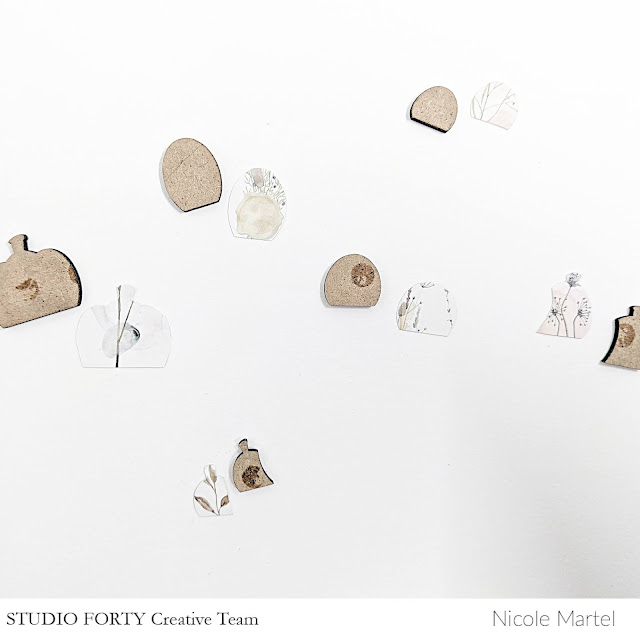
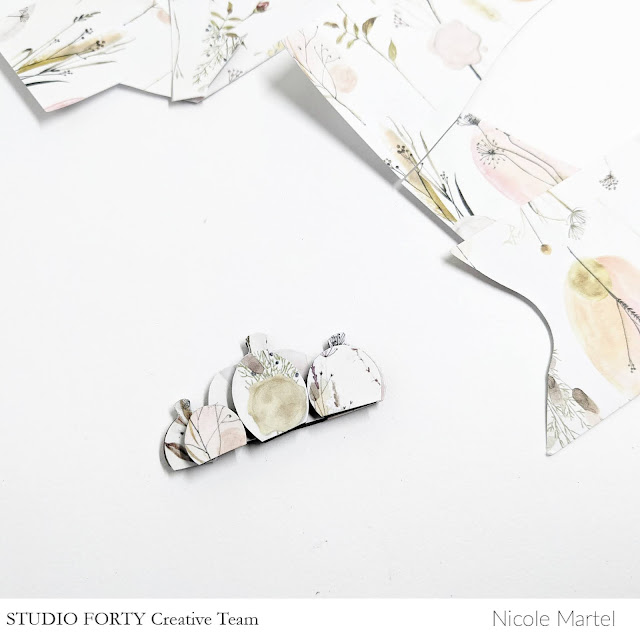
I cut some of the ornament die cuts in half so that I could spread them out and tuck them in, here and there... The smaller ornaments were cut from patterned paper.


Once I was satisfied with the top half of the layout, I started filling in the white space at the bottom. This took some time because I wanted it to look perfect.


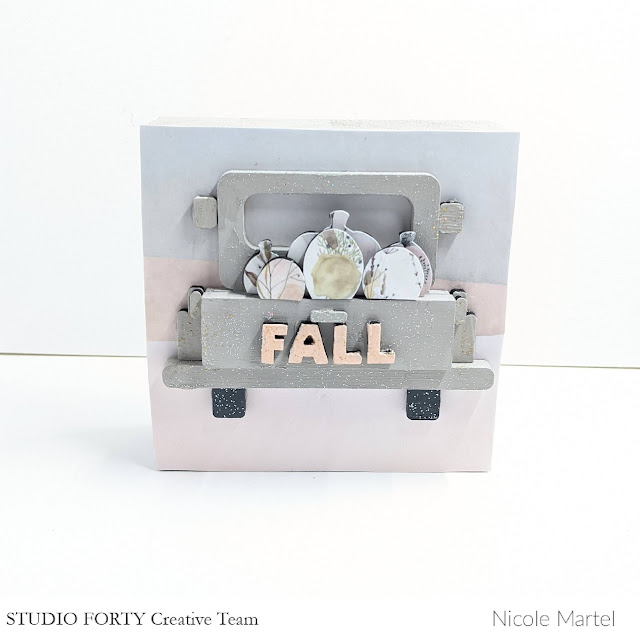
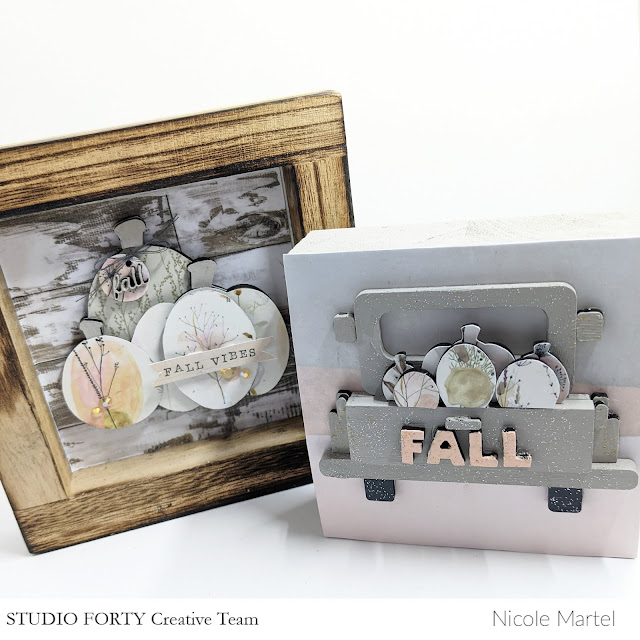
I added the tag and some more die cuts along with a few ornaments I cut from patterned paper. Then, I added the ribbon and chipboard star. Can I just say, this layout makes me super excited for Christmas! My nephew is really going to enjoy Christmas this year!! 


If you love this collection as much as I do, grab it today. Click here to see what is left of the Warm Wishes Kit. Thank you for visiting today!


Sunday, November 21, 2021

FALL/FELICITY JANE

Happy Sunday friends! I'm sharing a layout I created using Felicity Jane's Mollie Kit. It is finally looking like Fall in my neighborhood! My street is so pretty right now. I snapped this photo a few days ago. I actually cut the photo in half to make two pictures for this layout and it totally worked! 


I matted both photos using the journaling cards and then placed them in the middle of the layout, tucking another card off to the side so that everything does not look too straight.


There are so many beautiful embellishments in this kit... I wanted to use them all. My favorites include the fabric heart and chipboard frames...oh and the die cuts. :) 


The chipboard has a really nice finish. I must say, Felicity Jane offers great quality product. These embellishments are not made out of thin paper... And I love that each kit has a stamp set. They are great for filling in white space.


Layering embellishments is my favorite thing because the best thing I enjoy the most when creating is playing with embellishments!


To complete the layout, I added some more stamping at the bottom of the layout. The heart journaling block and stitching stamp set is from Elle's Studio. I needed something for my journaling and this worked out perfectly!


Thanks for visiting today! I hope you've had a wonderful weekend!


Thursday, November 18, 2021

MIXED MEDIA TIER TRAY FOR NOVEMBER/STUDIO FORTY

Good morning friends! Today I'm sharing a few pieces I created for my tier tray this month using some papers from Studio Forty's Herbarium Collection and Foundation Decor's Pumpkin Frame/Truck Tray Kit. It's super cute and I hope you like it!


While these wood crafts look simple, I can assure you, a lot of love and time went into each piece. :) To begin, I cut the patterned paper so that it would fit within the frame and then adhered it using Mod Podge. 


Then, I traced the pumpkin wood chips onto the patterned paper and cut them out. This process took a bit of thinking because I wanted certain flowers... LOVE this paper! It is my absolute favorite.

Next, I used Matted Gel Medium to adhere the paper to the wood chips. Initially, I was going to use the blue backing for the frame and then I changed my mind... Here are all of the pieces. You can see how I cut the flowers to fit properly. Aren't they lovely?

I glued them all together and added some string to one of the chips.


To complete the piece, I cut the "fall vibes" strip from patterned paper and mounted them to the pumpkins using foam squares and then I added a few gems. I just love how this piece turned out!

For the next piece, I painted all of the pieces using a light brownish/gray acrylic paint and let the pieces sit to try. The tires were painted with black acrylic paint


While this was trying, I carefully traced the patterned papers to the tiny pumpkins and then I cut them out.

Next, I glued the pieces together using a Matte Gel Medium.

Before assembling the pieces together onto a 4x4 wooden block that was covered with patterned paper, I added glitter all over the wood chips to add a bit of shimmer. Then I glued all of the additional pieces together for the truck.


I had so much creating these pieces and I hope you found this post inspiring! I try to create different things for our fans to give you different ideas on how to use Studio Forty's products! 


Click here to grab some goodies! Save 10% on your purchase with coupon code: NICOLE10. Thank you for visiting today!


Saturday, November 13, 2021

2021 MINI ALBUM/ELLE'S STUDIO

Hi everyone. I have built up a good stash of journaling cards this year, being a subscriber to Elle's Studio. I actually just un-subscribed because I need to start using up my stash more...and that's my GOAL for 2022. Until then...let me share this adorable mini I created using a variety of journaling cards and embellishments.


I had fun with this spread. I searched through my cards and embellishments for all of the blues and purples. For the bottom part, I used a variety of stamps within the journaling blocks. Super fun!


My friend's hair matches the purplish-pink color of these cards! I just love this so much. I used the "Love you" metal die for the bottom. Simple, but very effective. LOVE the overall design of this spread.

This is a picture of my mom with my sister Katie. Mom went out to visit Katie and Oddie. I used a washi sticker and some embellishments at the top. Super simple with just a few embellishments at the bottom.


This is my nephew, Henry. Isn't he adorable. I wanted to make this spread bright and fun...just like his personality. Those rainbow chipboard embellishments are a must have!


This year, Edward's grannies took him to the water park for a long weekend and they had so much fun! I added lots of layers on this piece.


Here is my sister Jamie and her handsome son. I snagged this photo she posted on FaceBook because it is too precious not to share.


Katie came home in January...she surprised us all and we were super thrilled! We took so many photos... for the right shot. Sigh...my family.


Just the four of us... I used a variety of labels and die cuts. The "moment" die is a metal die I punched out using my Sizzix. And another chipboard rainbow!


Jamie and Mat took Henry for the first time and Henry had such a great time. Just look at him. He's such a cutie. I was so happy I actually had a card and some embellishments that worked!


My little man...while he was in New Jersey, visiting Meme this summer. They had such a great time and he actually stayed for almost two weeks. So glad he enjoys being with Pete's mother since he doesn't get to see her that much.


One of these days, I'm going to get out to Colorado to visit Katie and do all of the fun things she likes to do with her friend Hailey. :)


Isn't this adorable? I made this adorable mini with my Mini Cinch. It's available at Clique International if you need it! Or want it... :) Thanks for visiting today!


Tuesday, November 09, 2021

JOY/FANCY PANTS DESIGNS

Hello! Is it OK to share holiday layouts, yet? I figured since Christmas is a month a way, it was safe to to share! I've been itching to share this layout I created with Fancy Pants Design's Cozy Christmas Collection.


The star printed patterned paper really caught my eye along with the adorable green sweater print paper! Super pretty. I used the Merry Christmas Senti-mini 3x4 stamp from Trinity to use as a sub-title.


I just received these adorable Big Bows Little Bows stamps from Trinity Stamps. Aren't they beautiful? You can also also buy metal dies for them. I really like how they look on this layout. Super pretty. I colored them in using a red and green alcohol marker.


I used Trinity Stamp's Big Joy Cut & Foil Die Set, too...without foil since I did not have any red foil. It's the perfect size to use as a nice title! I included a variety of ephemera to pull this layout together. Isn't this fun? I love it. Need these stamps/dies in your life? Grab a few dies and stamps of your own using my affiliate link! I get a small commission for your purchases, however, your price remains the same!

Thanks so much for visiting today!


Sunday, November 07, 2021

WONDERFUL YOU/AMERICAN CRAFTS

Happy Sunday friends! Don't forget to turn back your clocks if you haven't already done so! Today I'm sharing a layout I created with the Fairytale Kit. It's sooooo pretty!! 


I'm not gonna lie...at first I wasn't sure how to use this beautiful kit. All I know is that I absolutely love the patterns and ephemera. But then I forgot that I had the perfect picture to use... Love it when that happens. To begin, I selected my favorite patterned papers. I cut the main floral print to measure 8/12x11 and the yellow print to measure 10x6 1/2 inches. I realized too late that I cut the yellow paper too small... so I cut a strip of red patterned paper and placed it to the side. Then I cut a circle from the patterned paper and mounted down the papers.


Next, I moved the florals around the circle paper until I was happy with their placement. This took some time...but I'm happy with it!


I mounted down the ephemera using some foam squares to add dimension.  Those mushrooms are super cute!!


I glued a few white gems to the center of the butterfly and tiny flowers. Then I mounted the "my beautiful world" across the bottom of the photo using foam squares.


I had to find a way to use one of the bows. Super pretty and feminine. The tab and sticker word is from my stash. I felt that I needed a tab or tag at the top to pull it together. 


Isn't this just lovely? Check out the Fairytale Kit here. If you love it, grab it fast because they will be flying off the shelves. Thank you so much for visiting today and I hope that you are having a wonderful weekend full of scrapbooking and relaxation!