Saturday, May 29, 2021

MIXED MEDIA SUMMER LAYOUTS

Hello friends! I'm beyond excited to share my first two layouts I created using Studio Forty's Lazy Days Collection. I think this is my all time favorite collection. It's so beautiful!!! And I'm proud of myself for cutting into some of my favorite patterned papers from this collection instead of hoarding them. :)


To create this layout, I started out by spraying spray ink onto white cardstock. I sprayed the blue down first and dabbed the excess ink off the paper using a sheet of paper towel. Then I sprayed the Pink and yellow until I was satisfied with the background. I splashes the black ink using a tiny paintbrush tip. 


I used a stencil from my stash to create a fun background of circles and other patterns. 


Once I was finished with the background I stamped the birds and sun with the waves image from the Adventure Awaits and the Marine bulb Stamp set. I added a few clear word stickers at the bottom and framed one of the sentiments using a chipboard frame. I fussy cut the turtle from the patterned paper.


Isn't this beautiful. A little different for me...but I totally had fun creating this piece!


I stamped the "I want to Remember this" using black ink. Then I stamped the clouds onto a scrap piece of paper and colored them in using markers. I used scissors to cut them out and glued them next to the photo. I added a few sticker dots for dimension. 


For my next layout, I started out with a simple design and then added to it. My initial goal was to use the Lazy Days Stamps in a fun, creative way! 


To begin, I stamped the image onto the layout where I planned on adding my photo to use as a base for the layout. I love this stamp so much! Super pretty!


I tucked a few 3x4 journaling cards behind the photo. Then I fussy cut the surf boards from patterned paper.

I stamped the "Let's Go Somewhere" sentiment from the Mountain bulb stamp set  down the page and then added the chipboard frames to make the layout fun and playful. 

And don't overlook the adorable sand castle! I stamped it directly onto the photo. Super, super, cute!!

I can't wait to share a few other layouts I created using this adorable collection. Thank you so much for stopping by today!


Sunday, May 23, 2021

HELLO WEEKEND

Happy Sunday! I've been scrapbooking this weekend for fun and it felt great! I am so pleased with what I created this weekend and I can't wait to share them with you. My mojo just hasn't been there lately. I haven't felt like doing much of anything... It's been awhile since I participated in Pinkfresh Studio's monthly challenge and since I had product, I decided to join in on the challenge!

This photo was sent to me yesterday from my mom. She took Edward to The Great Wolf Lodge for the weekend and they are headed back as I create this post. :) I miss my little man!


This month's challenge is anything goes, which I love... because I can do whatever I want. :)

For this layout, I used the Some Days Collection. I love the yellow paper with the numbers. It's so fun!!


I added the heart speech bubble to show the girls in the background...they photo bombed this photo. LOL I'm not sure if my mom and grand-mom even noticed. :)


I added a few small embellishments here and there to help pull the layout together. I wanted to keep it simple with the right amount of embellishments.


It's super cute! I can't wait to see this guy today! This collection is available at Clique International. Click here to grab yours today! Thank you for stopping by today.


Thursday, May 20, 2021

BOOKMARKS CREATED USING ARTESPRIX SUBLIMATION PRODUCTS

Hello! Nicole here with a variety of bookmarks I created. Before Covid-19 arrived, my son and I used to read together at night. He would read his book and I would read mine. I loved this time together! It makes me sad that he no longer has an interest in reading, but I get it...he’s on the computer all day doing the virtual learning… and by the time he’s done, he’s spent. However, I am not giving up! I decided to make some Pokemon bookmarks for him. Maybe, these little guys will spark his interest?!


What are Artesprix Sublimation Markers?

Magic Ink that transfers their beautiful colors from plain copy paper to a polyester product with a heat source. Iron-on-Ink Markers are the way to personalize sublimation, which is specially formulated inks that transfer only when activated with heat.

Materials:

Pastel and Original Sublimation Markers

Blank Copy Paper

Pencil

Bookmarks

I Choose You Clear Stamps by Ink Road

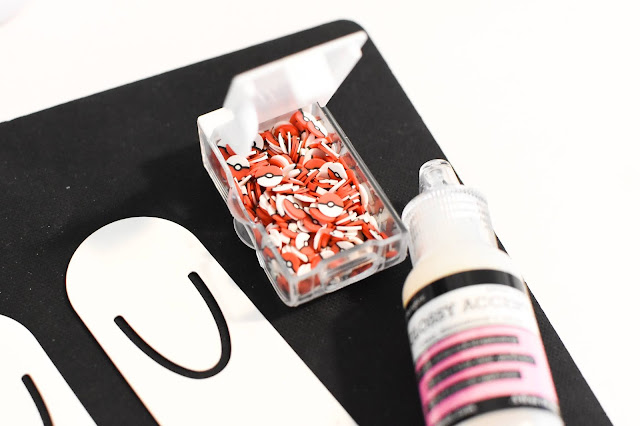
I Choose You Clay Sprinkles by Trinity Stamps

Acrylic Stamp Block

Sublimation Ink Pad

Project Mat

Protective Paper

Heat Tape

Heat Source (Heat Press or Iron)


Step-by-Step Tutorial

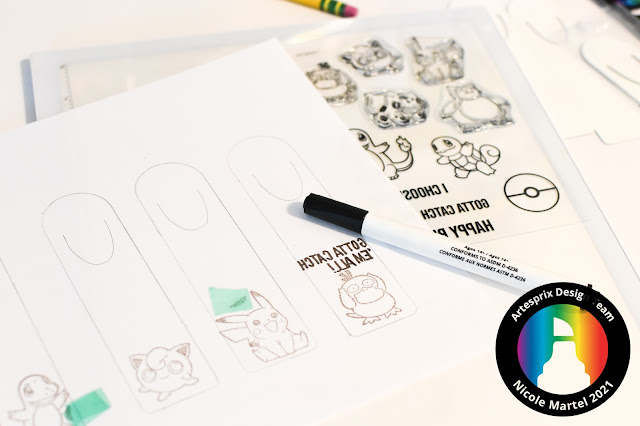
Step 1: Trace your Bookmark onto a plain piece of copy paper using a pencil. That way you know how much space you have to work with.

Tip: Set your heat press at 400 degrees fahrenheit for 45 seconds before you start working on your bookmarks. That way, the heat press will be hot enough to sublimate your images when you are finished. :)


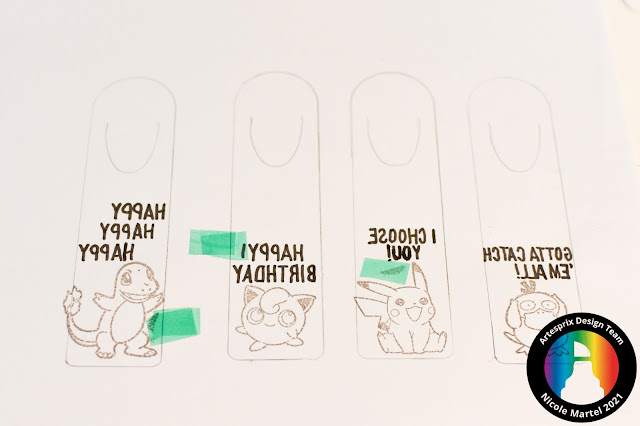
Step 2: Stamp images within the traced area using the Sublimation Ink Pad and Acrylic Block. 


Step 3: Use a lightbox to create a mirror image of text.


Step 4: Next, color in the images using your Sublimation Markers. It's OK to go outside the lines...that way you do not get any white edges if you are coloring the entire background.


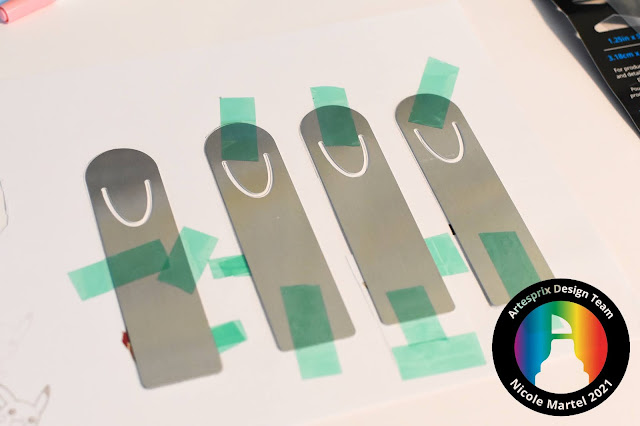
Step 5: Using heat tape, tape down the bookmarkers (white side faced down) onto the images. 


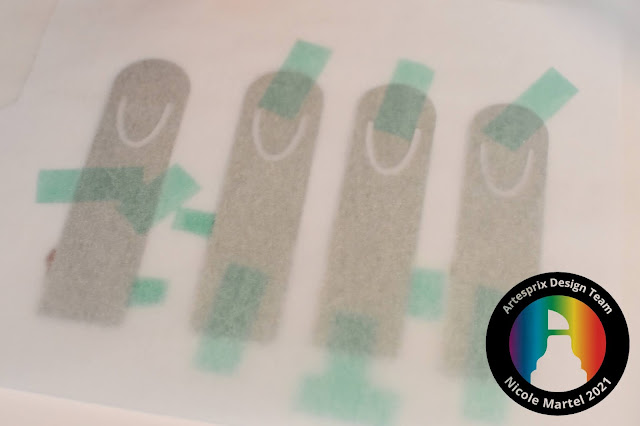
Step 6: Place a piece of Protective Paper at the top and bottom of your bookmarks.  Place your "Sublimation Sandwich" inside the heat press for 45 seconds at 400 degrees Fahrenheit. 


Step 7: Carefully, remove projects from the heat press using gloves. Then place the bookmarks onto the Project Mat to cool down. Then, remove the paper and heat tape to reveal your vivid designs! 


Step 8: Embellish as desired! 


Aren’t these little guys adorable!? I just love them and I can’t wait to give them to my son, Edward. Hopefully, he will show an interest in reading again! I miss my reading buddy!


Thank you for visiting today! If you enjoyed this tutorial, check out my other bookmarks! Looking to make your first purchase? Click here to shop through my affiliate link!

Nicole Martel, Design Team Member


Tuesday, May 18, 2021

Mixed Media Bookmarks

Hi everyone. Just popping on to share these mixed media bookmarks I created using the TCW2209 Beautiful Sentiments Stamp and TCW2203 Missing You Stamp set from The Crafter's Workshop.


To begin, I used my Sizzix and metal bookmark dies from Trinity Stamps to make the bookmarks.


Next, I used my gel plate and acrylic paints to alter the bookmarks. A little paint goes a long way... I love how these backgrounds turned out.


Once I was satisfied with the backgrounds, I chose my favorite backgrounds and stamped the images onto the bookmarks using black ink.


To complete the card, I colored in some of the images using alcohol markers and added ribbon at at the top of the bookmarks.


And here they are!


Thanks for stopping by today!


Sunday, May 16, 2021

ENJOY

Good morning! Nicole here with a layout I created using a mixture of Amy Tangerine papers and Heidi Swapp  from the shop! Who would have thought the two would work so well together. 


To begin, I cut the colorful floral print paper to measure 8 1/2x11. Then I cut the cream floral paper to measure 7 1/2x10 and matted them together with the smaller rectangle placed in the center of the layout.


I placed several die cuts across the middle of the layout to create a frame for the photo. Once I was satisfied with the placement, I tucked a few embellishments here and there using foam squares to add dimension. 


I fussy cut the leaves and flower from a scrap pieces of paper and mounted them at the top of the page, tucking them behind the frame to add more layers. Love how pretty the cluster of flowers and leaves look together. 


What do you think? Do you normally mix patterns together? It's one of my favorite things to do! Thanks so much for visiting today!


Monday, May 10, 2021

I UNDERSTAND BLACK LIVES MATTER CARD

Good morning friends! Nicole here with a card I created using the Black Lives Matter Stamp Set. It's been a difficult past few years for me, watching the news and seeing how unjust this world is... it makes me sad, but hopefully, together...we can make a difference! 

To create this card, I cut a piece of patterned paper to measure 6x8 and scored the paper in half to create the fold for the card. Then, I cut a piece of white cardstock to measure 5 1/2x 7 1/2 inches. I stamped the images onto the white card using black ink.


Next, I fussy cut the patterns from a scrap piece of patterned paper and adhered them to the card. I used foam squares to mount the sentiment in the middle of the card made from patterned paper.

To complete the card, I added the ribbon and some clear rhinestones.


Click here to grab your Black Lives Matter stamps set today! I absolutely love this stamp set and the "I understand that I will never understand. However, I stand with you" sentiment. Also, all proceeds for this stamp set will be donated to The Bail Project, freedom should be free. 

Thank you for stopping by today!

Nicole Martel,