Tuesday, August 04, 2020

SHINE BRIGHT

Happy Friday!! We are living in a crazy world of uncertainty right now... It's hard to maintain a happy mood when I'm spending most of my days indoors away from people. In the meantime, I have created something to brighten my mood. This Globe from Foundation Decor was sooooo much fun to create and it was not that hard to make. I didn't plan on this turning out sooo pretty. Otherwise, I would have taken step-by-step photos.


*Disclaimer: The Crafter's Workshop and Foundation Decor provided me with some product to create this project. The opinions I share are solely my own.

To begin, I used  Modeling Paste and the Flower Frenzy Stencil to cover the globe very carefully so that I would not move the screen. To speed up the drying time, I used a heat gun. Once the molding paste was completely dry, I painted all over the molded flowers using turquoise paint. 

While the flowers were drying, I painted the green grass and heart. Then, I used the TCW743 Crazy Waves Stencil to add a few circles and other patterns onto the grass. I kept the brush as dry as possible with just a little drop of paint to keep the paint flat to avoid smudging. As the wood pieces were drying, I used my finger tips to smear a touch of red on the yellow petals. And then I used my finger tip to smear some white all over to break up the colors a bit.

Next, I used a very tiny paint brush to paint the flower petals. Once the flowers were dry,  I smeared a bit of white paint all over the globe to break up the colors a bit. I used my fingers with a tiny bit of red paint to smear onto the petals to break up the yellow. Then, I used a Super Thick Gel to glue the heart and grass wood pieces to the globe.  Then I glued the remaining embellishments.


All of the colors and textures makes me so happy! It's so pretty.


Isn't this gorgeous? I think I need to visit Foundation Decor to grab a few more wood pieces to alter! What do you think? 

Thanks so much for visiting today!


Sunday, August 02, 2020

TOGETHER

Good morning! I'm excited to share this layout with you today. I love the Blooming Bunch Stamp Set from this month's release! The flowers and butterflies are beautiful!


For this layout, I sprayed light blue spray ink all over the white cardstock. Once the ink was completely dry, I stamped the Blooming Bunch Stamp two times at different angles to create a nice frame for the photo. Then, I colored in the flowers using my markers.


I embellished the top of the layout with a variety of embellishments that went with the color scheme of the layout. I'm loving this color combination!


To complete the layout, I punched out the title using my Sizzix and Marshmallow Alphabet Dies. Then, I colored the alphas using markers. At the last minute, I decided to splash some Raven Coloration Spray all over the layout to break up the bright colors.

Thanks so much for visiting today!


Saturday, August 01, 2020

BOYS RULE

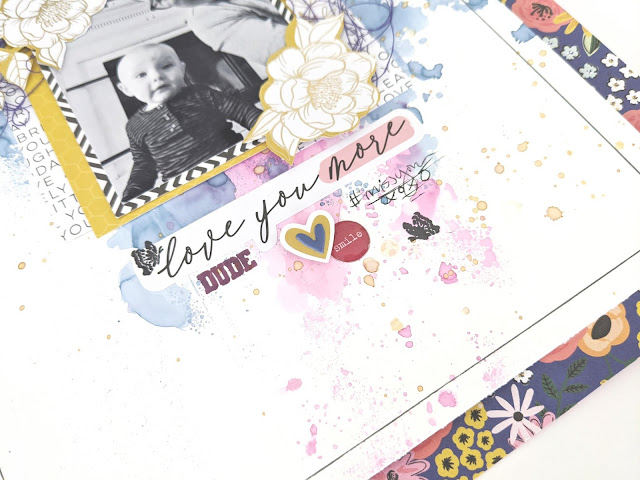
Good morning!! We have another fun challenge over at Scrapbook the Boys' blog. This month, we are challenging you to put a flower or more on your boy layouts. Who says boys can't have flowers on layouts? You can do whatever you want... it's your layout and memories!


Go ahead and give it a try... heck, if you want...add some pink, purple and yellow if you want... Boy layouts don't always have to be dark colors...

I had a lot of fun playing with this layout. I love the floral paper from Pebbles Inc. It's so pretty!! I decided to use the patterned paper as a backdrop. Then I used the cardstock as my base. I covered the cardstock using white gesso and let it completely dry before spraying on the Coloration Sprays from Art Anthology. The colors are absolutely beautiful...true to their original colors. 


I fussy cut the flowers from another sheet of patterned paper from Pebbles Inc. I just love the white flowers with the gold foil. Gorgeous!! Once I was happy with the flower arrangements, I tucked some thread here and there and added a few embellishments at the bottom of the layout to pull it together. I stamped the "Boys Rule" at the top so it wasn't too naked at the top of the layout. The stamps are from Jillibean Soup!


Thanks so much for visiting today! Wanna see more inspiration on how you can scrapbook those little boys? Click here! Hope you have a wonderful day!